UCC Filing How-To Guides
Texas SOS UCC Filing User Manual
PDF Version of the UCC User ManualUpdated as of 9/17/2024
Contents
- Purpose
- How to File an Initial Filing
- How to File an Amendment
- For Party Information Change
- For Termination on an Aircraft Maintenance Lien
- For Termination Not on an Aircraft Maintenance Lien
- For Assignment
- For Collateral Change
- For UCC5 Information Statement
- How to File a Master Filing
- For Master Assignment
- For Master Amendment
- How to Search for and Order Filings
- Bulk Orders
- Accessing and Managing Bulk Filings
Purpose
Purpose of the Guide
The purpose of this User Manual is to assist customers in navigating the Uniform Commercial Code (UCC) process through the State of Texas Secretary of State (SOS) online portal. This guide has been created to provide clear, step-by-step instructions for various UCC-related tasks, ensuring that users can efficiently and accurately complete their filings. The manual covers a range of procedures including initial filings, amendments, and searches. By following the instructions provided, users will be able to:
- Initiate and Complete Filings: Understand the process for starting new filings, including initial filings and amendments.
- Amend Existing Filings: Get detailed steps on how to amend existing UCC filings, including changes to party information, collateral, and more.
- Terminate Filings: Follow the process for terminating UCC filings, including specific instructions for aircraft maintenance liens.
- Search for Filings: Learn how to search for existing UCC filings by various criteria such as filing number, debtor, or secured party.
This manual aims to simplify the UCC filing process, reduce errors, and enhance user experience by providing comprehensive and easy-to-follow guidance.
How to File an Initial Filing
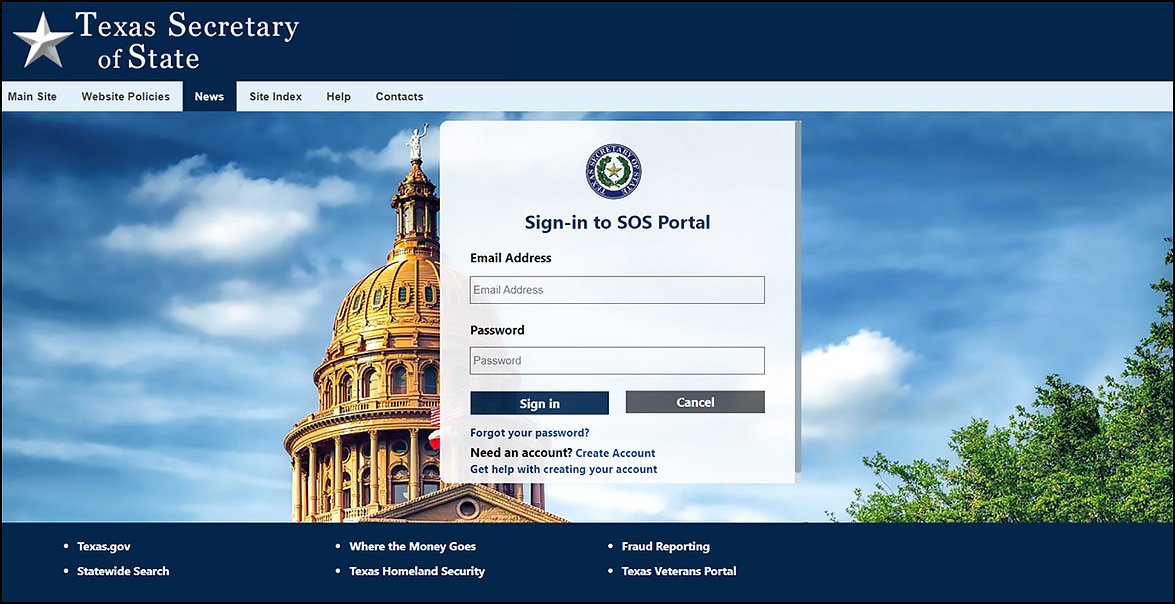
- Log into SOS Portal
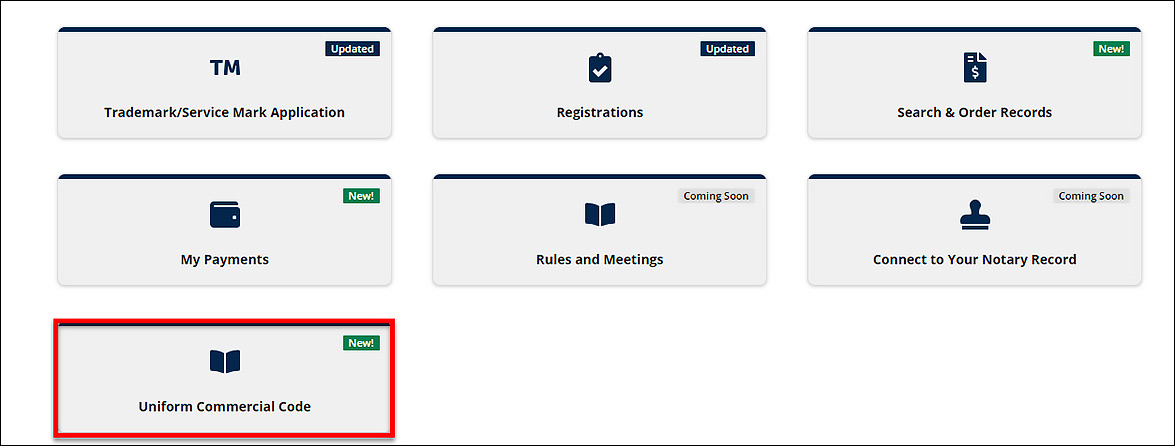
- Select UCC tile on the dashboard
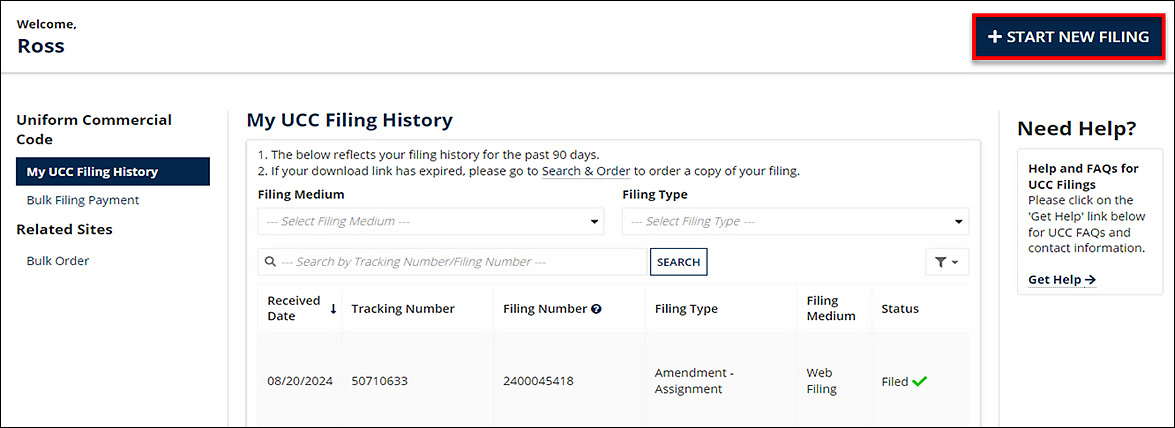
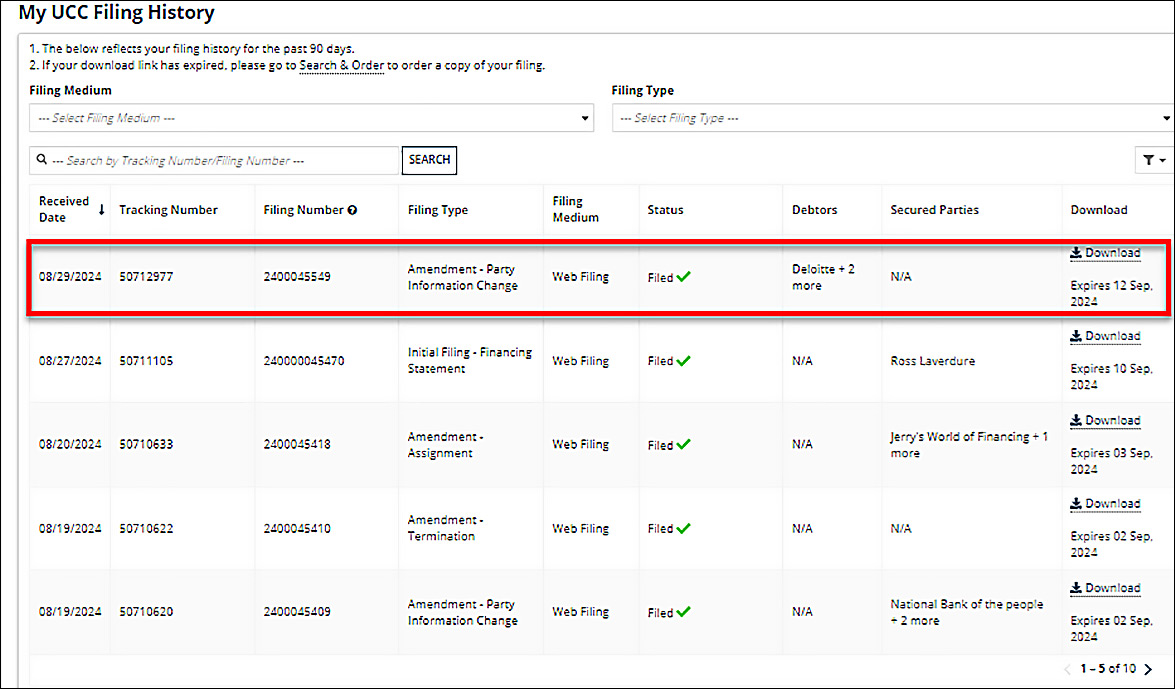
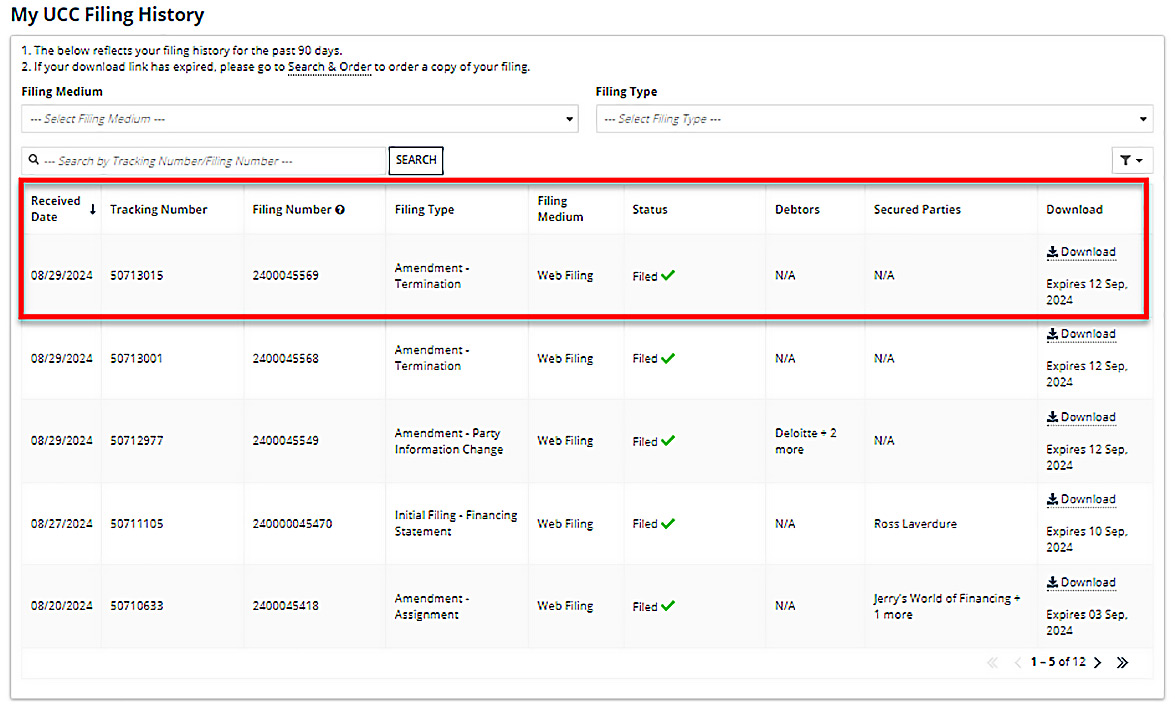
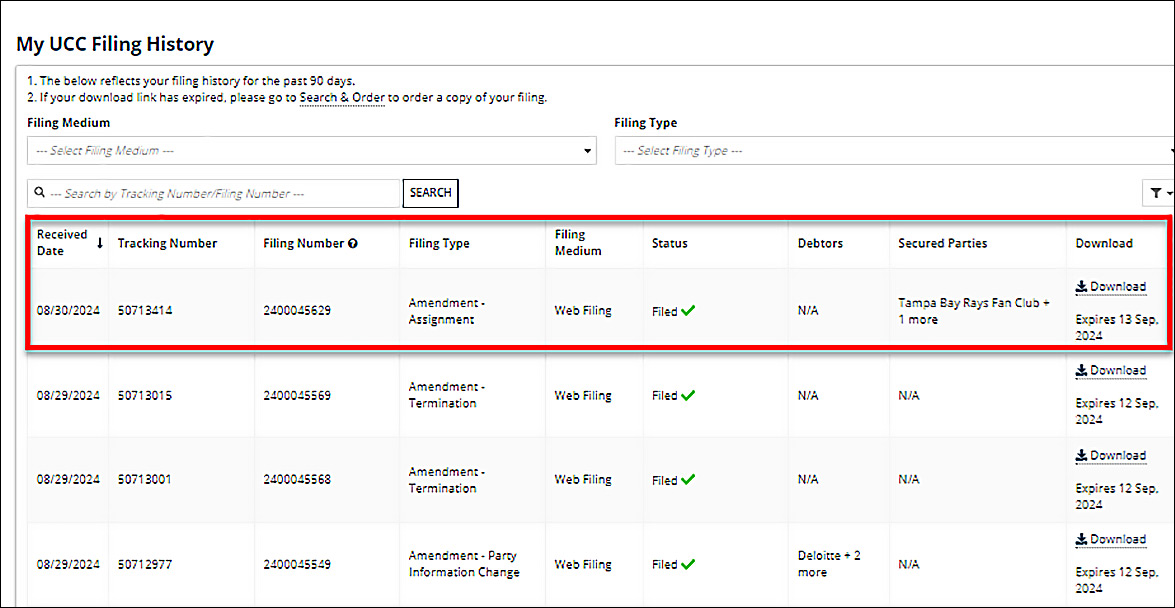
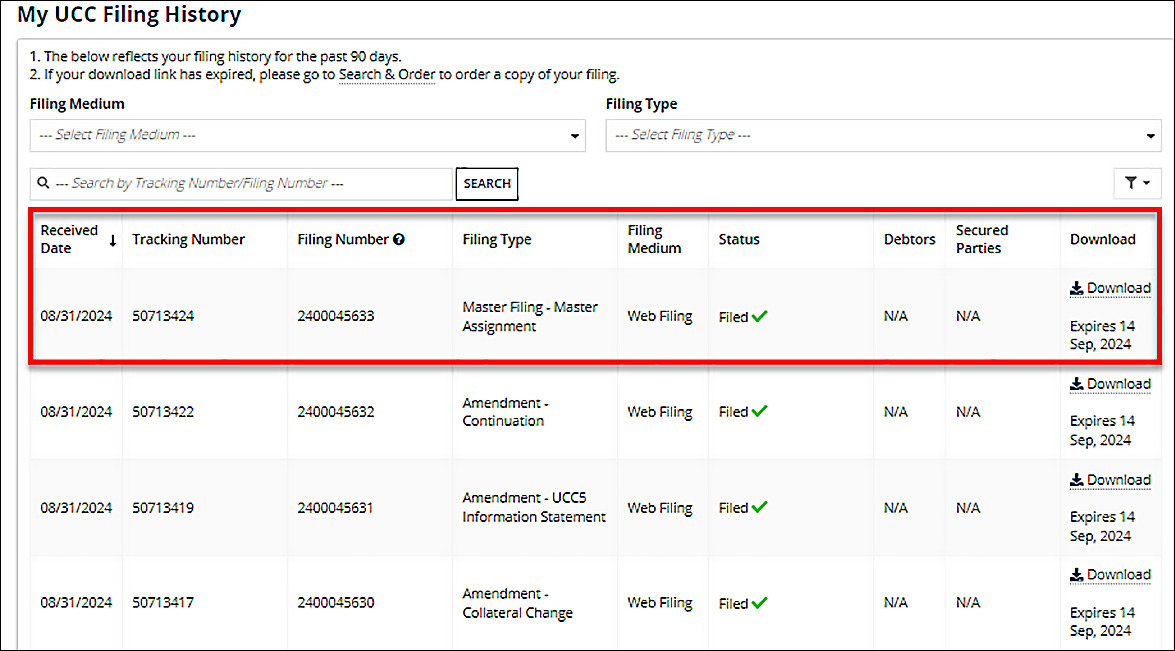
- You Will Then See Your UCC Filing History
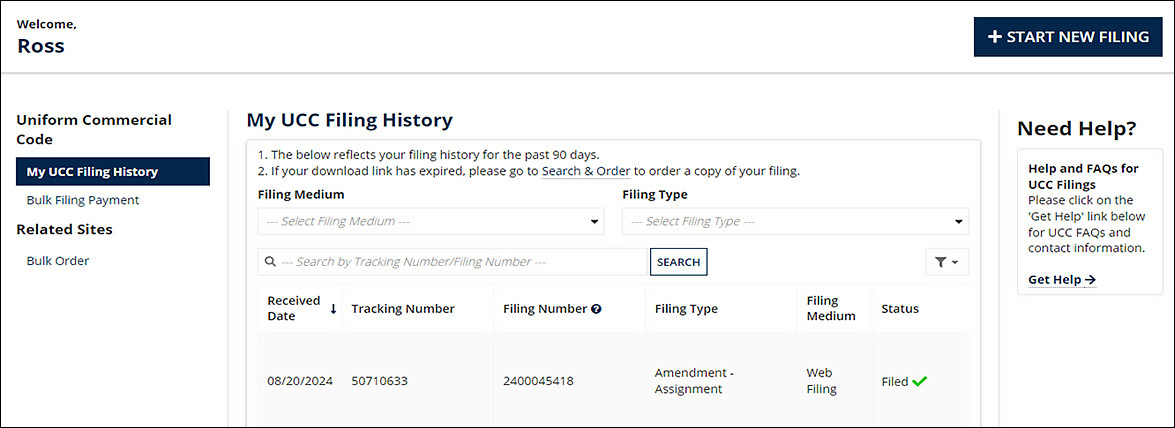
- Click “START NEW FILING”
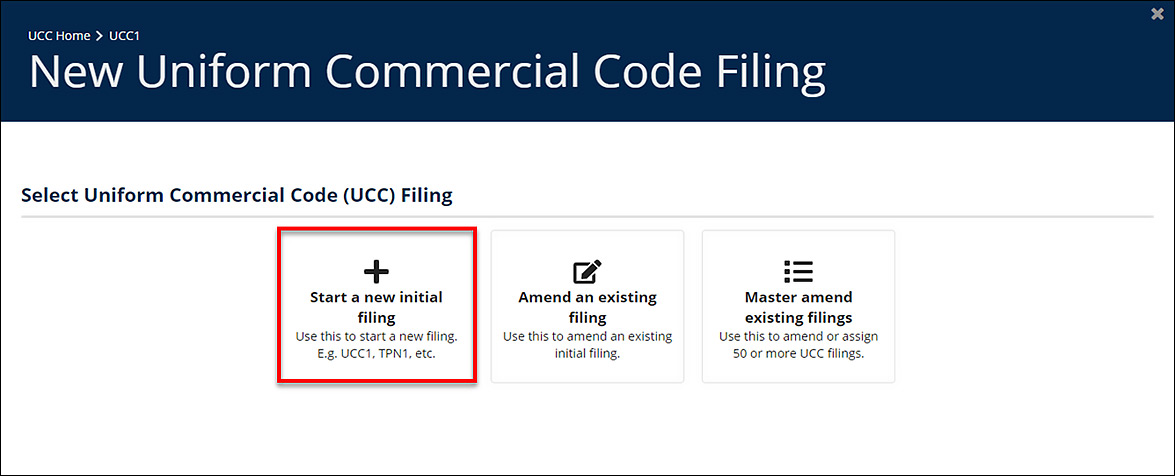
- Click “Start a new initial filing”
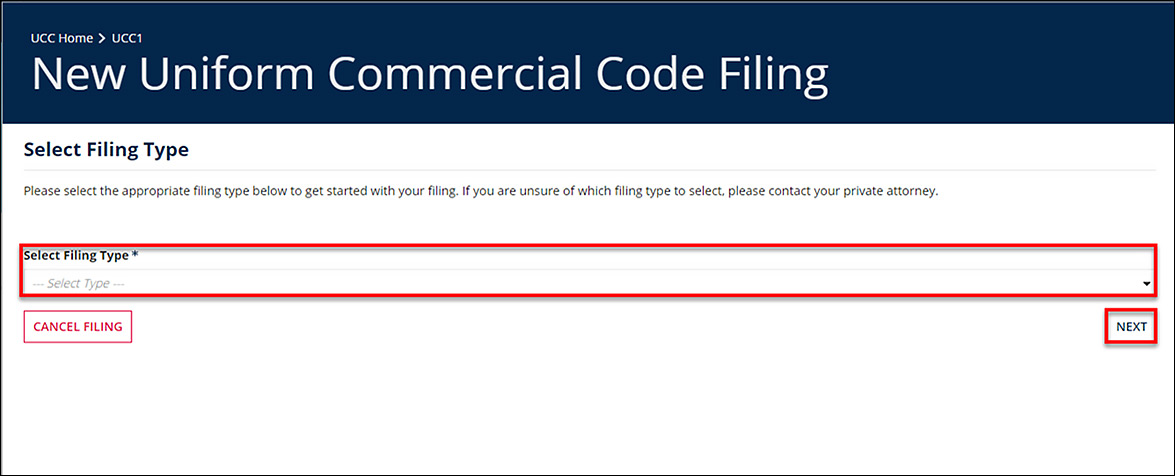
- Select Filing Type using the dropdown menu, then click NEXT
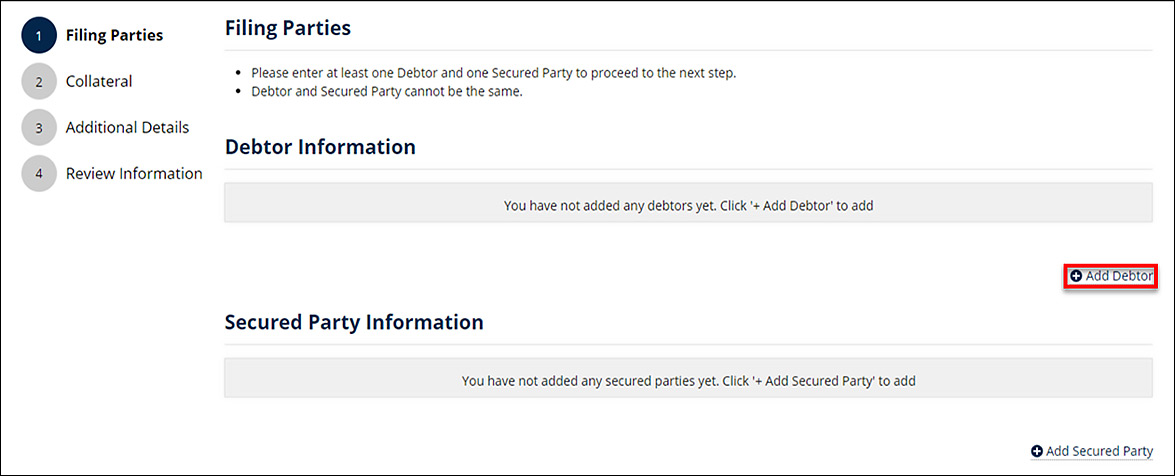
- Then, enter Filing Parties
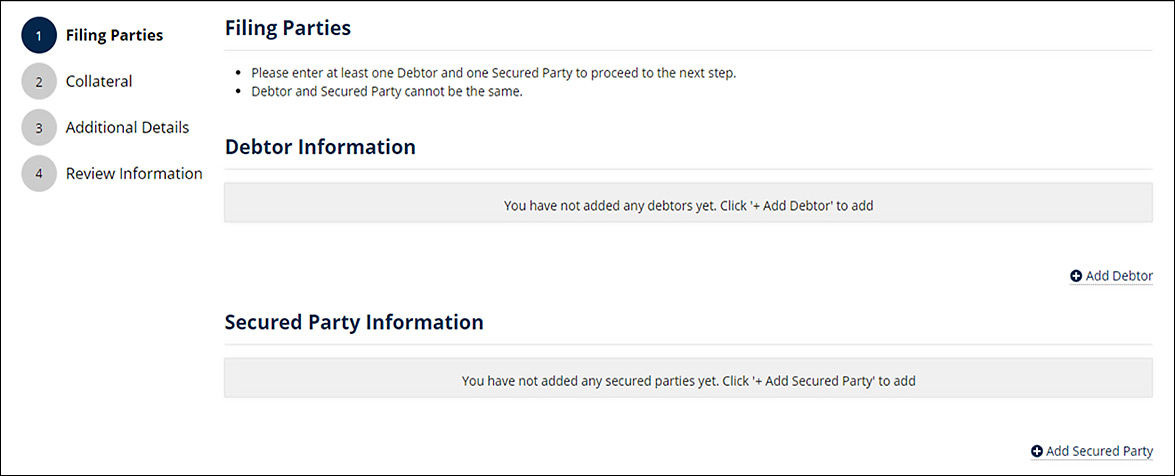
- Click Add Debtor
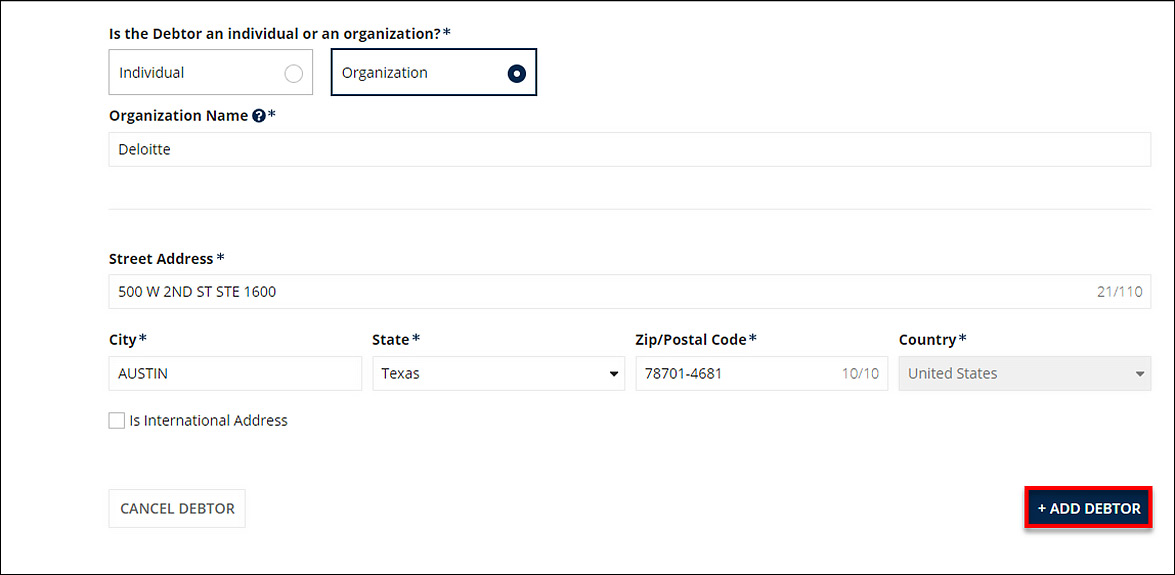
- Select if the debtor is an individual or an organization

- Fill out Debtor name and address. Then click ADD DEBTOR
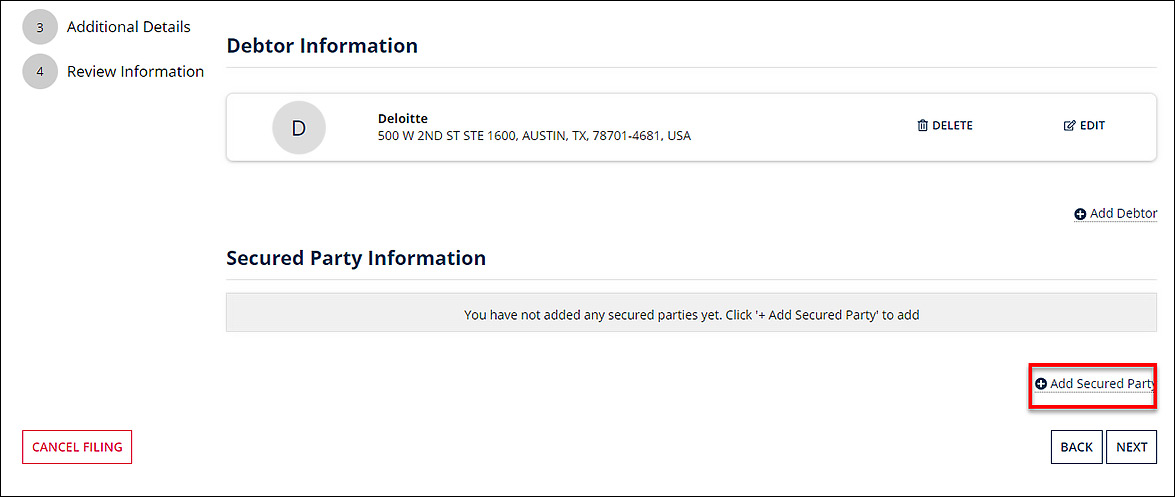
- Once debtor information is entered, click Add Secured Party
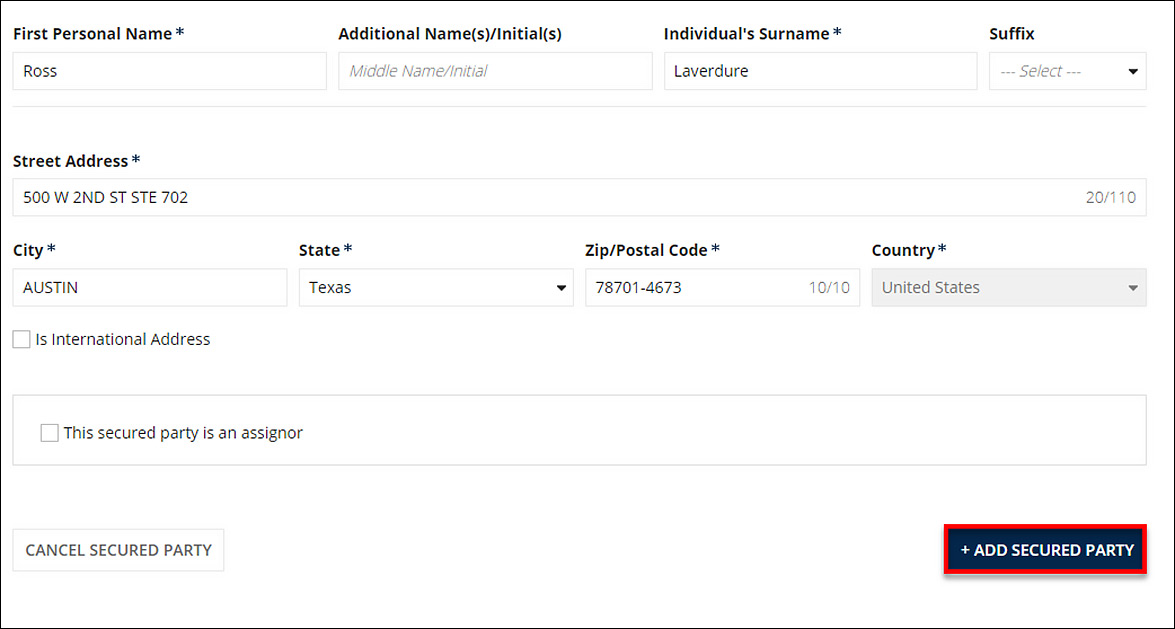
- Select if the Secured Party is an individual or an organization
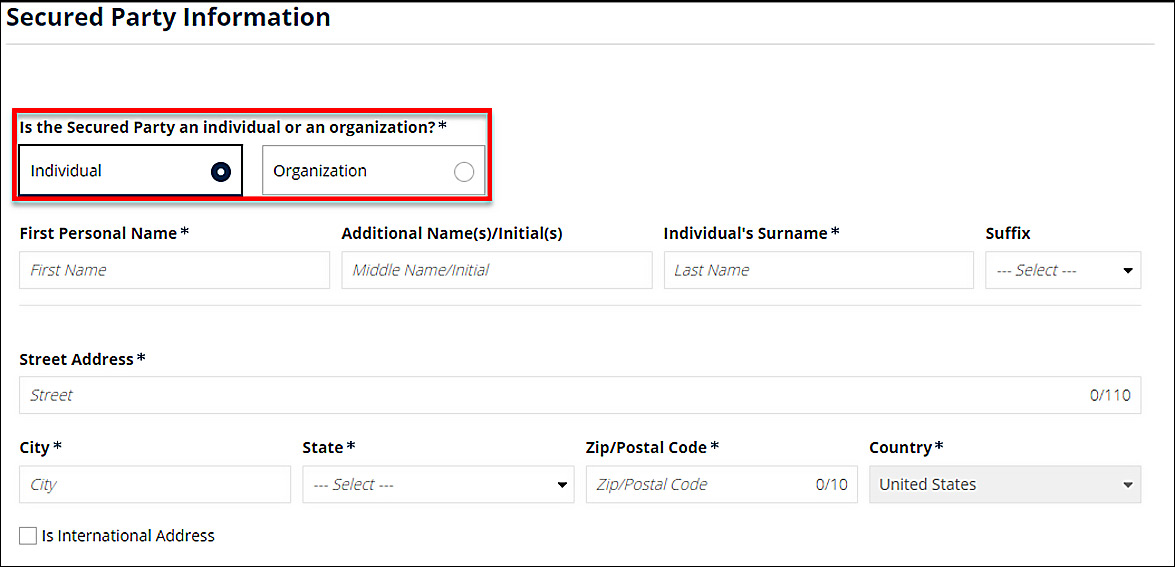
- Fill out Secured Party name and address. Then click ADD SECURED PARTY
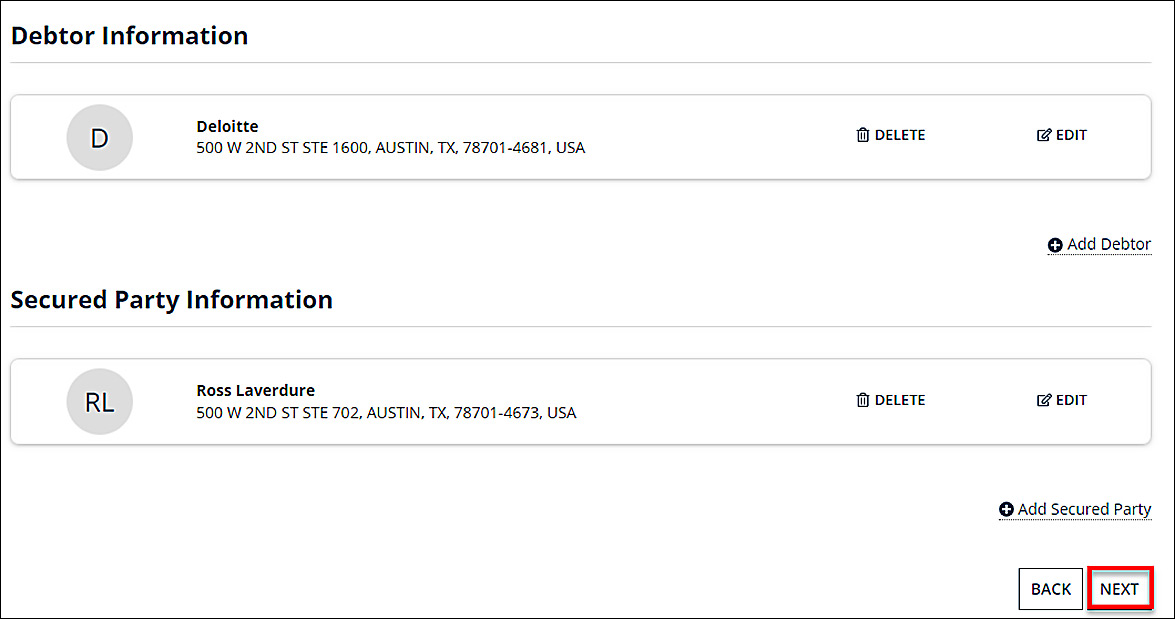
- Click NEXT to proceed to the Collateral page
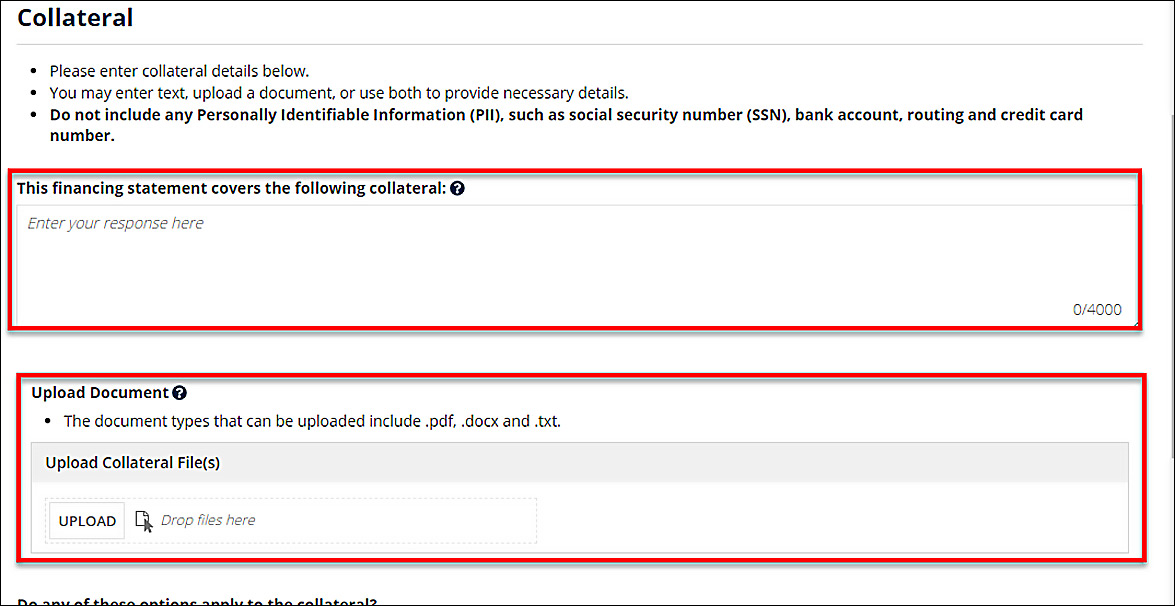
- Describe the Collateral or Upload a Document/Collateral Files
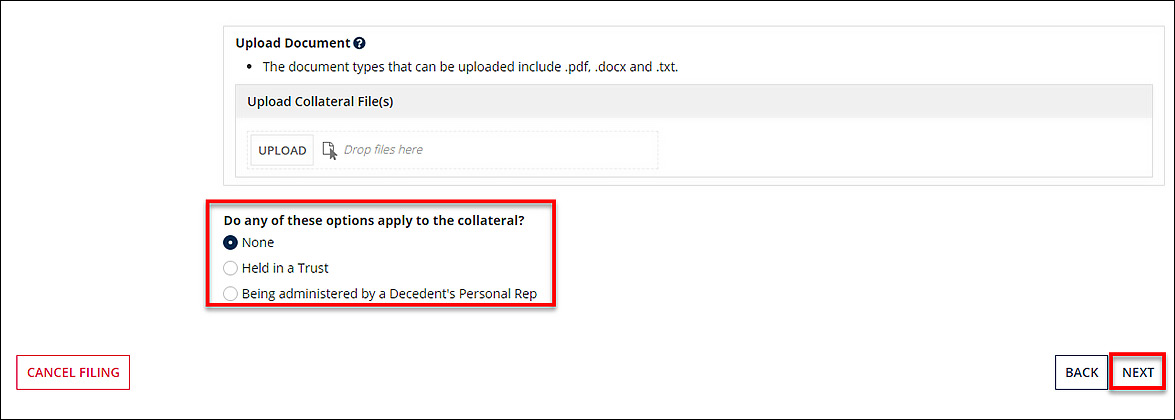
- Answer final question about the collateral, then click NEXT
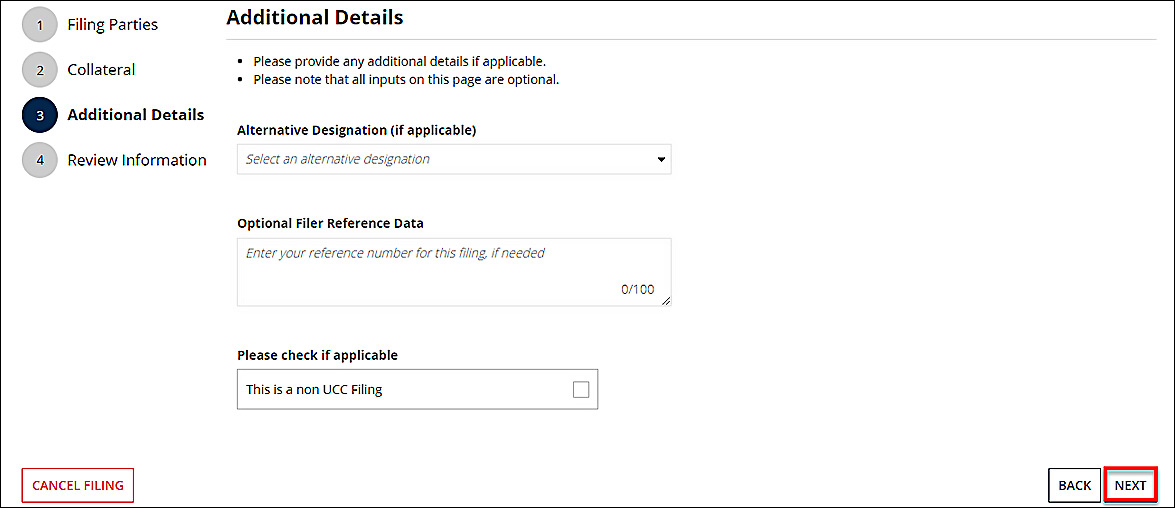
- Provide Additional Details (if applicable). Then, click NEXT
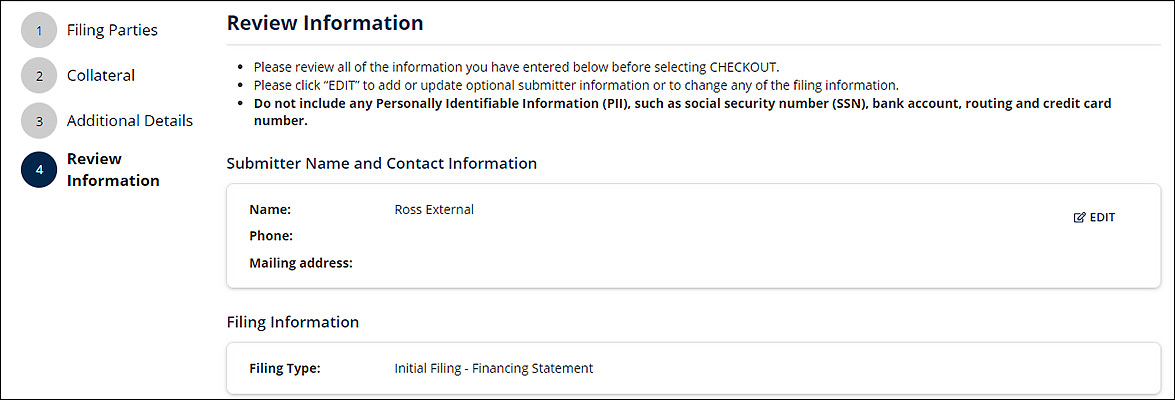
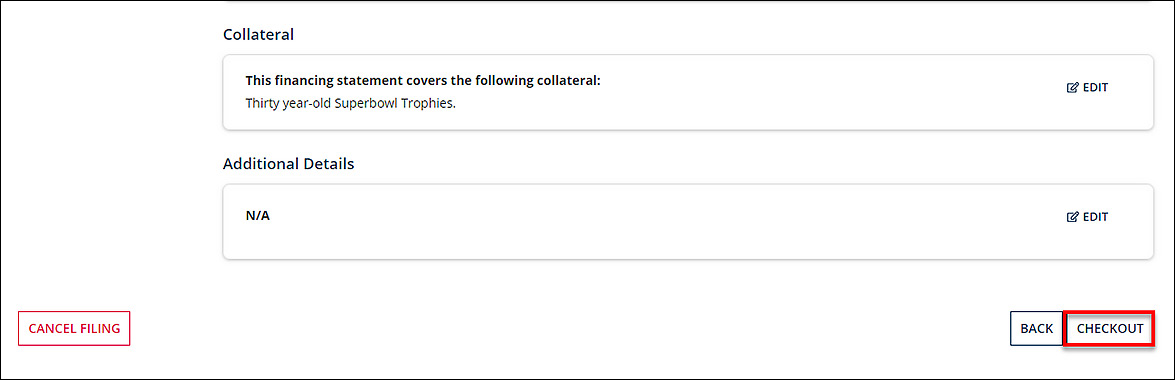
- Review Information, then, click CHECKOUT at the bottom of the page
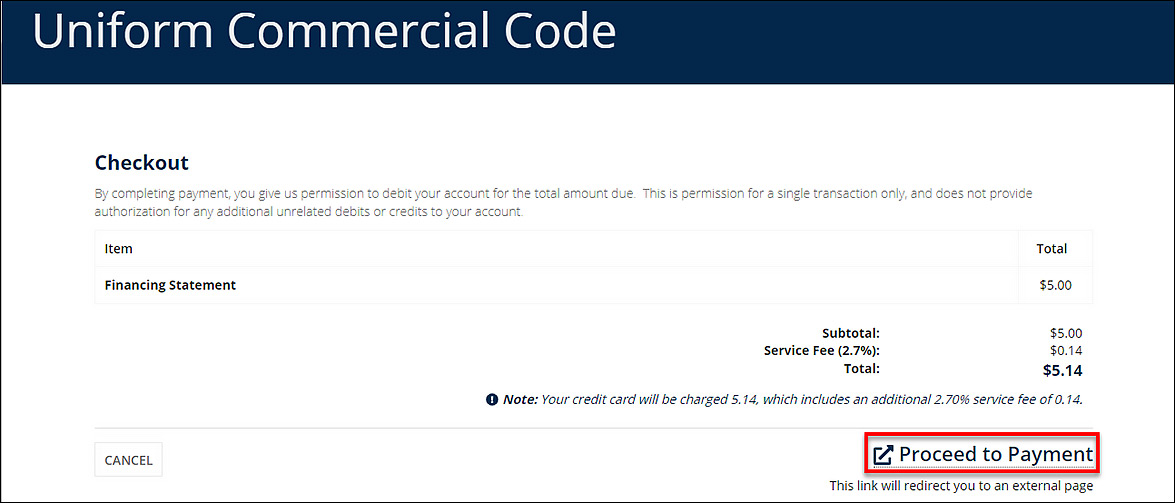
- The Checkout page will show total amount owed. Click Proceed to Payment
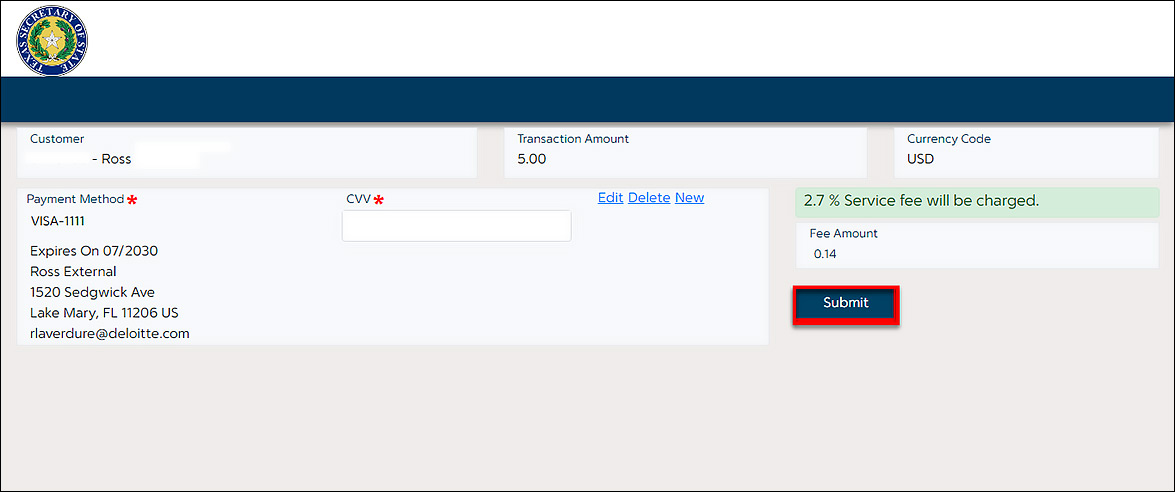
- Review and confirm Payment Method. Then, click Submit
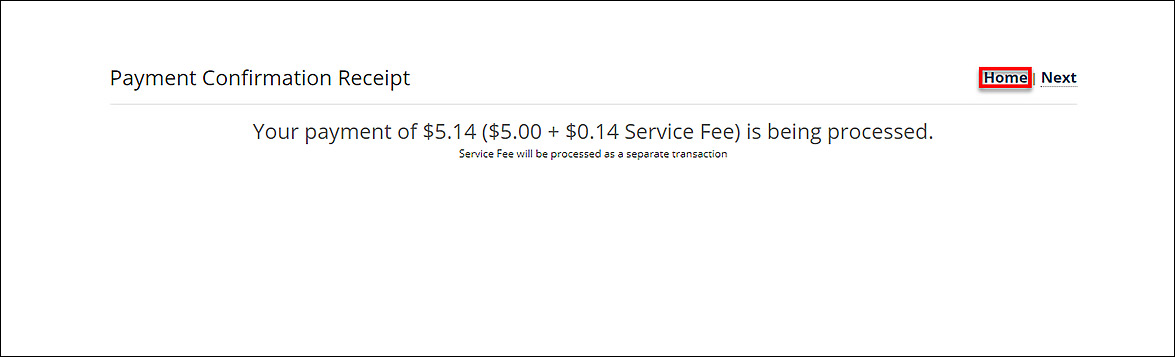
- Proceed to Payment Confirmation Receipt. Then, click HOME to return to UCC Filing History
- Newly filed document is available for download for the next two weeks

How to File an Amendment
- Log into SOS Portal
- Select UCC tile on the dashboard
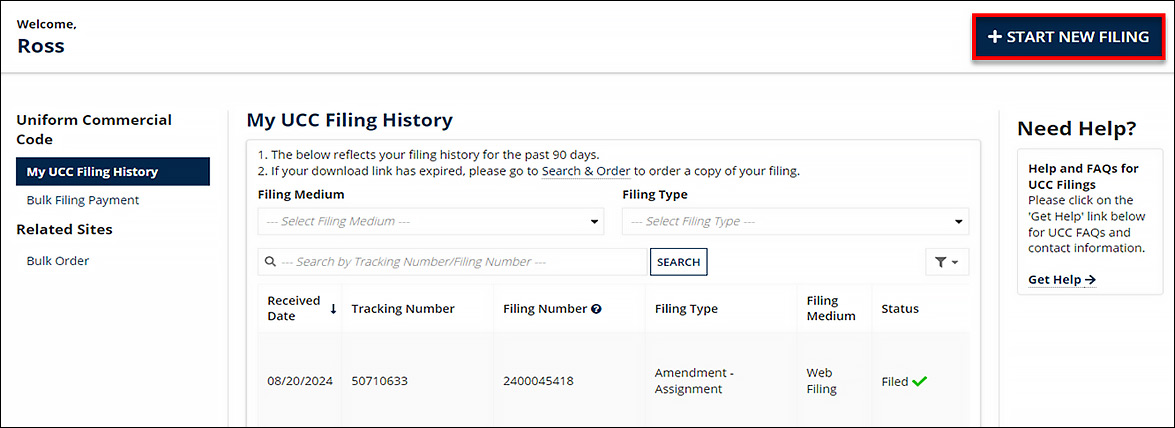
- You Will Then See Your UCC Filing History. Click “START NEW FILING”
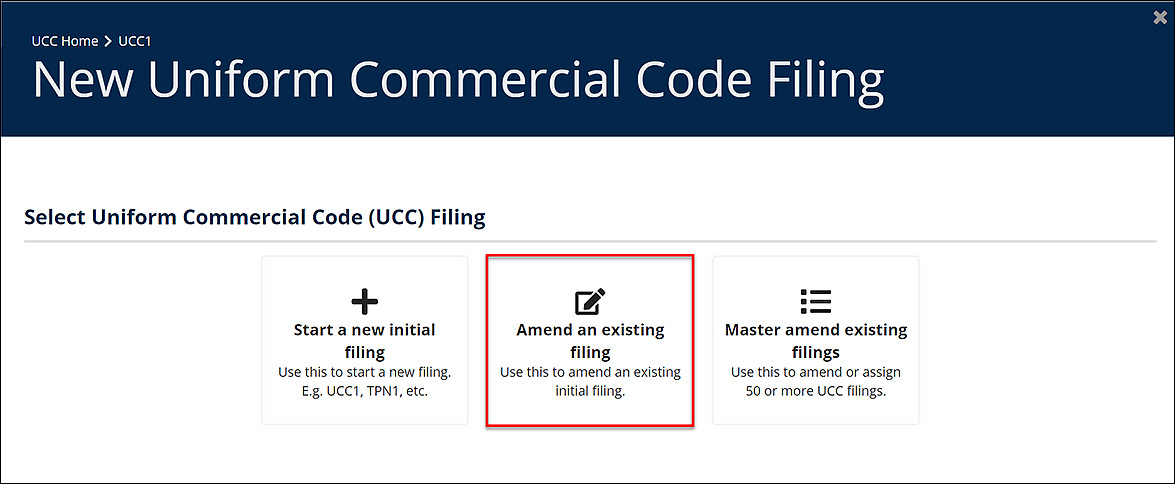
- Choose the option to Amend an existing filing.
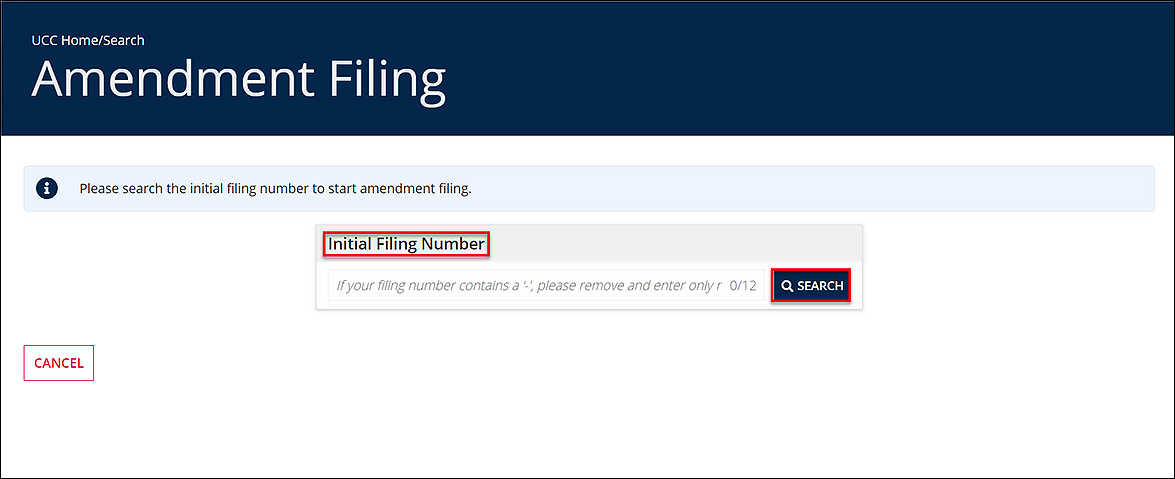
-
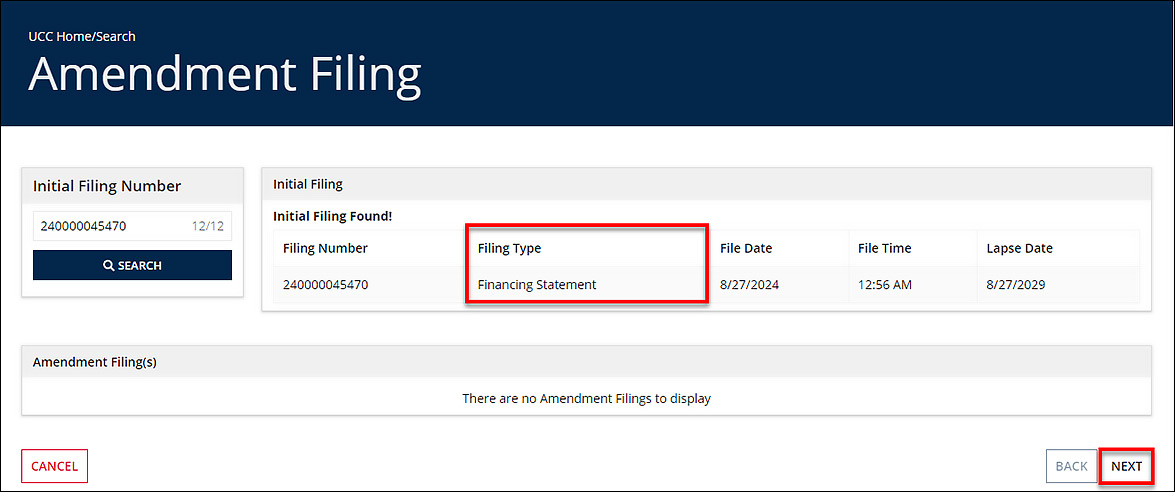
Enter the Filing Number of the Document You Want to Amend. Then click SEARCH
For Party Information Change:
- Look at the Filing Type. To confirm that it is the document to be amended, click Next
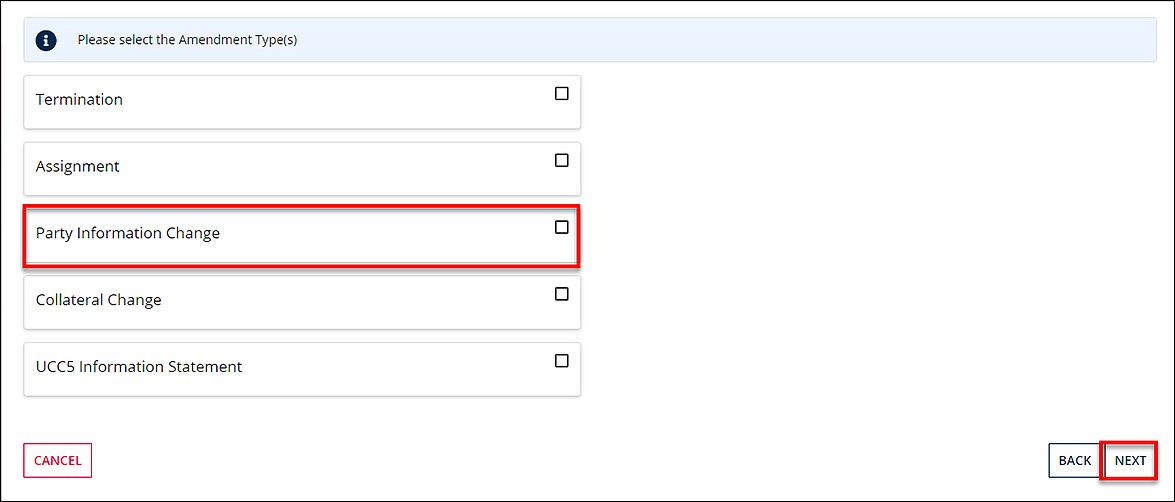
- Select Amendment Type. For Party Information Change, choose Party Information Change. Then, click NEXT
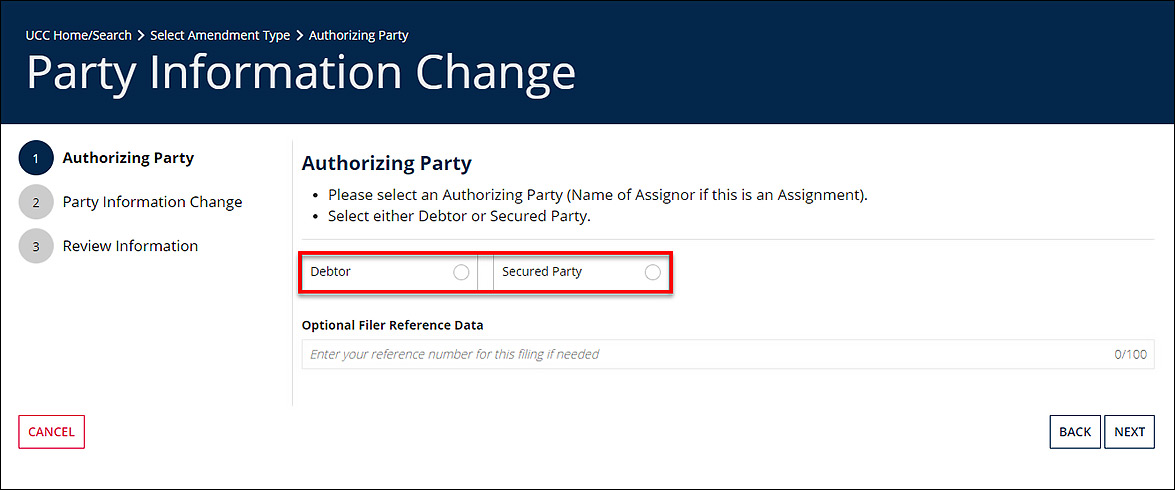
- Select an Authorizing Party (Debtor or Secured Party)
- Confirm that a change will be made by checking the box next to the Authorizing Party chosen
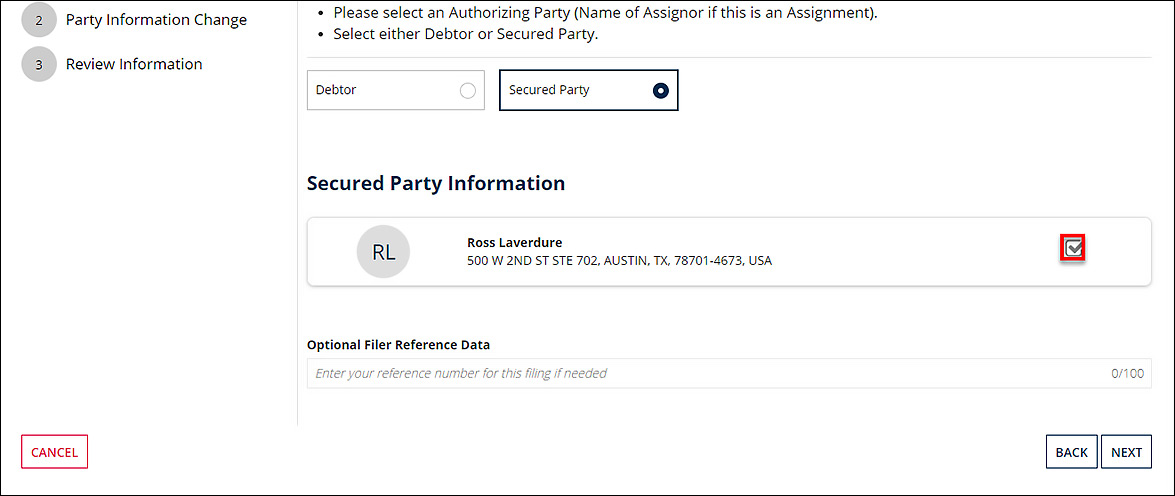
- Click “NEXT”

- Pick the Filing Party to be updated
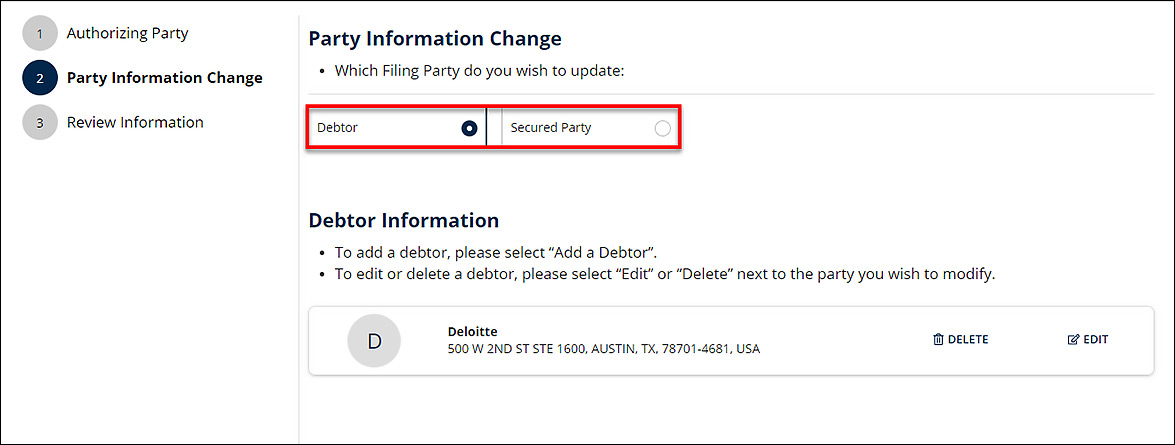
- Pick to Add, DELETE, or EDIT the Filing Party
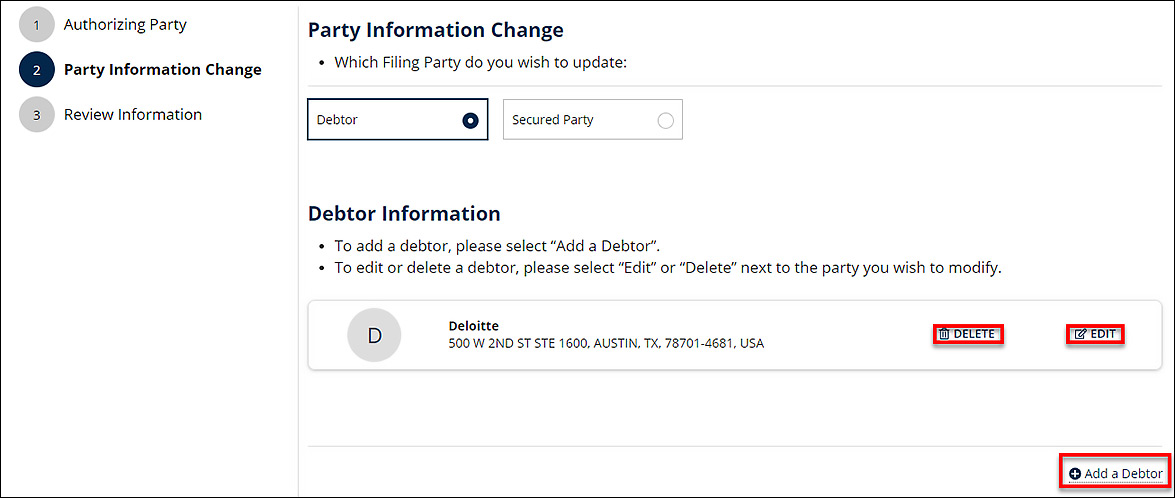
- Update Filing Party Information. Click NEXT to confirm
- Review the Information
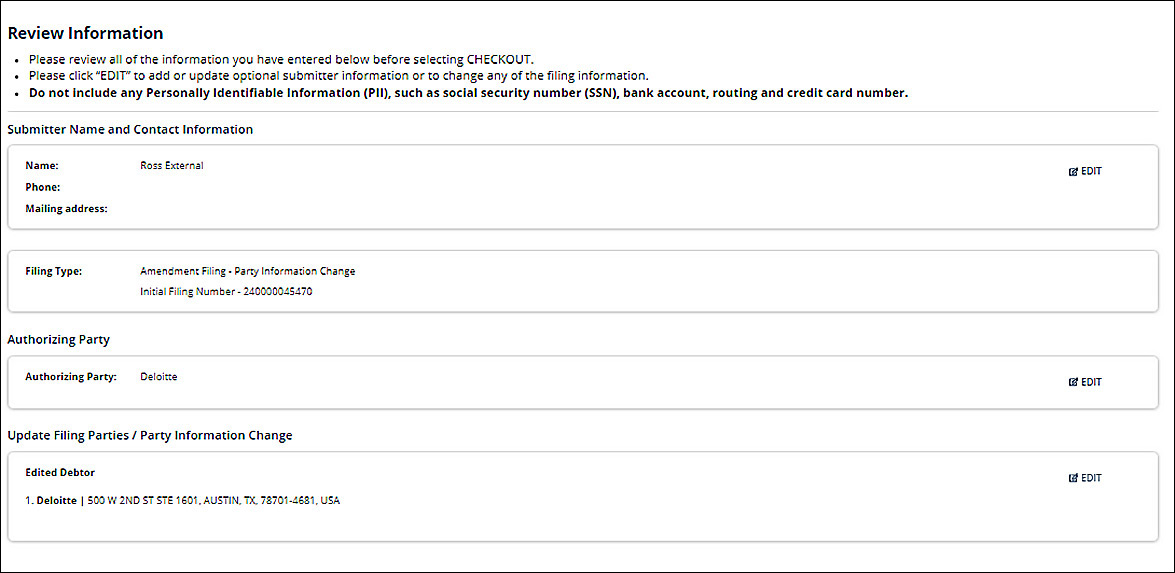
- Click “CHECKOUT” on the bottom right of the screen.
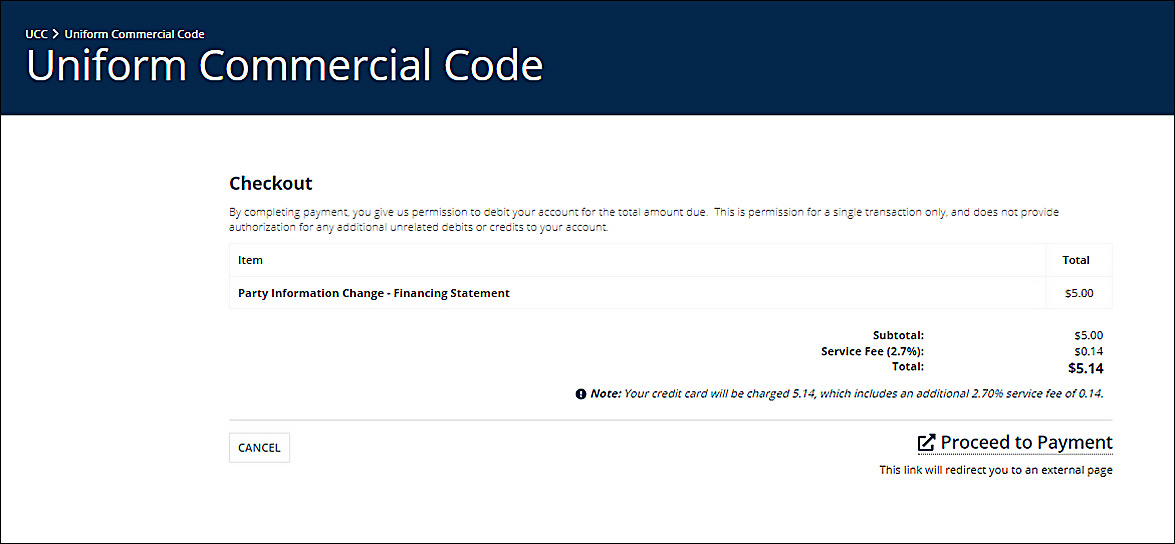
- Click "Proceed to Payment”
- Submit Payment Method, then, view Payment Confirmation Receipt. Then, click “Home” to return UCC Filing History

- Form/Application Available for Download. The form/application will be available for download for two weeks.
For Termination on an Aircraft Maintenance Lien:
Follow Amendment Filing steps 1 through 7
- Look at the Filing Type to Ensure It Is Correct. Make sure it is an Aircraft Maintenance Lien

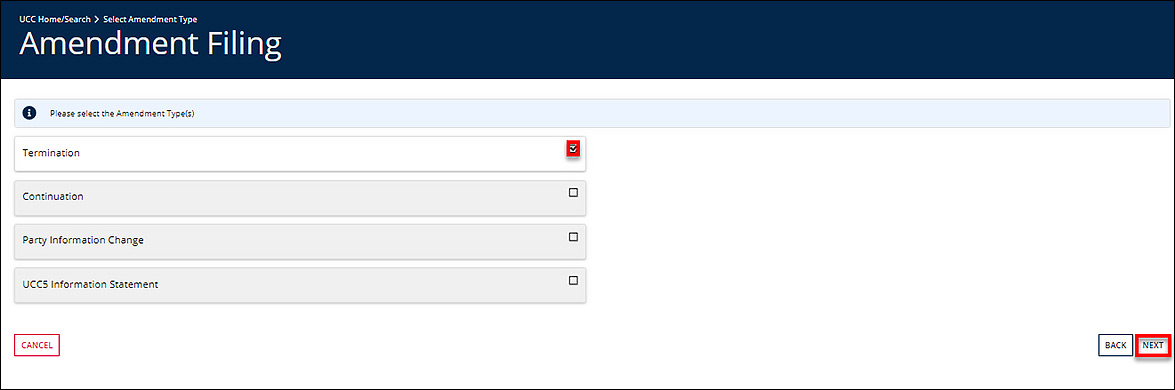
- Click Next to select an Amendment Type on the following screen
- Select Termination. Then click NEXT

- Upload the termination Document. Then, click NEXT
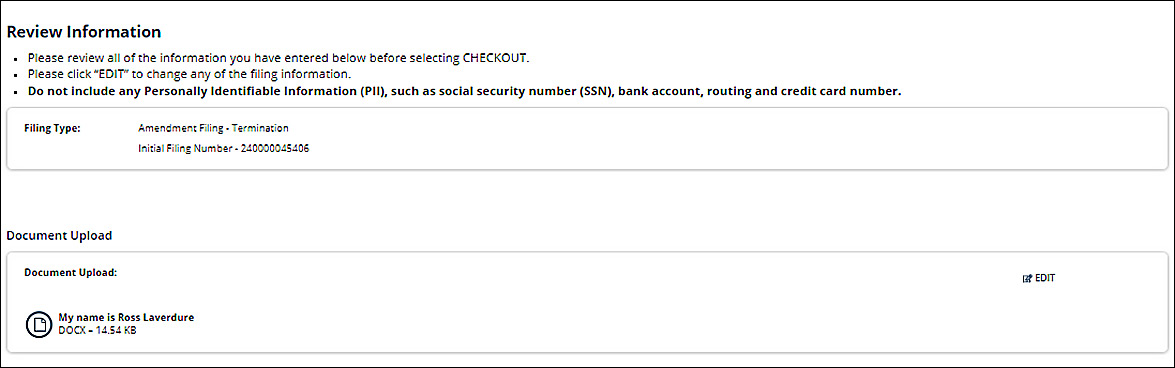
- Review the Information. Then, click CHECKOUT
- On the following screen, click "Proceed to Payment”
- Confirm Payment Method, then Submit.
- On the following screen, view Payment Confirmation Receipt
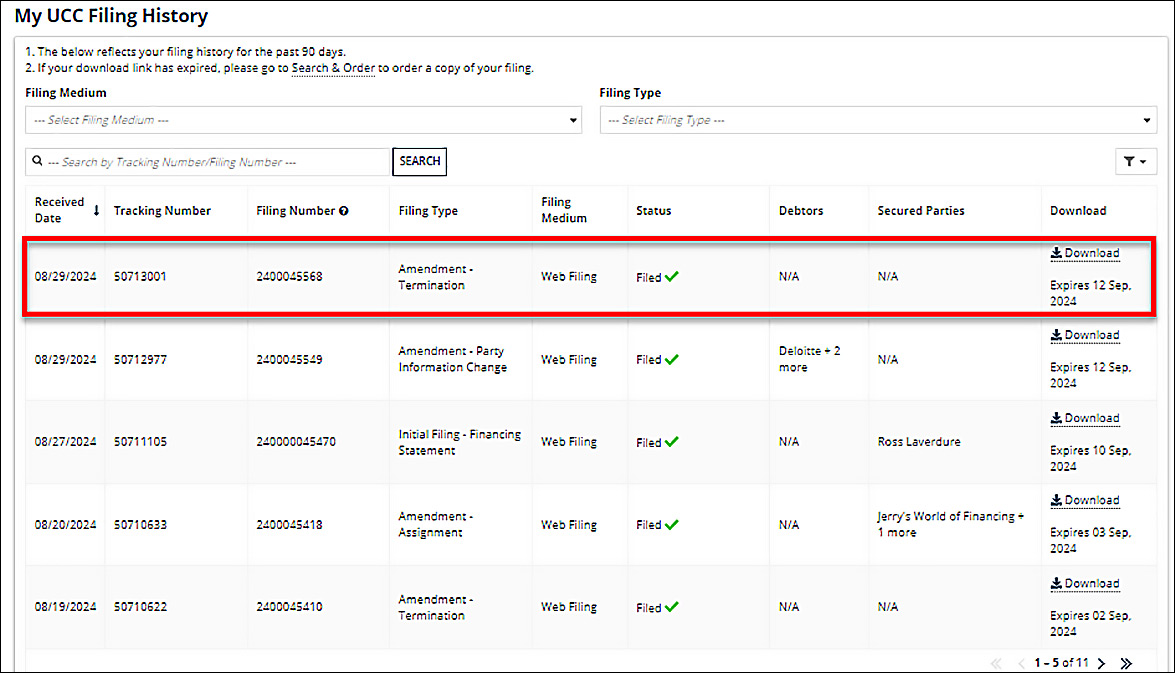
- Then, click “Home” to See UCC Filing History, where Form/Application will be available for Download
For Termination Not on an Aircraft Maintenance Lien:
Repeat steps one through 7
- Look at the Filing Type to Ensure It Is Correct. Make sure it is NOT an Aircraft Maintenance Lien

- Click Next to select an Amendment Type on the following screen
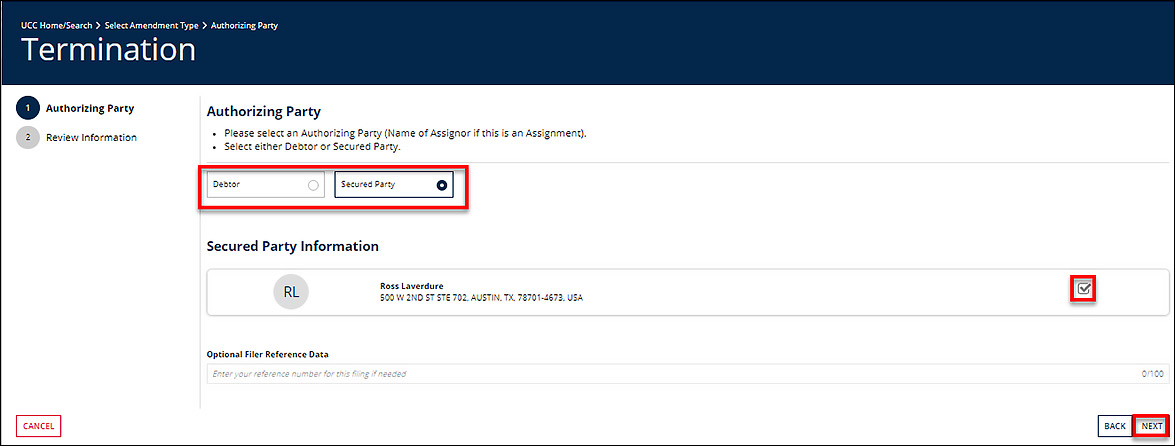
- Select Termination. Then click NEXT
- Select an Authorizing Party (Debtor or Secured Party). Confirm the Change by Checking the Box. Then click, NEXT
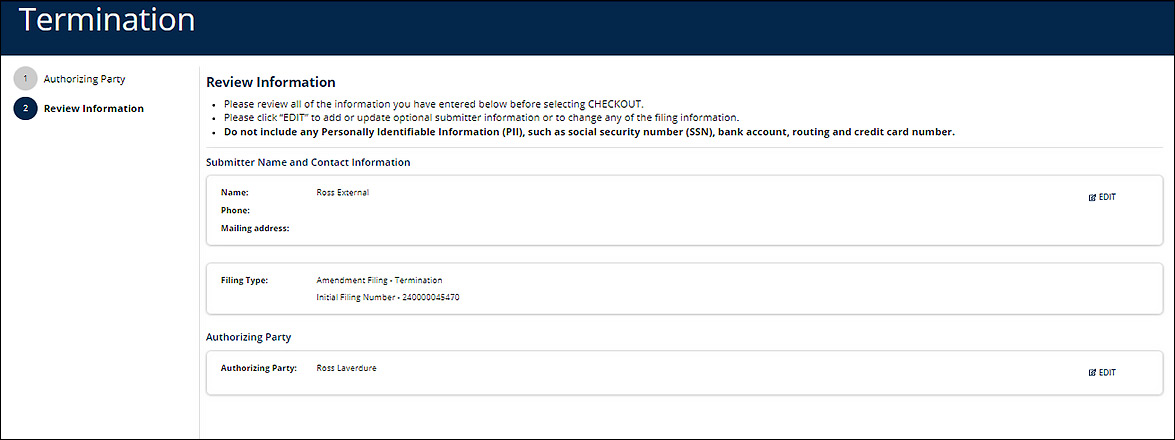
- Review the Information. Then, click “CHECKOUT”
- On the following screen, click "Proceed to Payment”
- Confirm Payment Method, then Submit.
- On the following screen, view Payment Confirmation Receipt
- Then, click “Home” to See UCC Filing History, where Form/Application will be available for Download
For Assignment:
Follow Amendment Filing steps 1 through 7
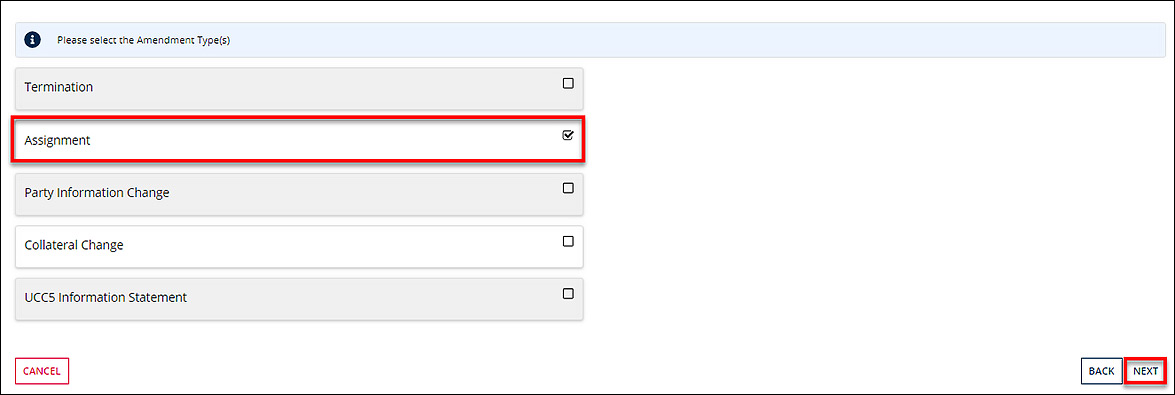
- Look at the Filing Type to Ensure It Is Correct. Then, click NEXT

- Select Assignment. Then click NEXT
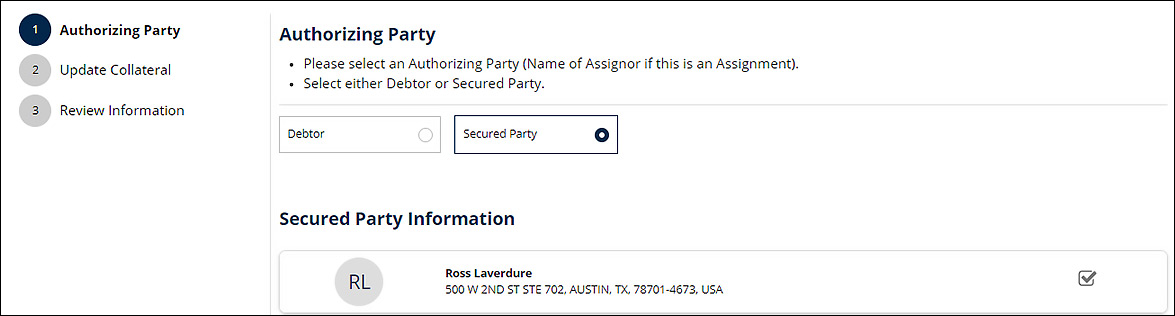
- Select an Authorizing Party (Secured Party).
- Confirm the Change by Checking the Box. Then, click “NEXT”
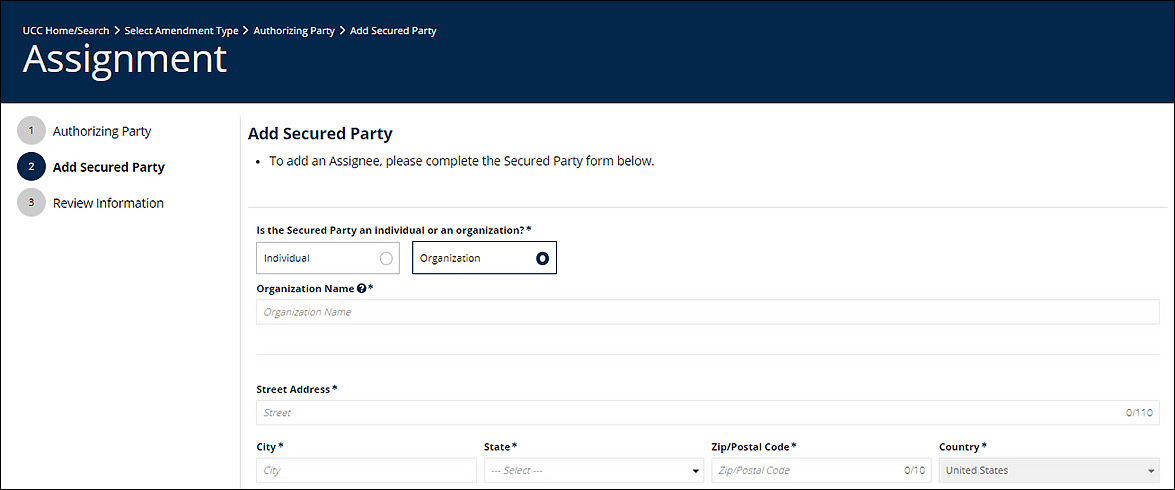
- On the following screen, add new Secured Party. Specify if new Secured Party is an individual or organization. Then, click NEXT
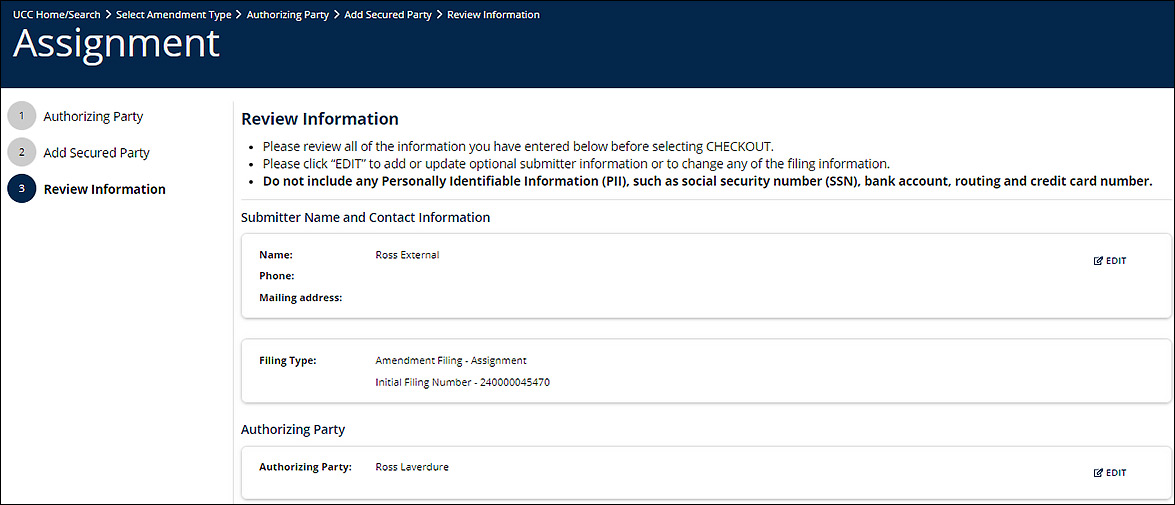
- Review the Information. Then, click “CHECKOUT”
- On the following screen, click "Proceed to Payment”
- Confirm Payment Method, then Submit.
- On the following screen, view Payment Confirmation Receipt
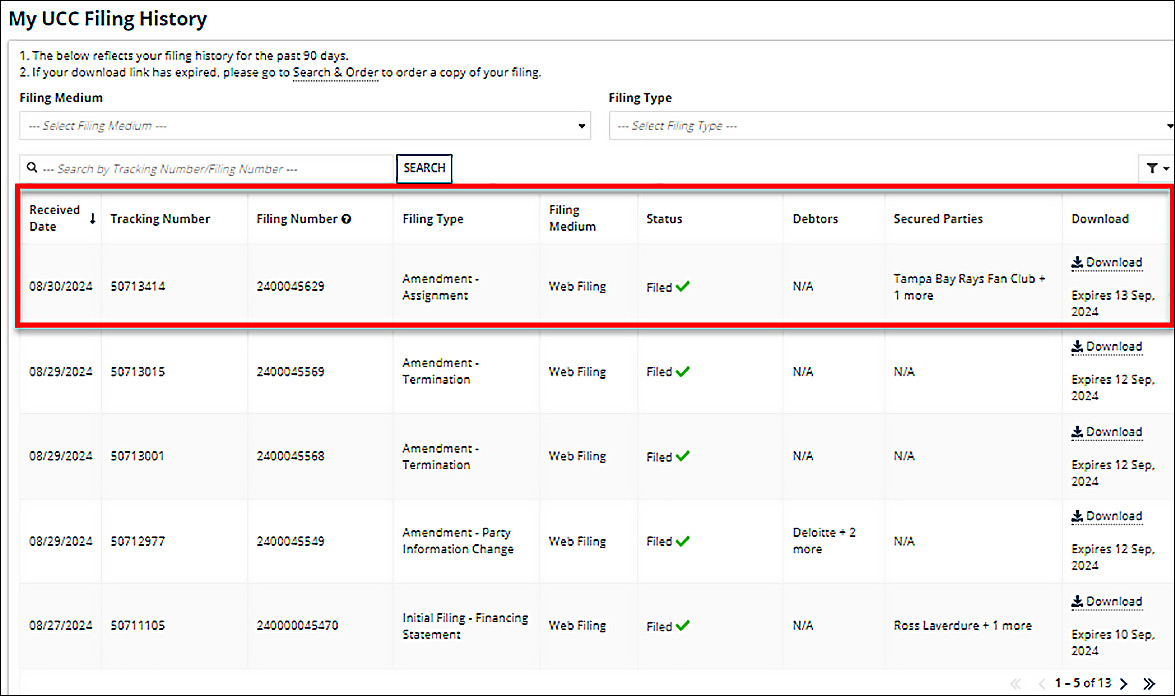
- Then, click “Home” to See UCC Filing History, where Form/Application will be available for Download
For Collateral Change:
Follow Amendment Filing steps 1 through 7
- Look at the Filing Type to Ensure It Is Correct

- Click Next to select an Amendment Type on the following screen
- Select Collateral Change. Then click NEXT

- Select an Authorizing Party (Debtor or Secured Party). Then, click NEXT
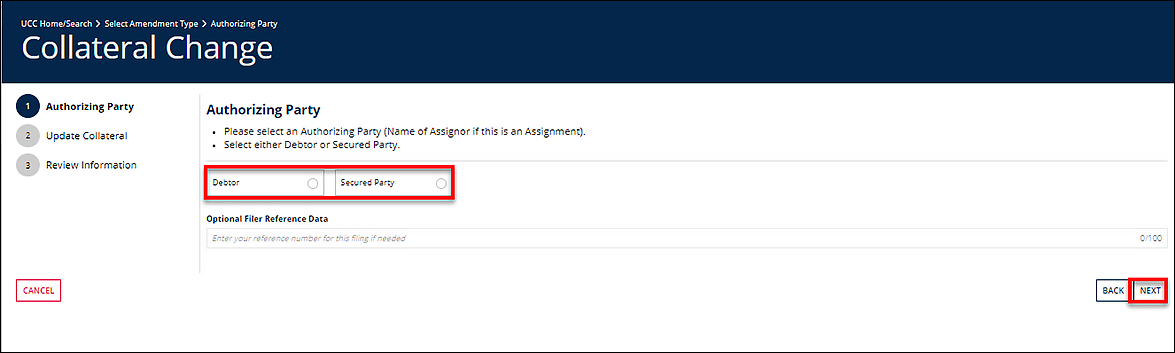
- Confirm the Authorizing Party, then click NEXT
- The following screen asks for Collateral Details:
- Select the type of collateral change: ADD. DELETE, or RESTATE
- Details must be provided in the Collateral text box.
- A document can be uploaded to explain the collateral change (not mandatory)
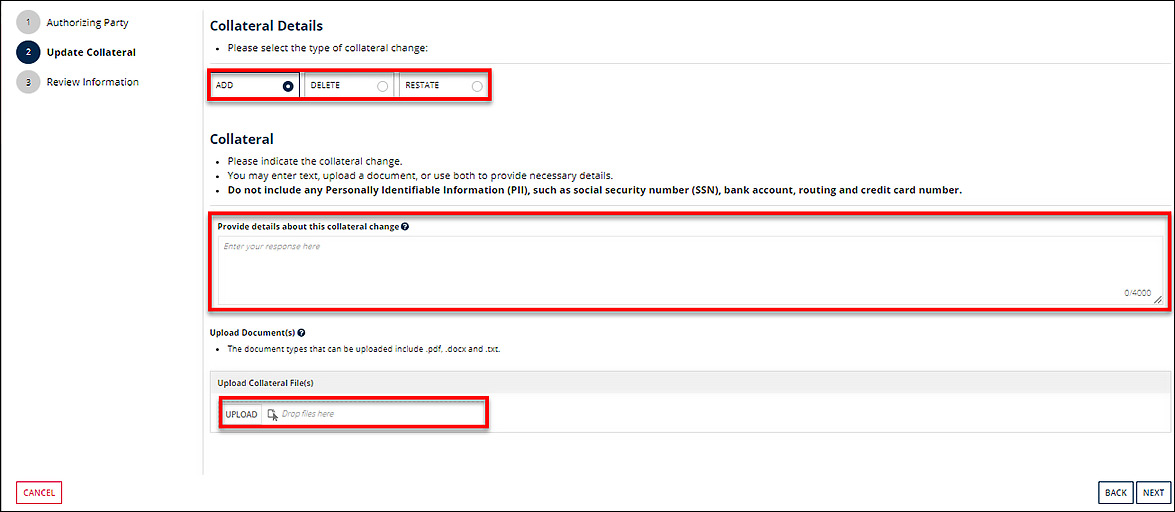
- Click “NEXT” to proceed to Review Information entered.
- Once the information is confirmed, click Checkout at the bottom right of the screen.
- Confirm Payment Method, then Submit.
- On the following screen, view Payment Confirmation Receipt
- Then, click “Home” to See UCC Filing History, where Form/Application will be available for Download
For UCC5 Information Statement:
Follow Amendment Filing steps 1 through 7
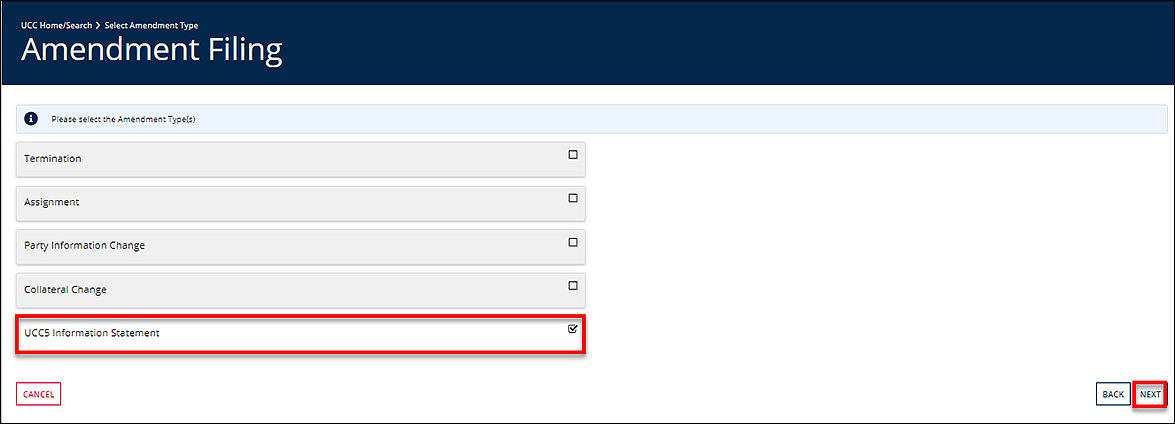
- Look at the Filing Type to Ensure It Is Correct. Then, click Next to select an Amendment Type

- Select UCC5 Information Statement
- Select an Authorizing Party. Confirm the Change by Checking the Box
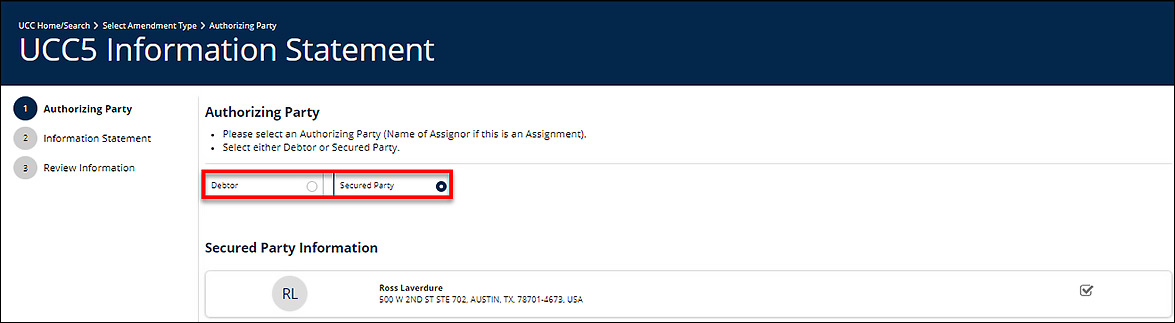
- Click “NEXT” to proceed to the Information Statement Claim page
Fill Out the Information Statement Claim.- State which filing this UCC5 pertains to
- Choose whether Record is inaccurate, wrong, or filed by someone unauthorized to do so. Then, describe why in text box
- Document related to claim can be uploaded.
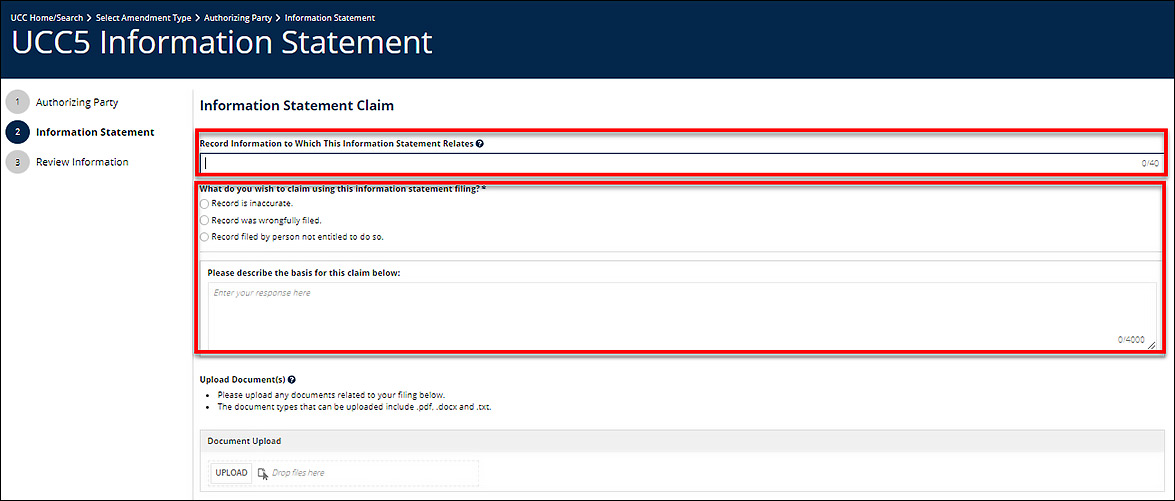
- Click “NEXT”
- Review the Information. Then, click “CHECKOUT”

- Once the information is confirmed, click Checkout at the bottom right of the screen.
- On Checkout page, click Proceed to Payment.
- Confirm Payment Method, then Submit.
- On the following screen, view Payment Confirmation Receipt.
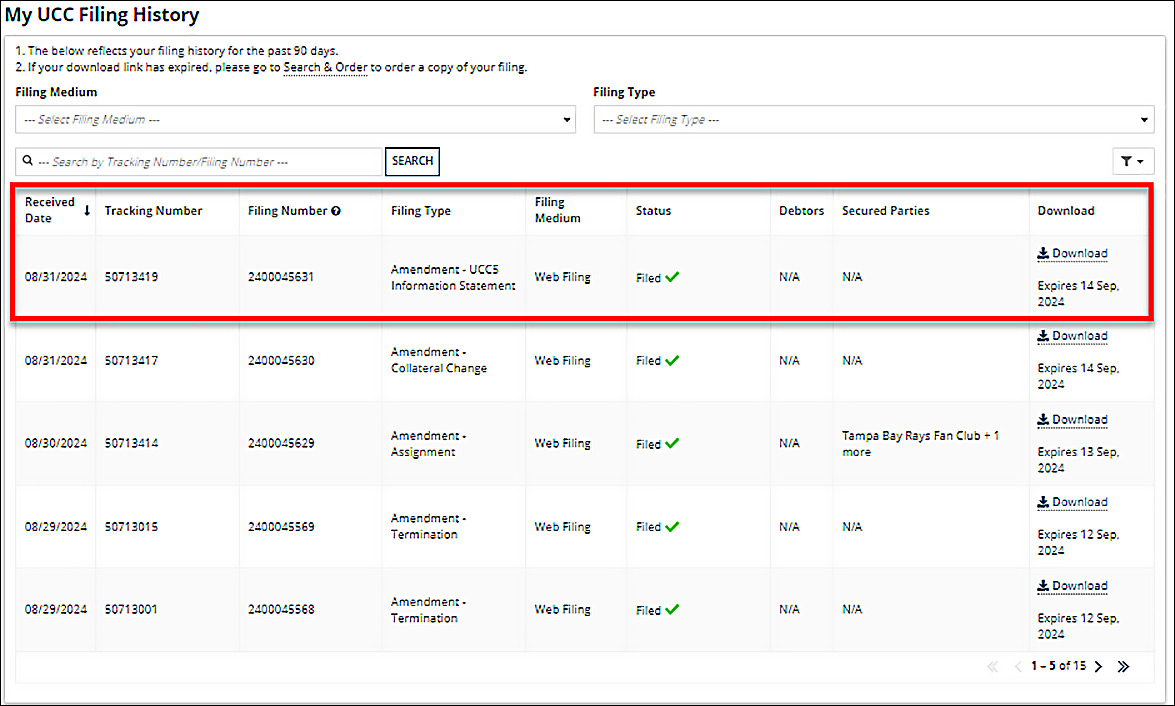
- Then, click “Home” to See UCC Filing History, where Form/Application will be available for Download
For Continuation:
Follow Amendment Filing steps 1 through 7
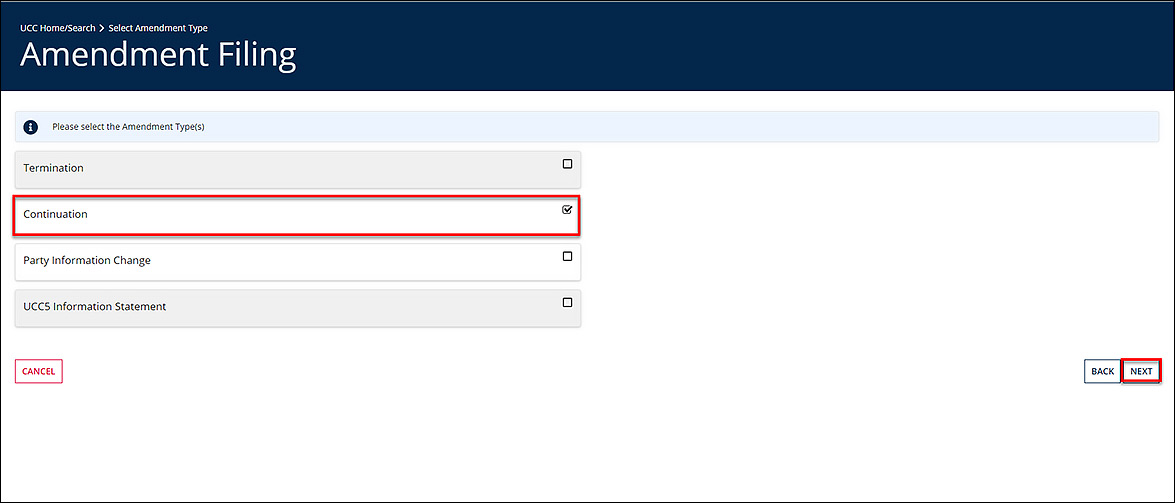
- Look at the Filing Type to Ensure It Is Correct. Then, click Next to select an Amendment Type
- Select Continuation. Then, click NEXT
- Select an Authorizing Party (Debtor or Secured Party). Confirm the Change by checking the box. Then click NEXT
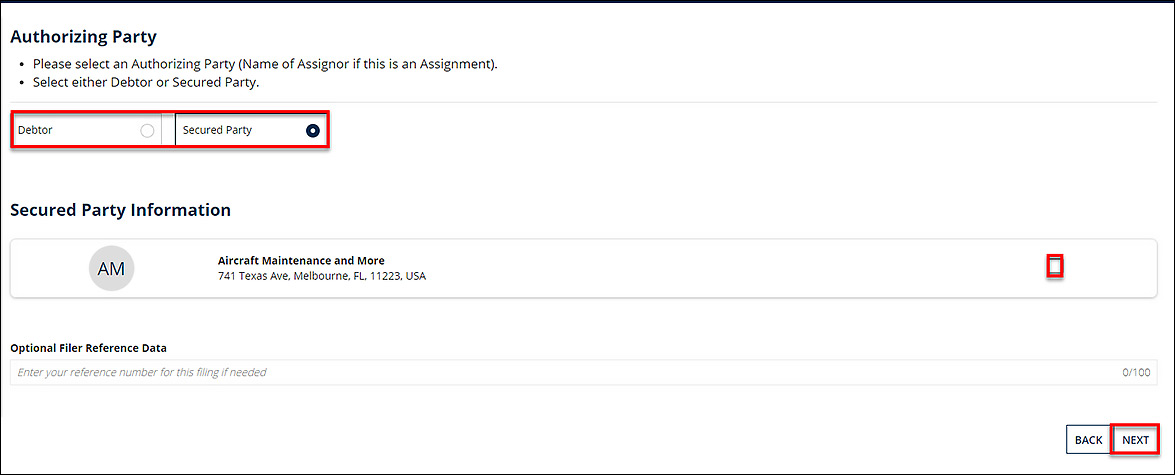
- Review the Information. Then, click “CHECKOUT”
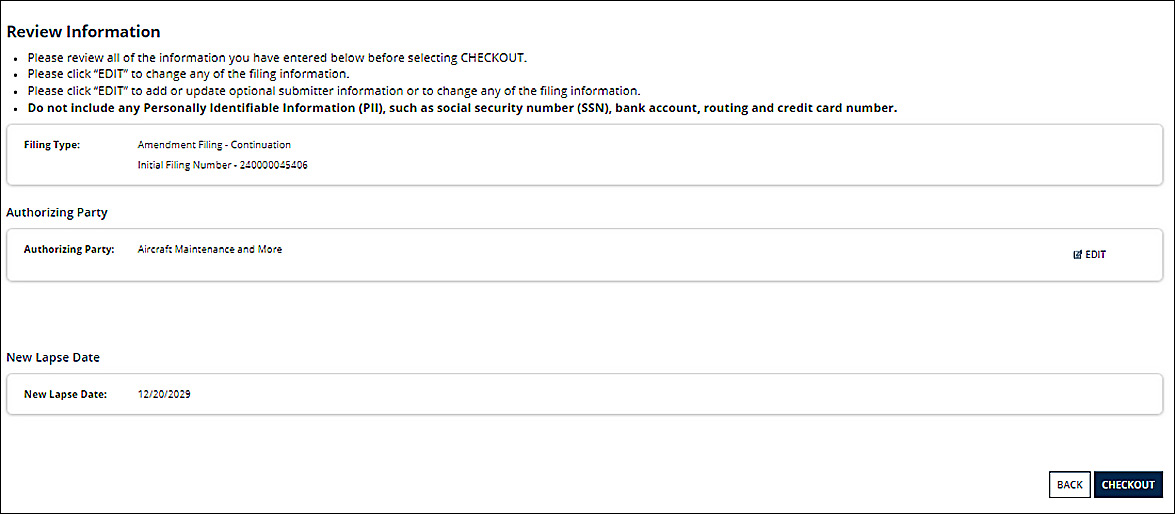
- Once the information is confirmed, click Checkout at the bottom right of the screen.
- On Checkout page, click Proceed to Payment.
- Confirm Payment Method, then Submit.
- On the following screen, view Payment Confirmation Receipt.
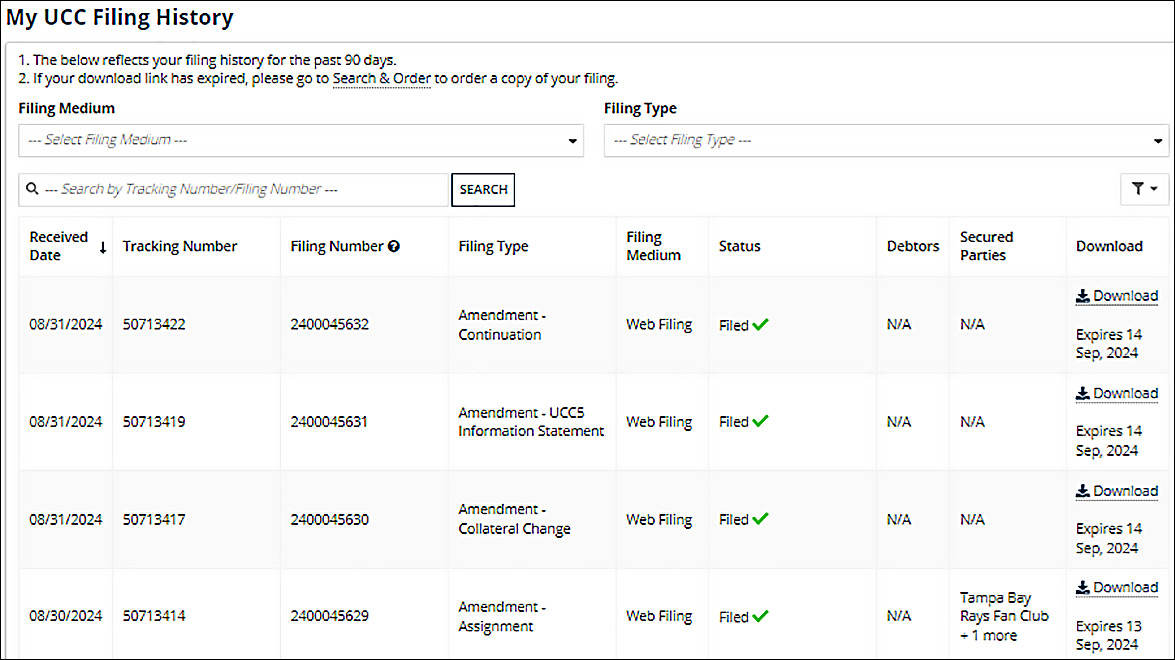
- Then, click “Home” to See UCC Filing History, where Form/Application will be available for Download
How to File a Master Filing
- Log into SOS Portal
- Action: Navigate to the SOS website and enter your login credentials.
- Action: Navigate to the SOS website and enter your login credentials.
- Select UCC tile on the dashboard
- Action: From the main menu, locate and click on the UCC tile.
- Action: From the main menu, locate and click on the UCC tile.
- You Will Then See Your UCC Filing History
- Click “START NEW FILING”
- Select the type UCC filing needed

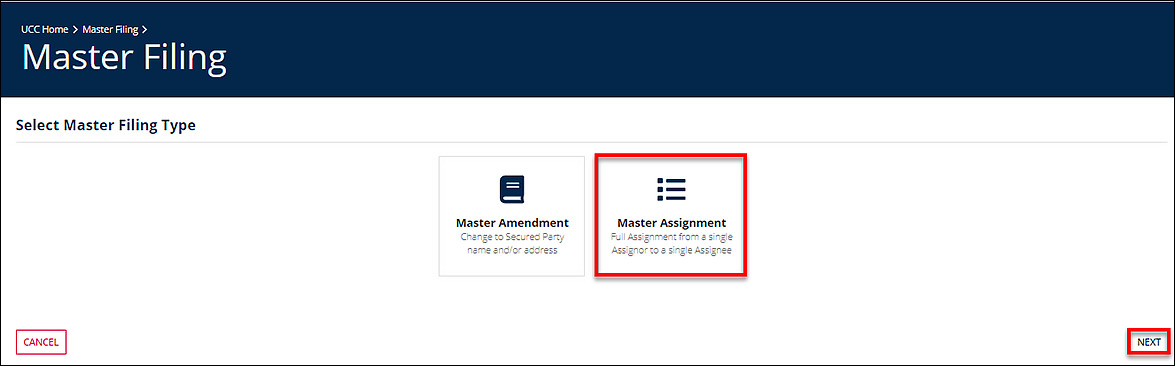
For Master Assignment
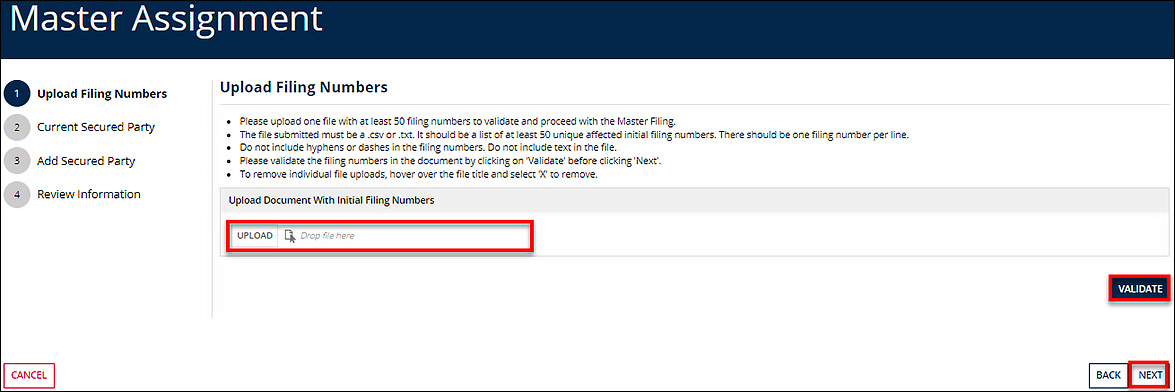
- Select Master Filing Type, then click NEXT

- Upload file with at least 50 filing numbers. Click VALIDATE. Then, click NEXT
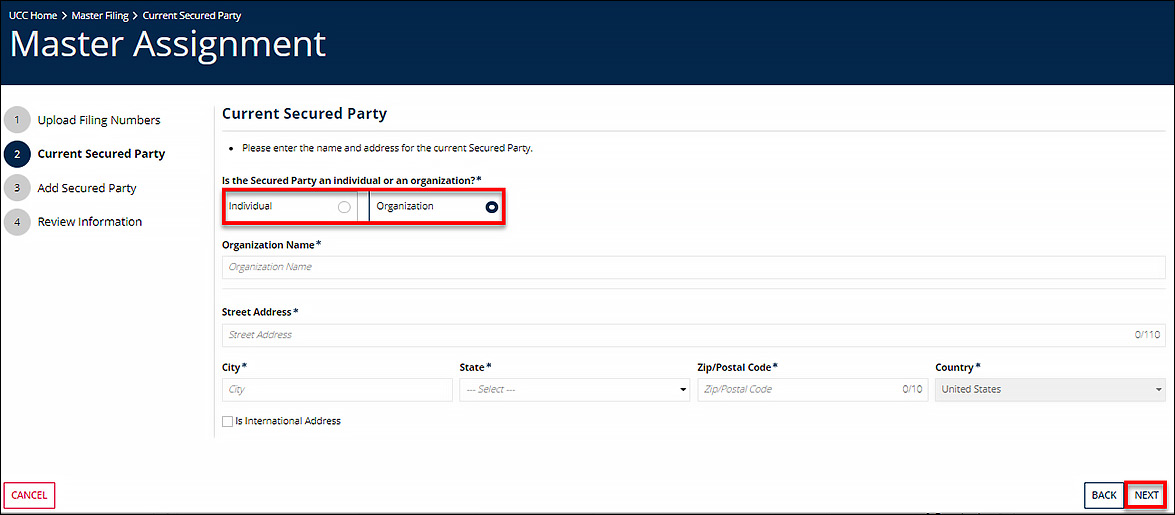
- Enter the Current Secured Party’s information (Specify if Individual or Organization). Then, click NEXT
- Add new Secured Party’s information (Specify if Individual or Organization). Then, click NEXT

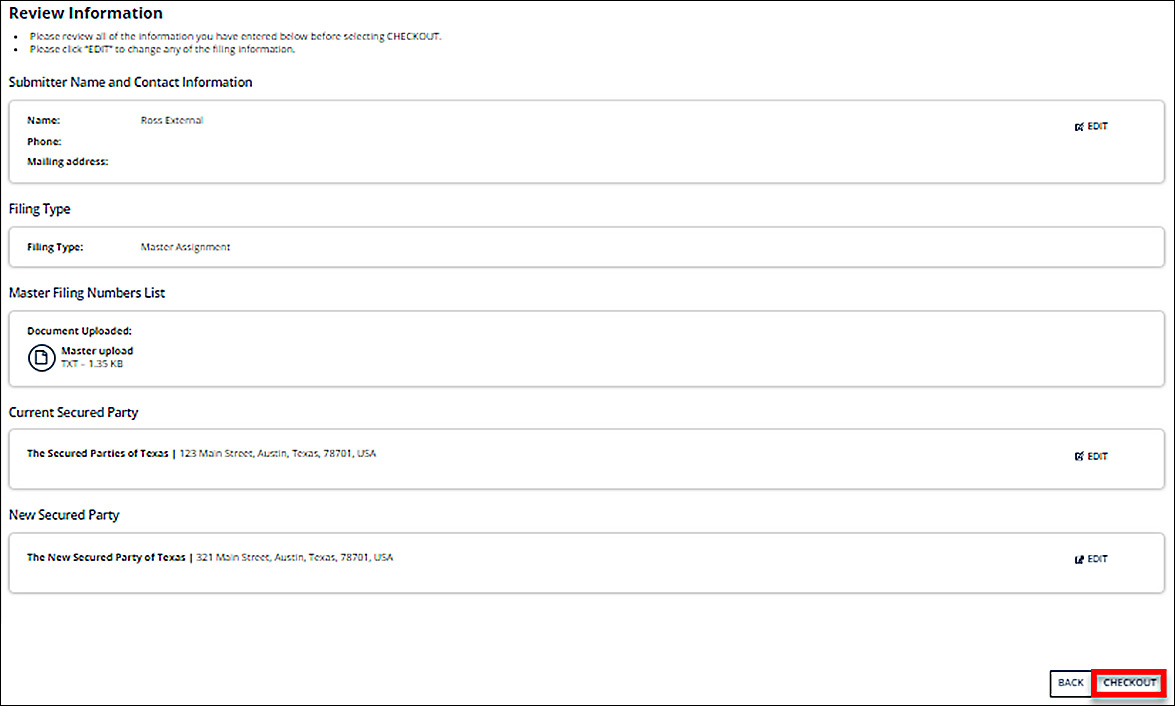
- Review the Information. Then, click “CHECKOUT”
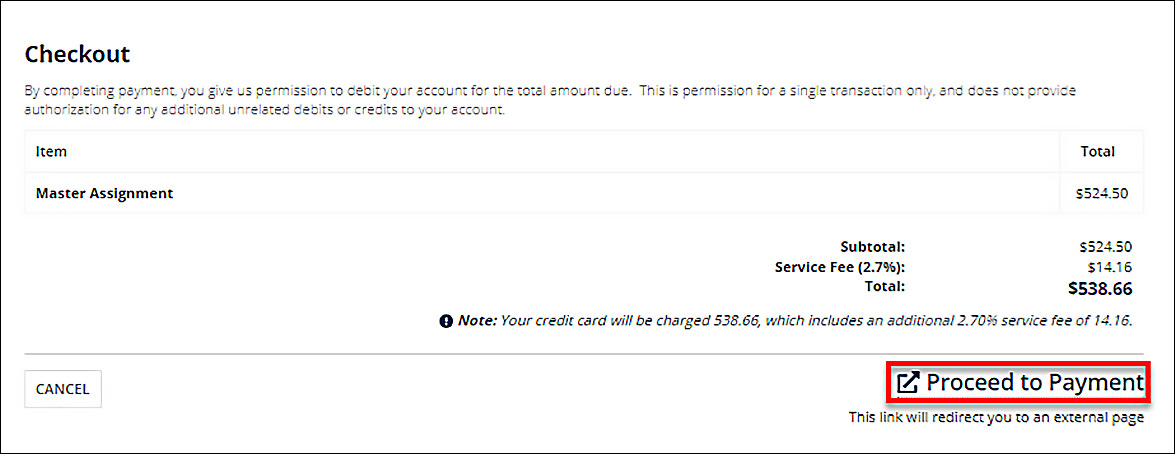
- On Checkout page, click Proceed to Payment.
- Confirm Payment Method, then Submit.
- On the following screen, view Payment Confirmation Receipt.
- Then, click “Home” to See UCC Filing History, where Form/Application will be available for Download
For Master Amendment:
Follow Master Filing steps 1 through 5
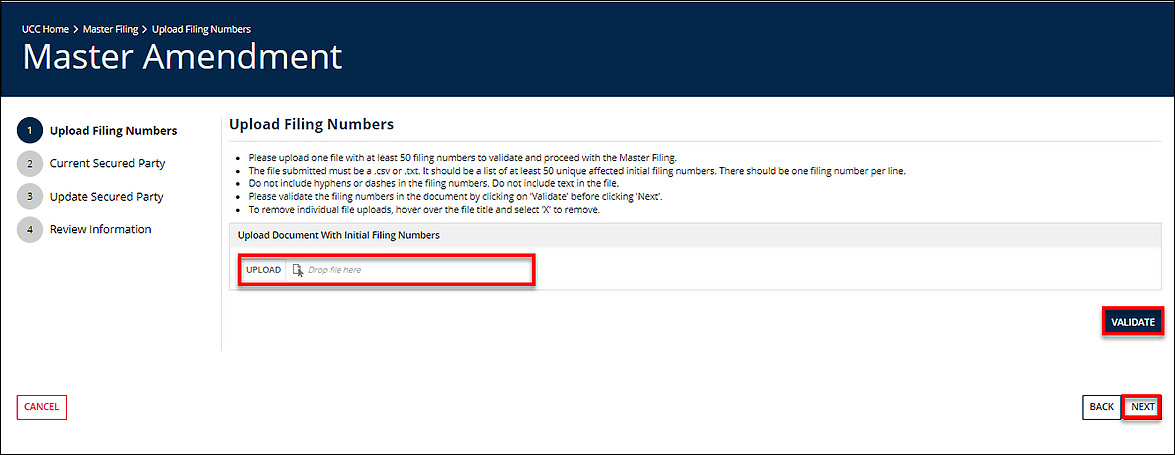
- Select Master Filing Type, then click NEXT
- Upload file with at least 50 filing numbers. Click VALIDATE. Then, click NEXT
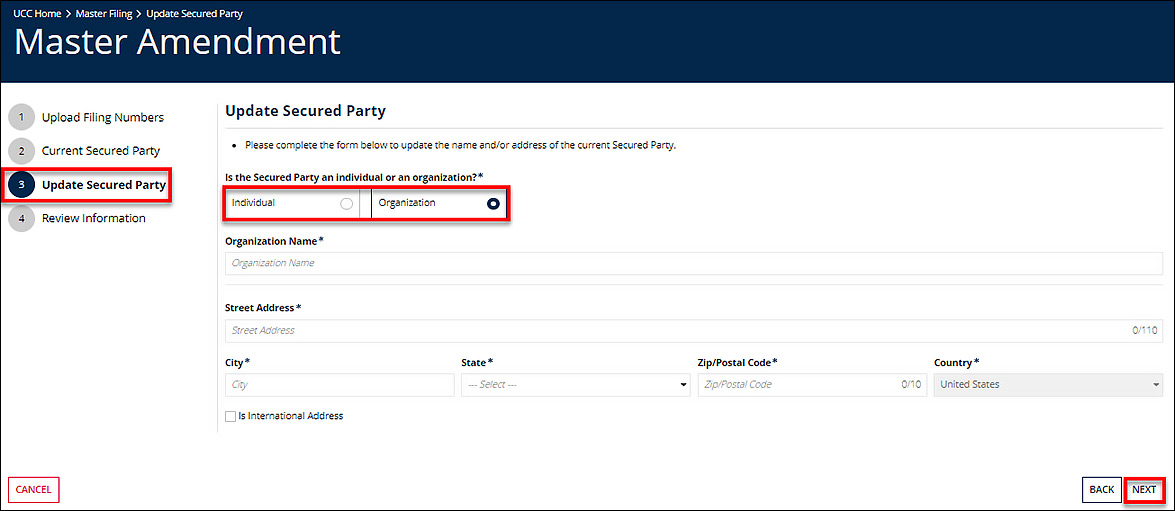
- Enter the Current Secured Party’s information (Specify if Individual or Organization). Then, click NEXT

- Add new Secured Party’s information (Specify if Individual or Organization). Then, click NEXT
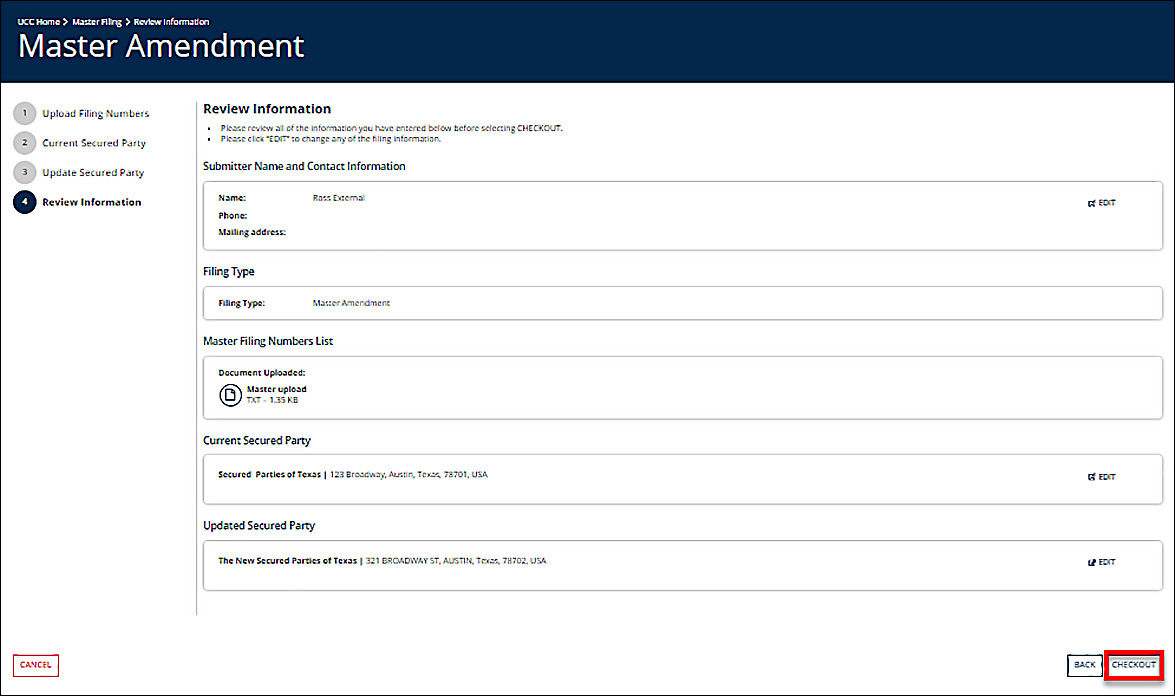
- Review the Information. Then, click “CHECKOUT”
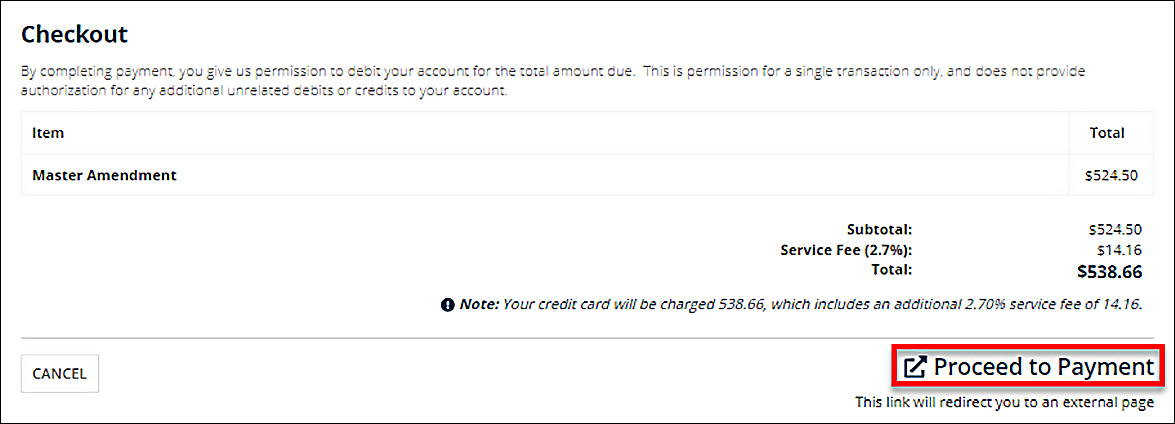
- On Checkout page, click Proceed to Payment.
- Confirm Payment Method, then Submit.
- On the following screen, view Payment Confirmation Receipt.
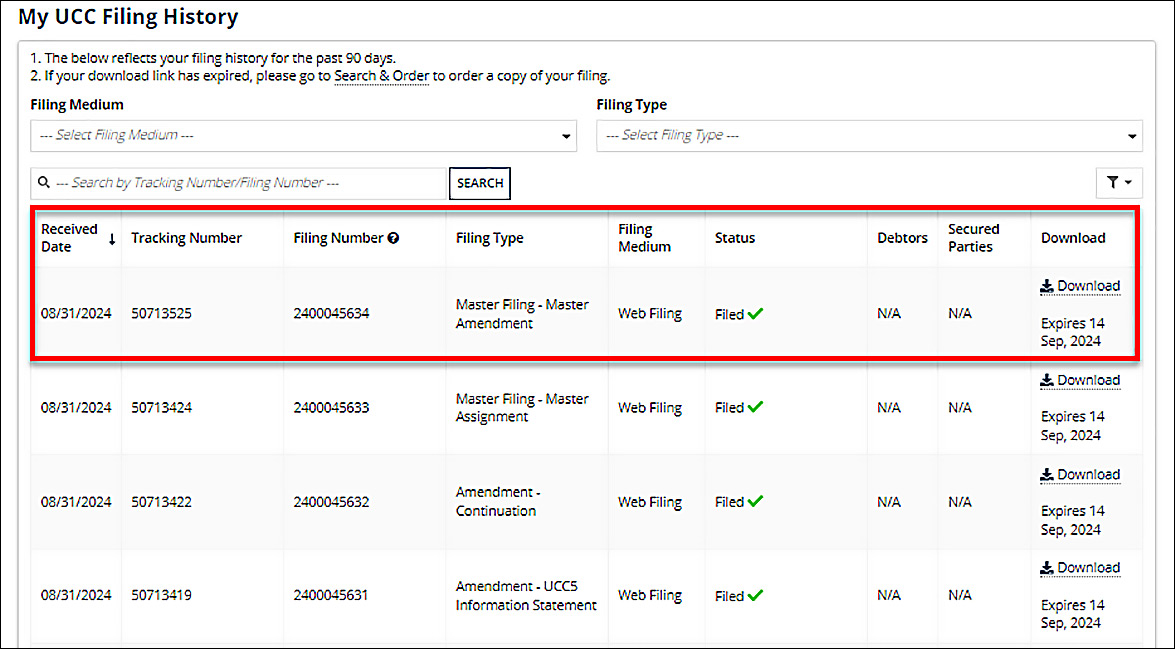
- Then, click “Home” to See UCC Filing History, where Form/Application will be available for Download
How to Search for and Order Filings
- Log into SOS Portal
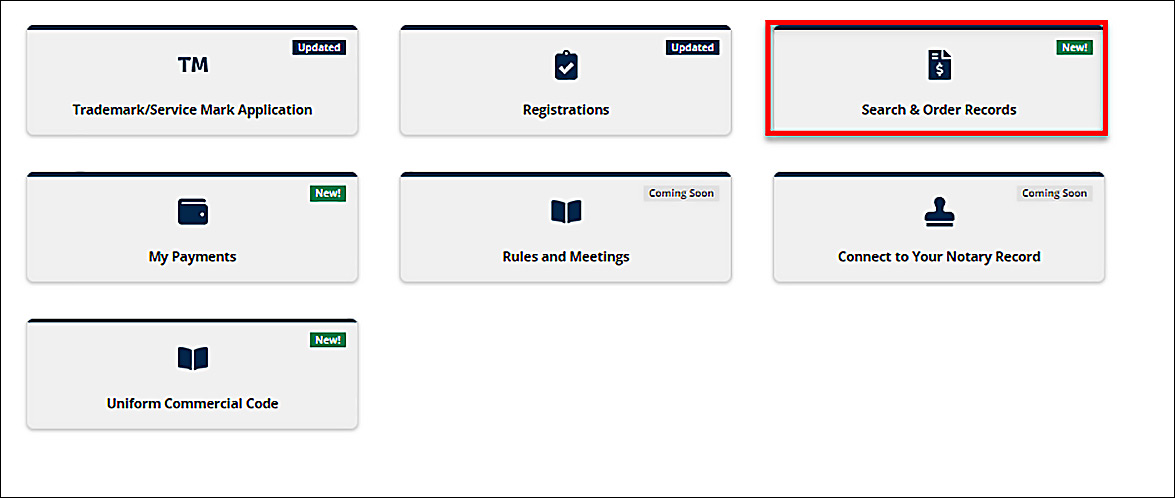
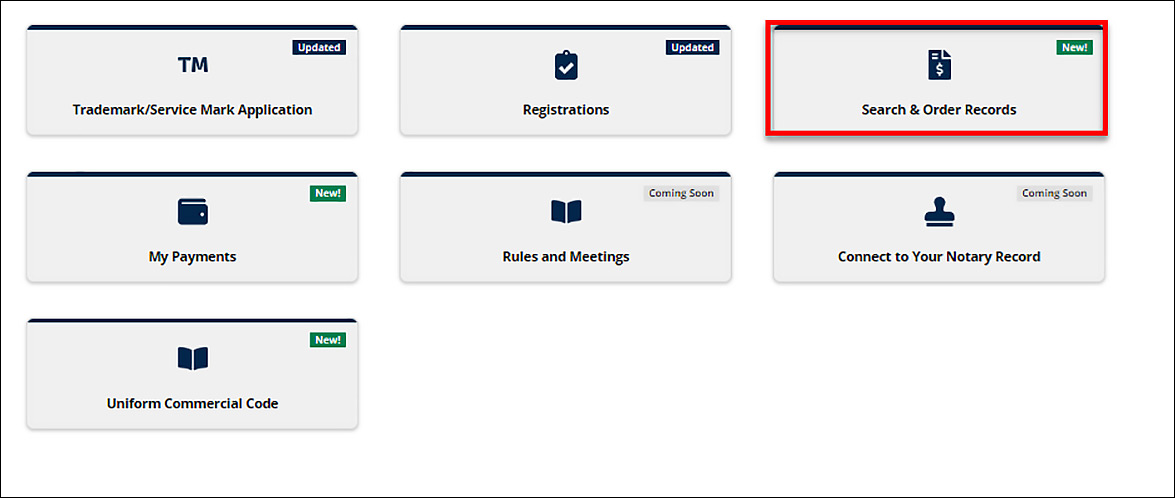
- Select ‘Search & Order Records’ tile on the dashboard
- On Order History page, click NEW SEARCH

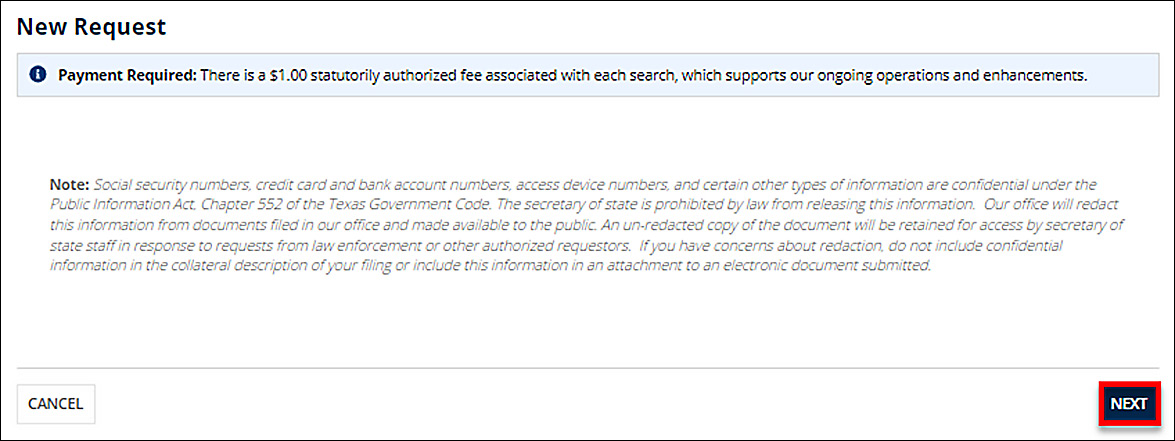
- The New Request screen explains that each search is $1.00. Click NEXT
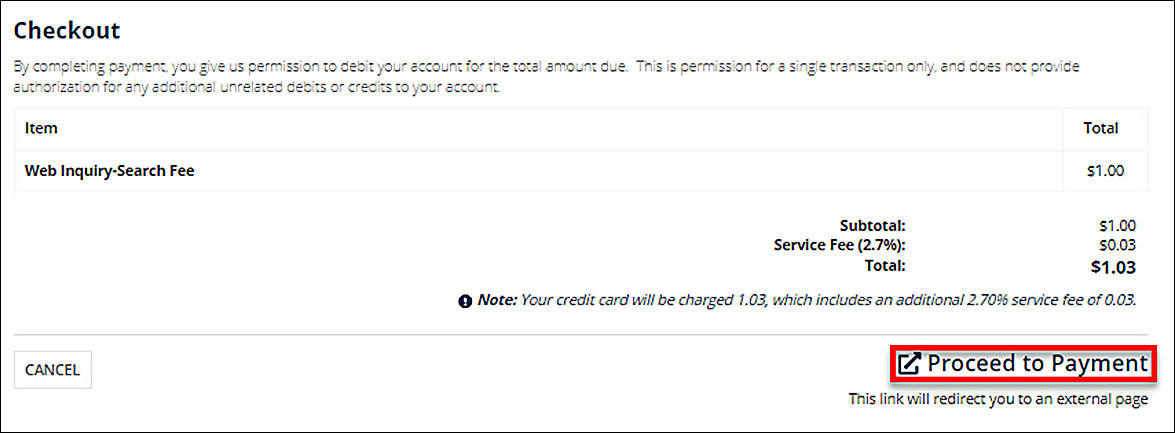
- At Checkout, to pay Web Inquity-Search Fee, click Proceed to Payment
- Confirm Payment Method, then Submit.
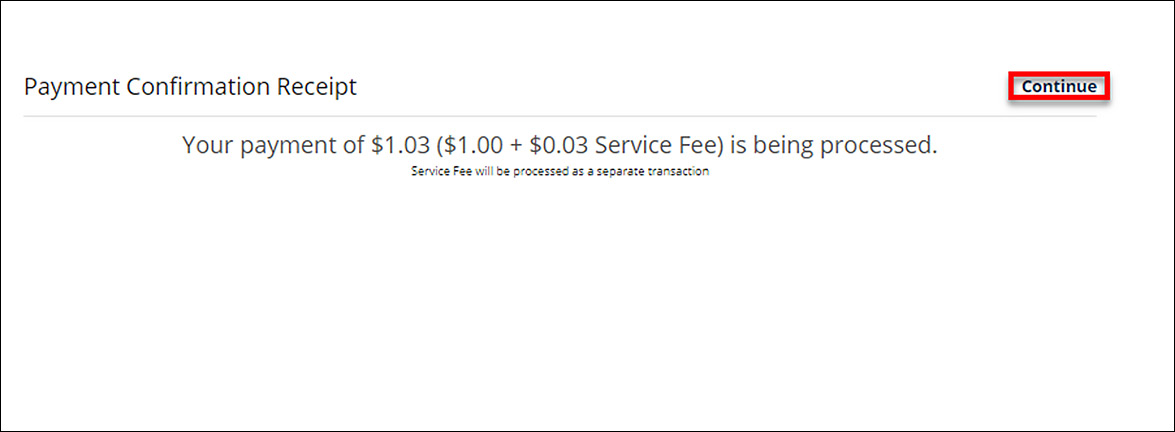
- On the following screen, view Payment Confirmation Receipt. Then, click Continue
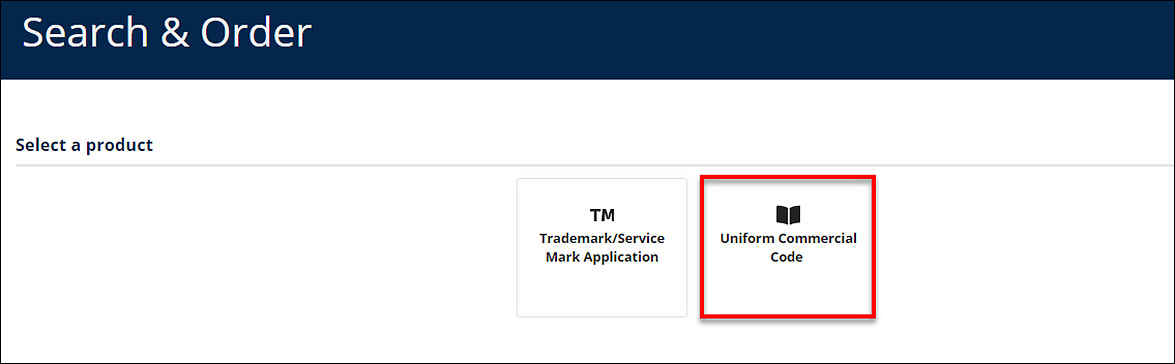
- Select Uniform Commercial Code tile to proceed to Search
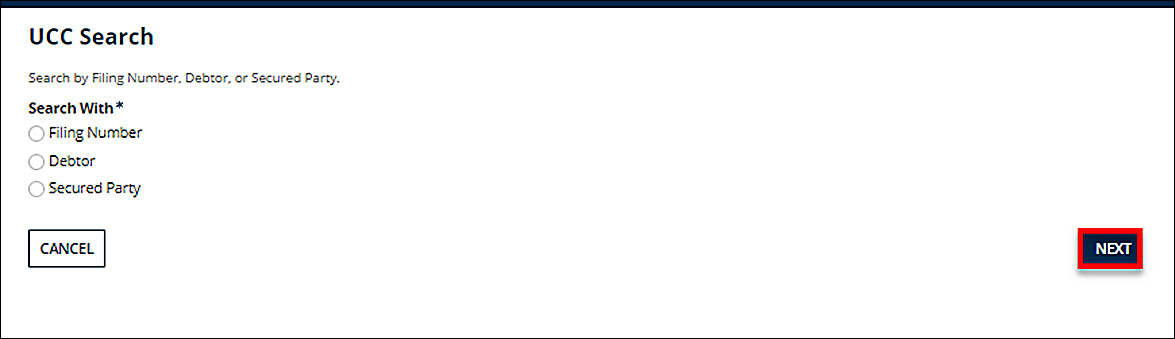
- Select to search by Filing Number, Debtor, or Secured Party.
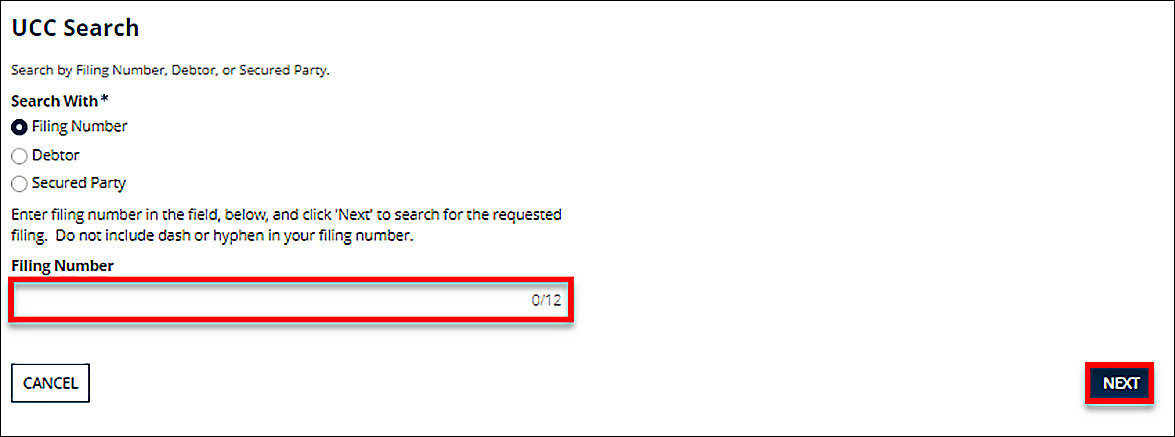
- For Filing Number search, enter Filing Number, then click NEXT
- For Debtor search, enter Debtor’s Name (Individual or Organization), then click NEXT
- City, State, and Country fields are to help refine search, but not necessary.
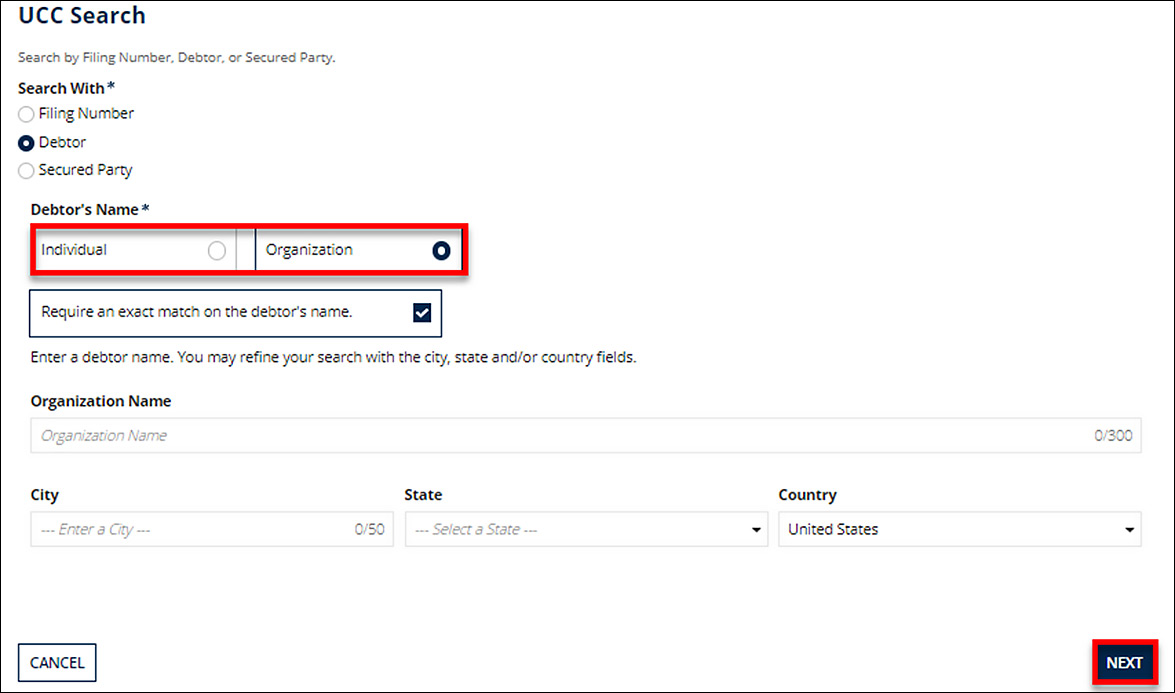
- City, State, and Country fields are to help refine search, but not necessary.
- For Secured Party search, enter Secured Party’s Name (Individual or Organization), then click NEXT
- City, State, and Country fields are to help refine search, but not necessary.
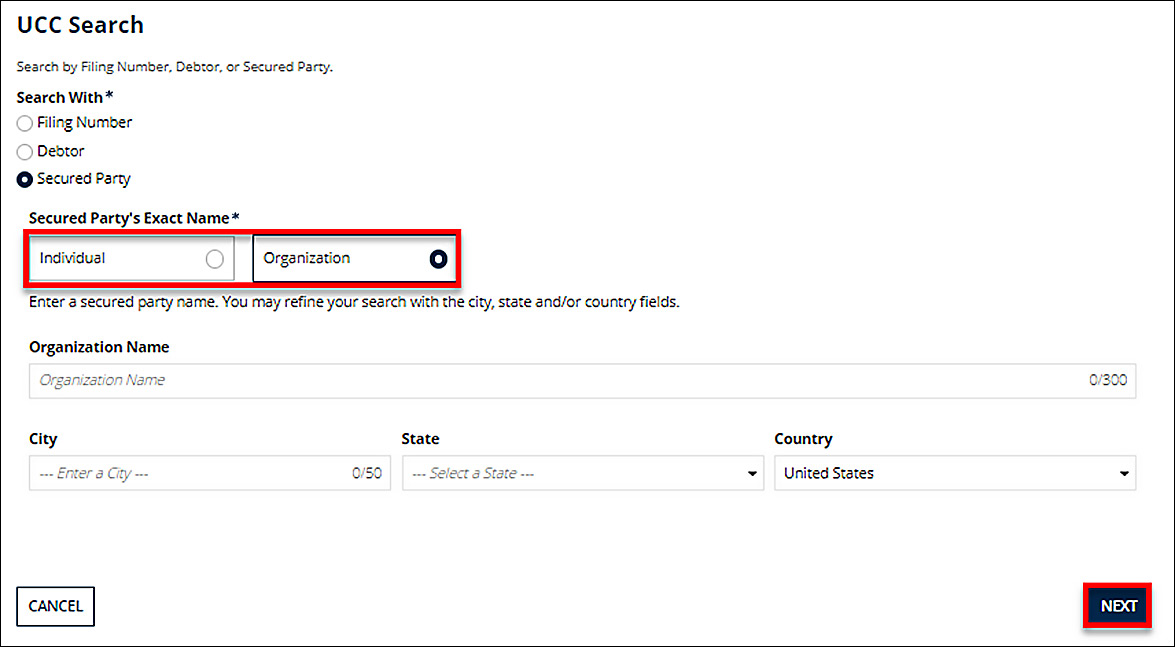
- City, State, and Country fields are to help refine search, but not necessary.
- For Filing Number search, enter Filing Number, then click NEXT
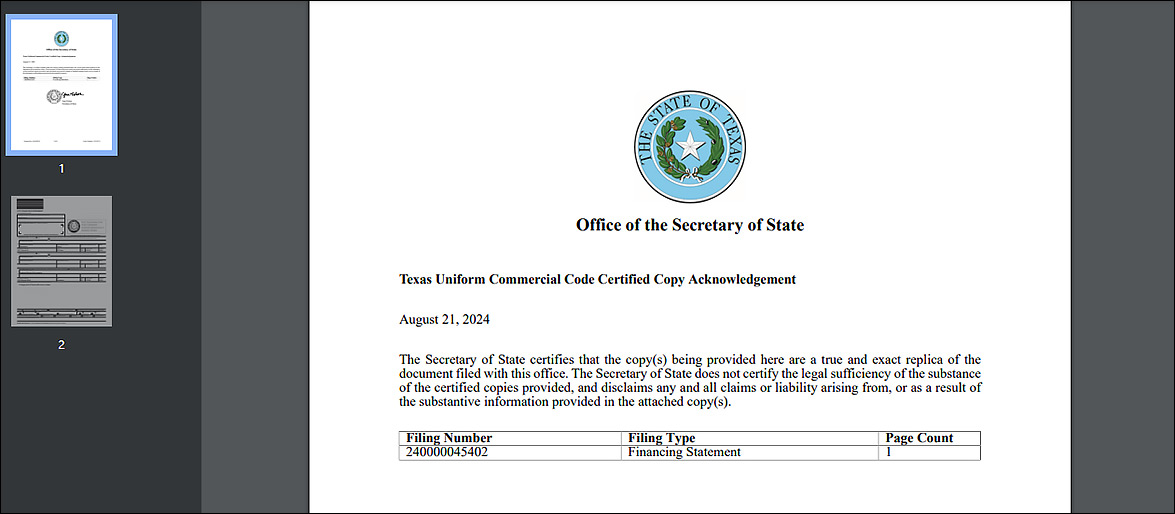
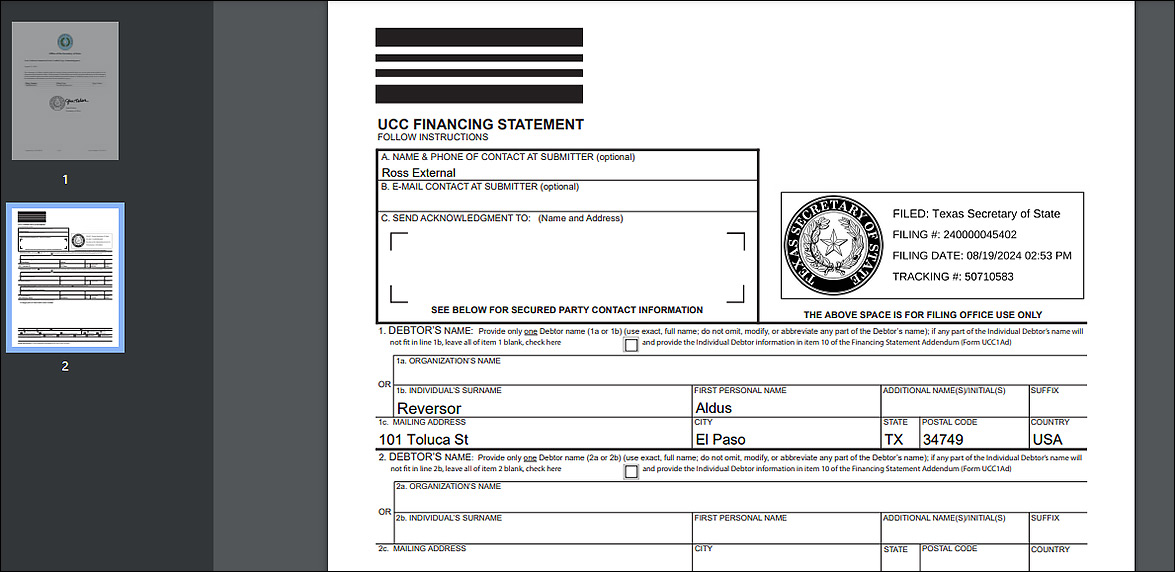
- Search results will offer a plain copy for download (when available). Certificates are also available for $15 each.
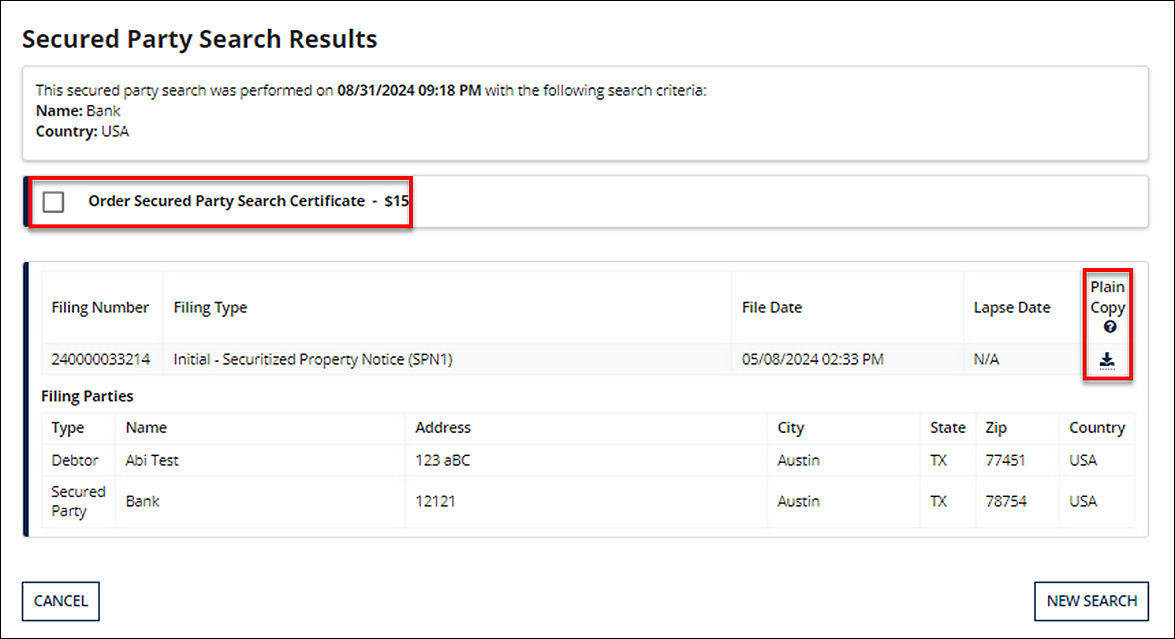
- When certificate is ordered, there is an option to CHECKOUT
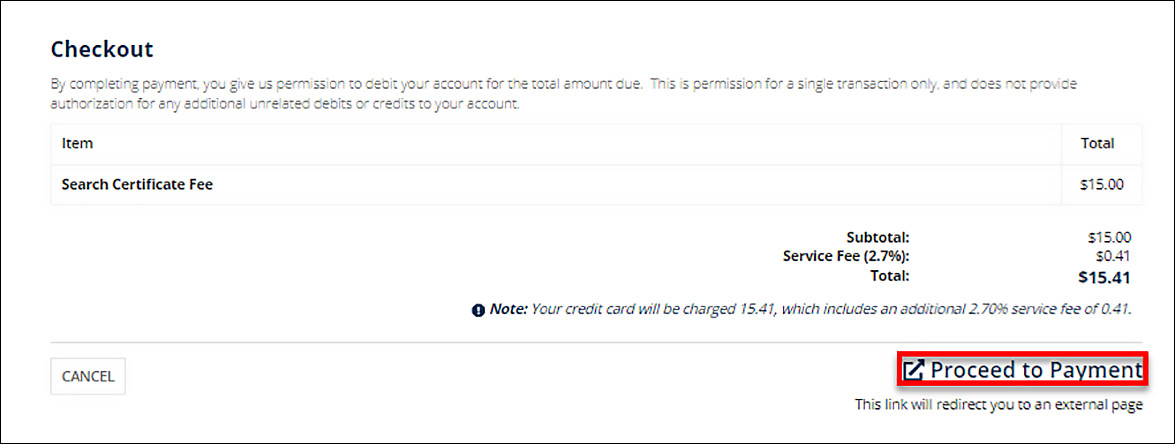
- Checkout screen will show Search Certificate Fee. Click Proceed to Payment
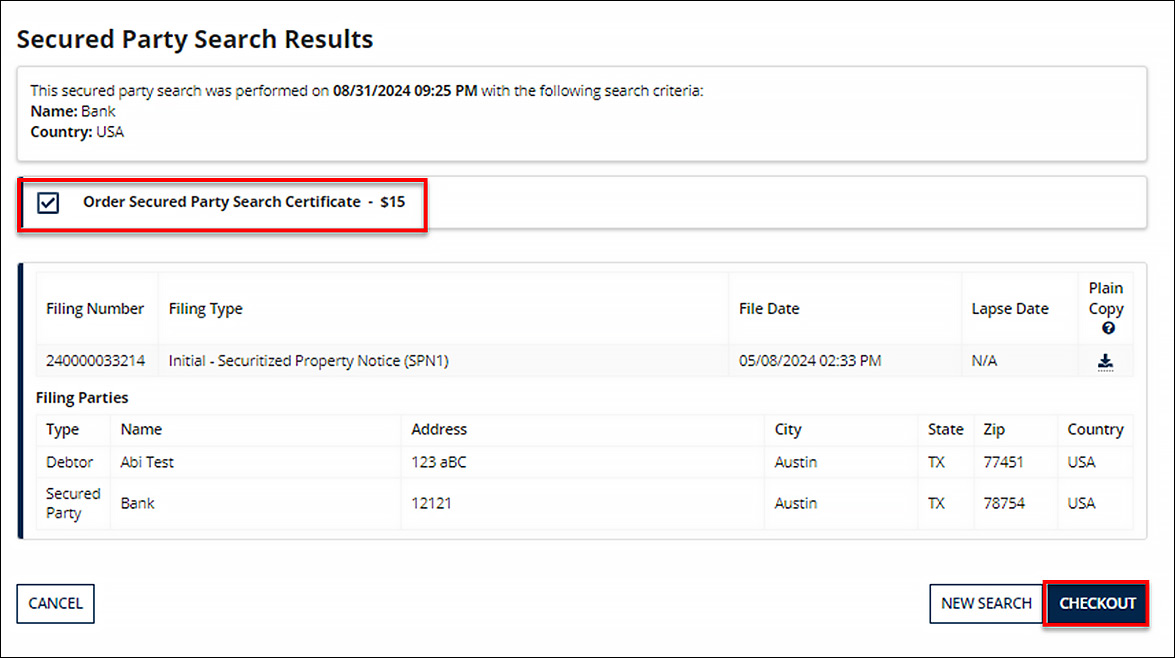
- When certificate is ordered, there is an option to CHECKOUT
- Confirm Payment Method, then Submit.
- On the following screen, view Payment Confirmation Receipt.
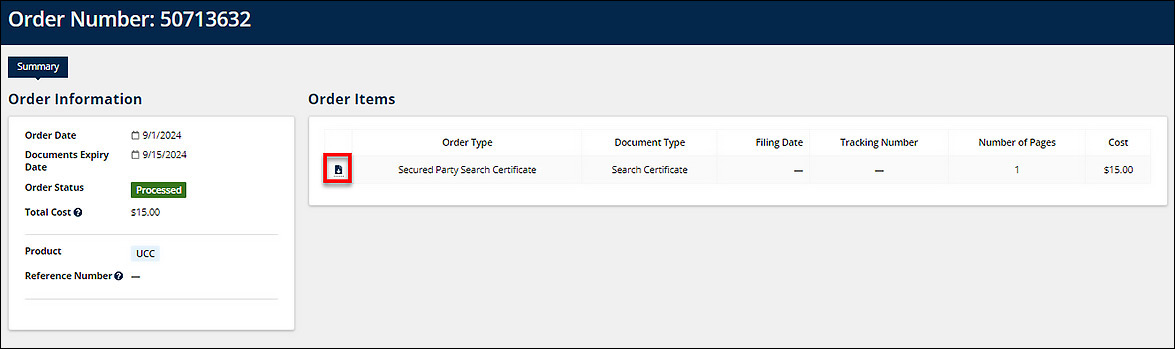
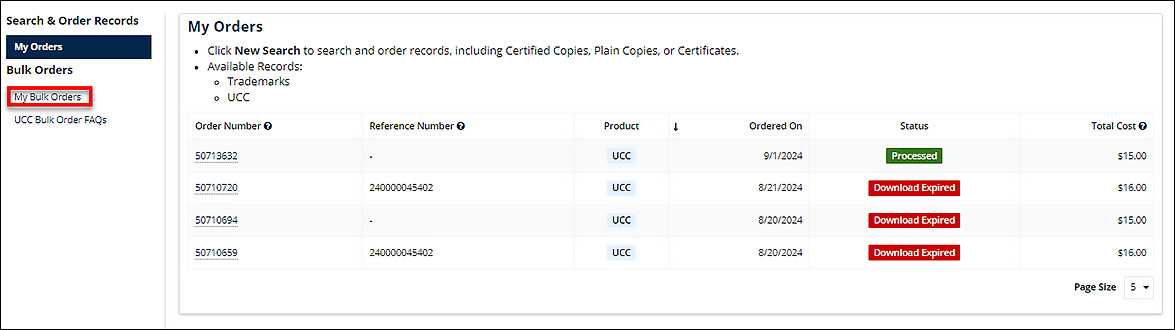
- Click “Home” to return My Orders page, where Form/Application will be available for Download under Order Number. Click the Order Number link corresponding to recent search.
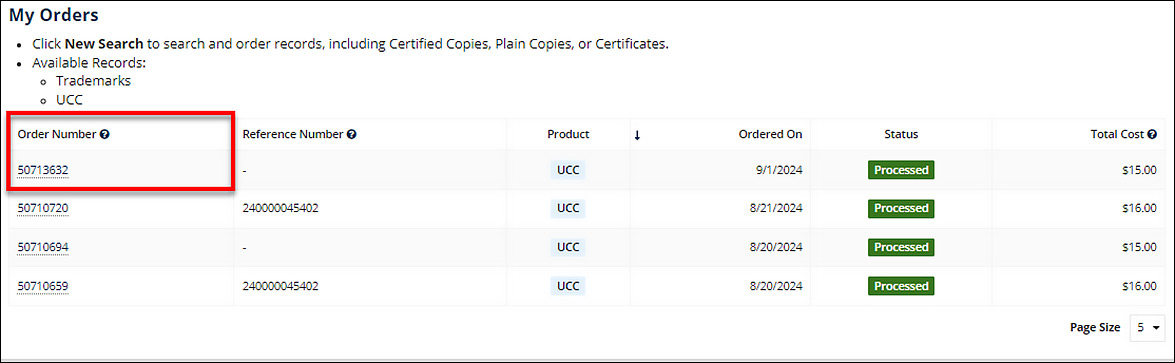
- Order Information page will show Order Item(s) in a table. Click download link to download plain copy and/or certificate
Bulk Orders
- Log into SOS Portal
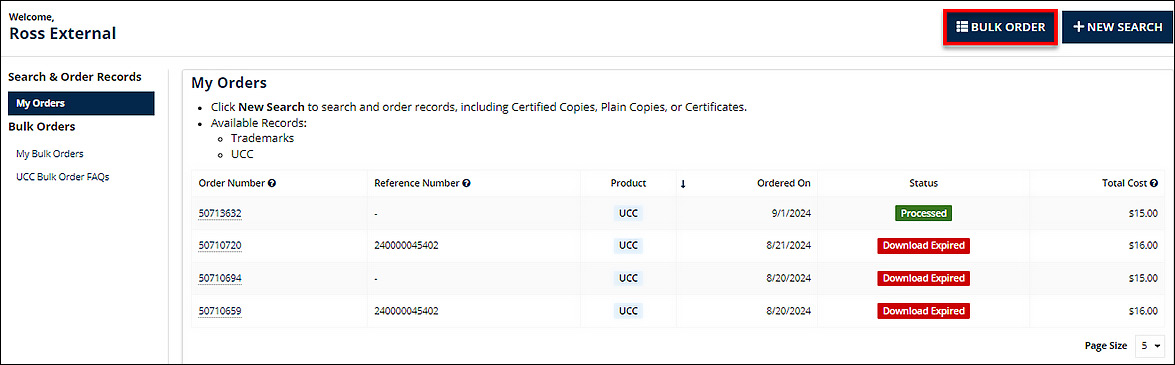
- Click on Search & Order Records tile on the dashboard
- Click on Bulk Order Button
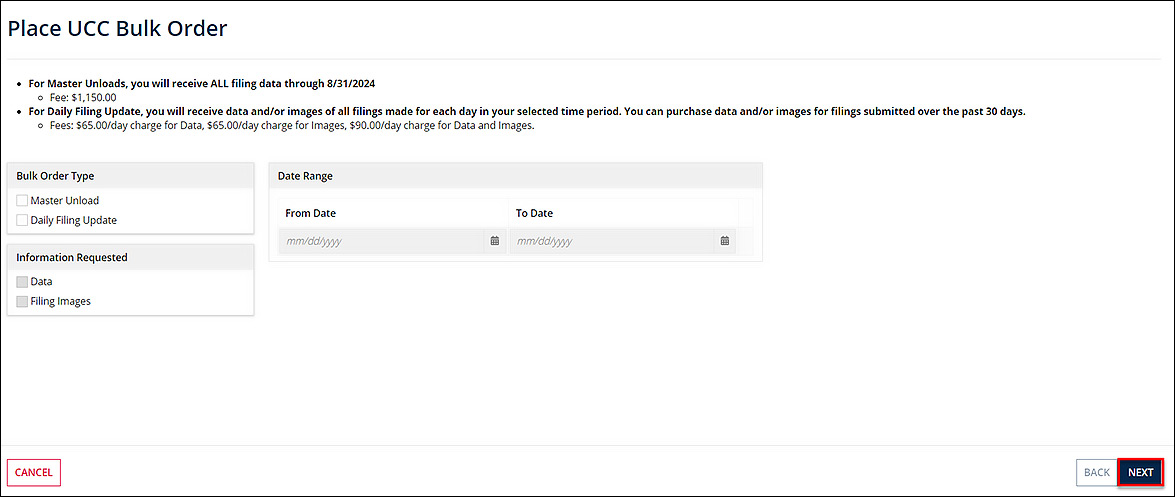
- Select Bulk Order Type, Information Requested (Date or Filing Images), and indicate date range
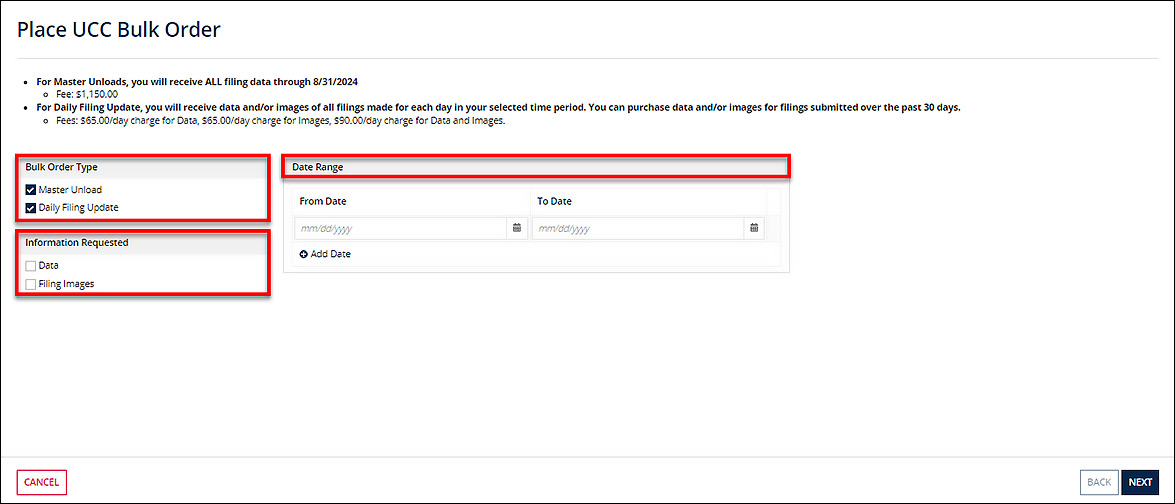
- Click “NEXT”
- Review the order information. Then, click "Proceed to Payment”
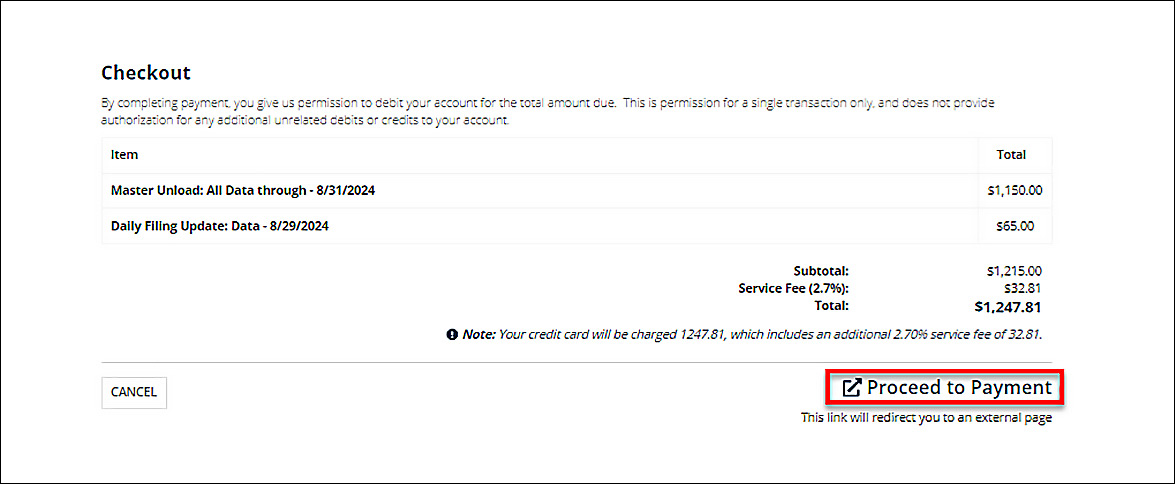
- Review and confirm Payment Method. Then, click Submit.
- Proceed to Payment Confirmation Receipt Then, Click Home to Return to Search & Orders/My Orders homepage.
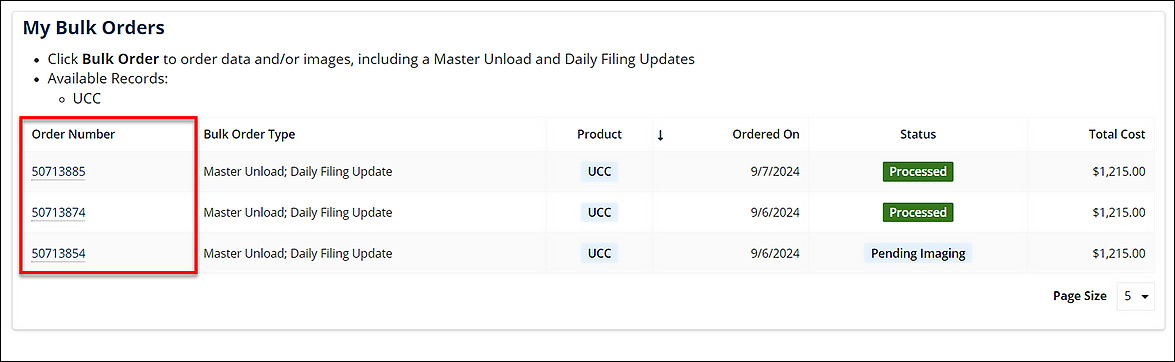
- On the Search & Orders/My Orders homepage, click My Bulk Orders to see recently the filed Bulk Order.
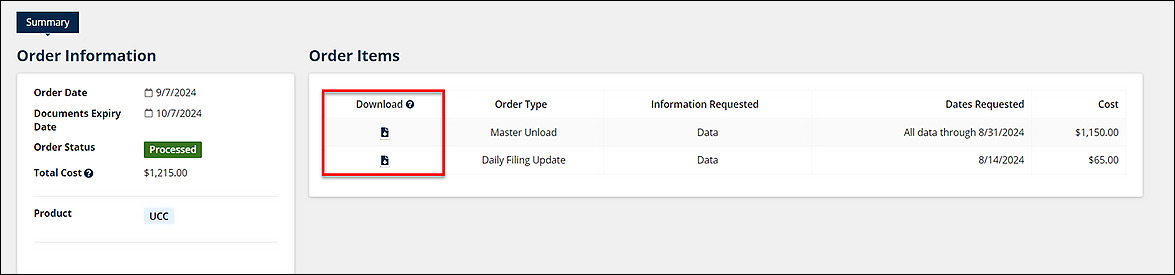
- On the My Bulk Orders page, recent Bulk Orders will be in a table. Click on Order Number to access Order Information and Summary, where there will be a Download link
- On Summary screen ordered items (Master Unload and/or Daily Filing Update) can be downloaded as zip files. User needs 7-ZIP software to have the ability to open the downloaded zip files.
Accessing and Managing Bulk Filings
- Log into the SOS Portal
- Click on UCC tile on dashboard

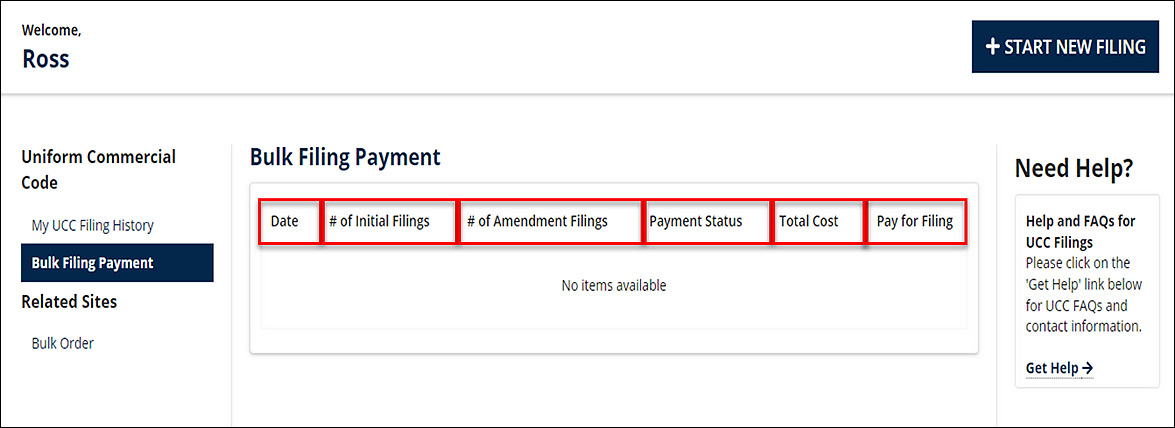
- Click on Bulk Filing Payment.
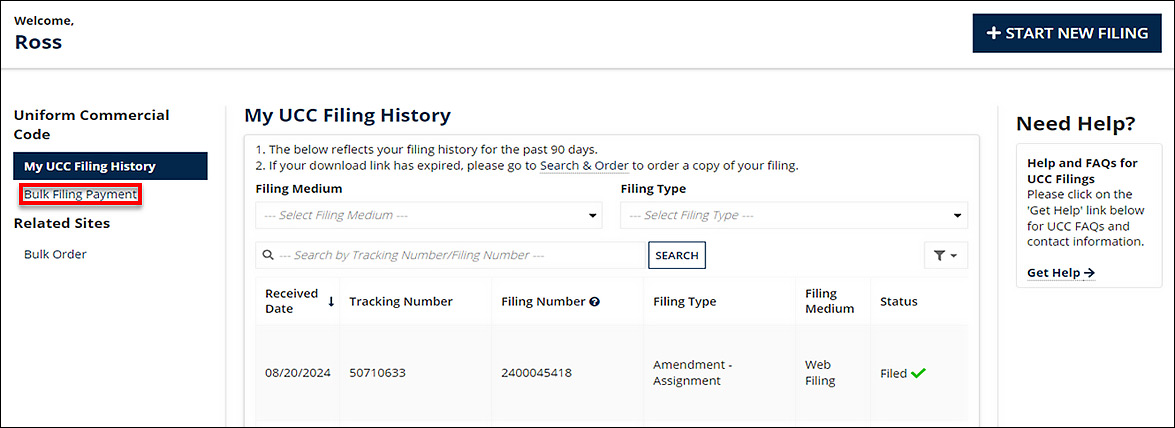
- On the Bulk Filing Payment page, you will see a table displaying the history of your bulk filings. This table includes:
- Date: The date of each filing.
- Number of Initial Filings: The count of initial filings.
- Number of Amendment Filings: The count of amendment filings.
- Payment Status: The current payment status of each filing.
- Total Cost: The total cost associated with each filing.
- Pay for Filing: An option to pay for the filing.