
Business Filings External User Guide

1. Purpose
The purpose of this User Manual is to assist customers in navigating the Business Filings (BF) process through the State of Texas Secretary of State (SOS) online portal. This guide has been created to provide clear, step-by-step instructions for various BF-related tasks, to guide users in accurately completing their filings. The manual covers a range of procedures including:
- Create or Register an Entity—Certificate of Formation, Application for Registration
- Manage an Entity Record—Amendments, Reinstatement, Termination/Withdrawal, Assumed Names, Registered Agents, and other filings
- Limited Purpose Filings—Name Reservation, Name Registration, Appointment of Statutory Agent
- Mergers and Conversions—Merger or Conversion involving a Texas Entity This manual aims to provide comprehensive and easy-to-follow guidance.
1.1 Business Filings Overview
The Business and Public Filings Division is responsible for the receipt, filing and permanent maintenance and retention of documents that create or affect businesses in the state of Texas. Business Filings include documents that form, register, amend, reinstate, and terminate domestic or foreign business entities, as applicable.
2. SOSPortal Account Overview and Login Process
To access the SOS Business Filings portal, you will need an SOSPortal account.
- To create an SOSPortal account, refer to the SOSPortal Account Setup and User Access Guide for step-by-step instructions
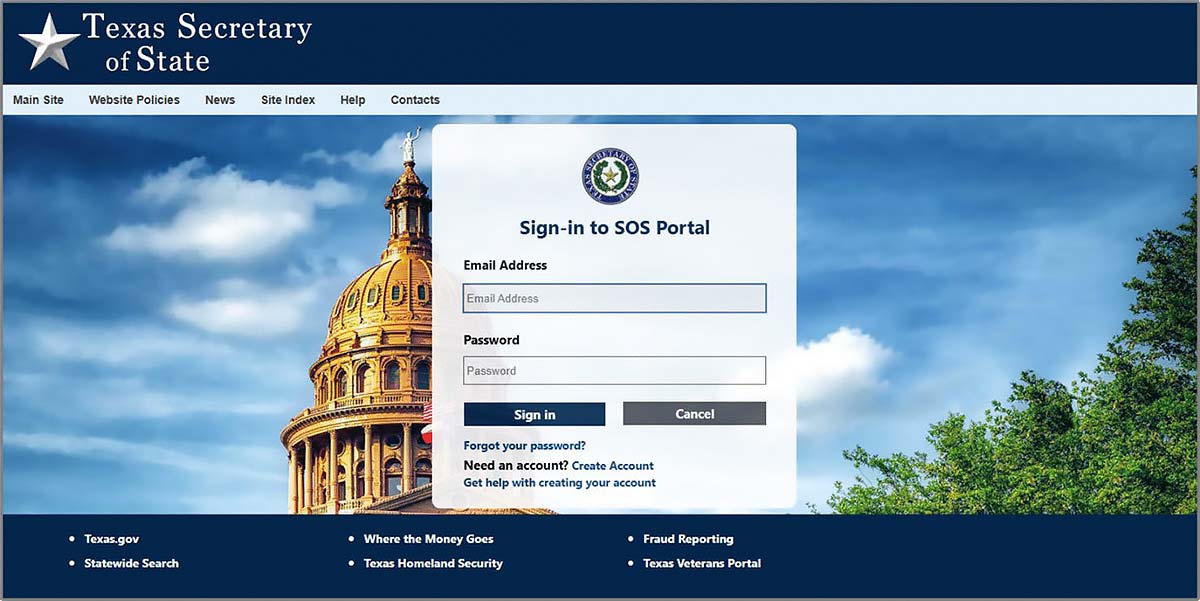
Step 1: Login to the SOSPortal by typing in your account email and password.
Step 2: Choose a multifactor authentication (MFA) option
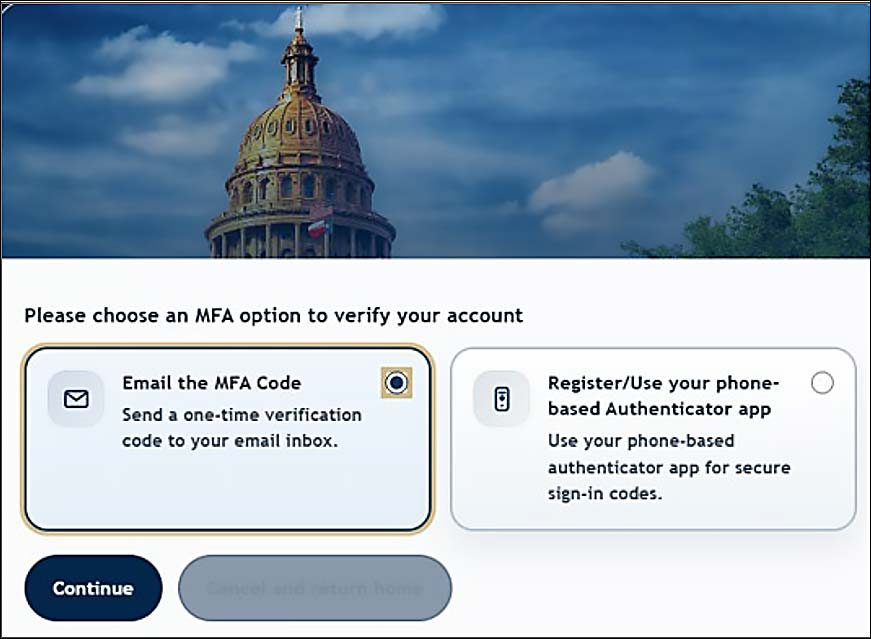
In this example, the Email option was selected.
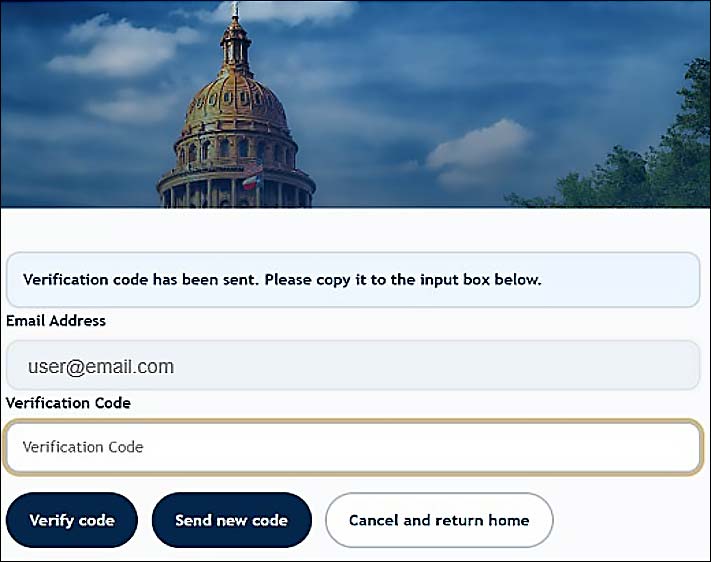
Type in the verification code and select the “Verify Code” button to login.
Step 3: Select the Business Filings tile on the dashboard.
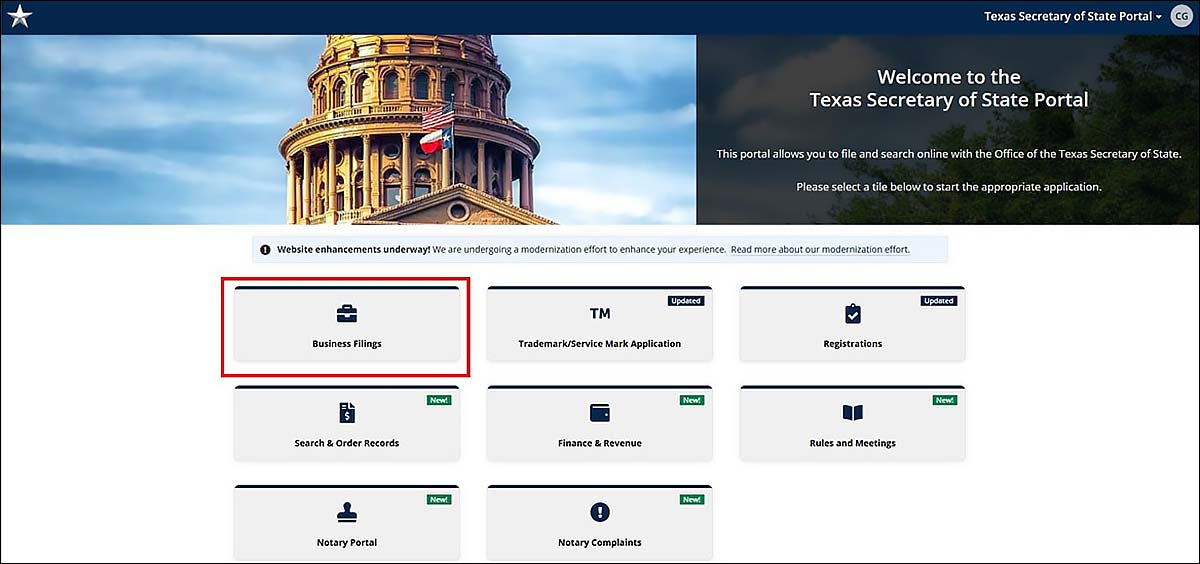
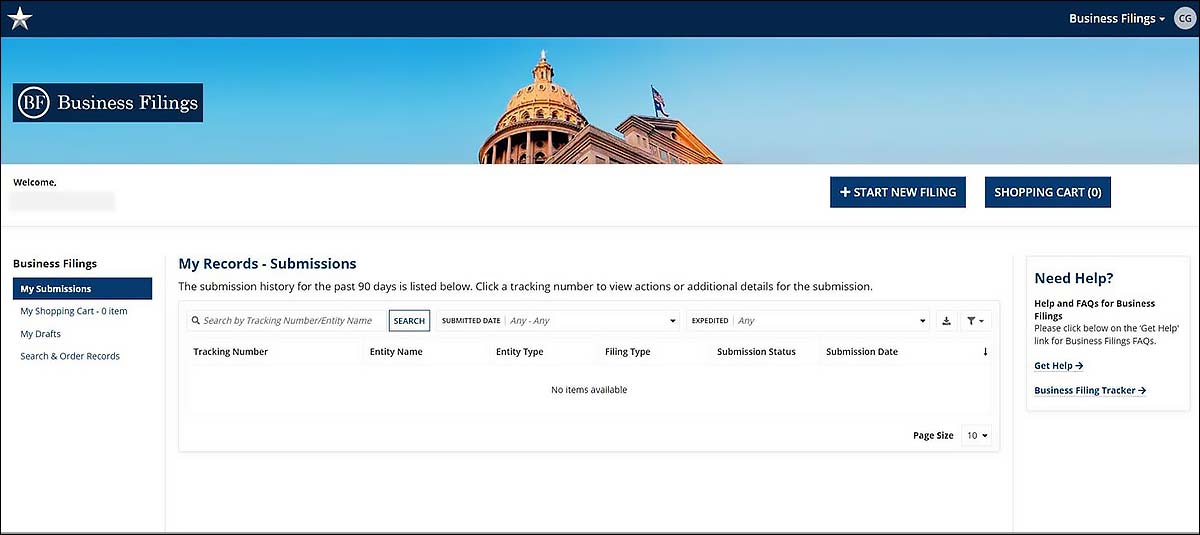
A new browser tab will display the Business Filings homepage.
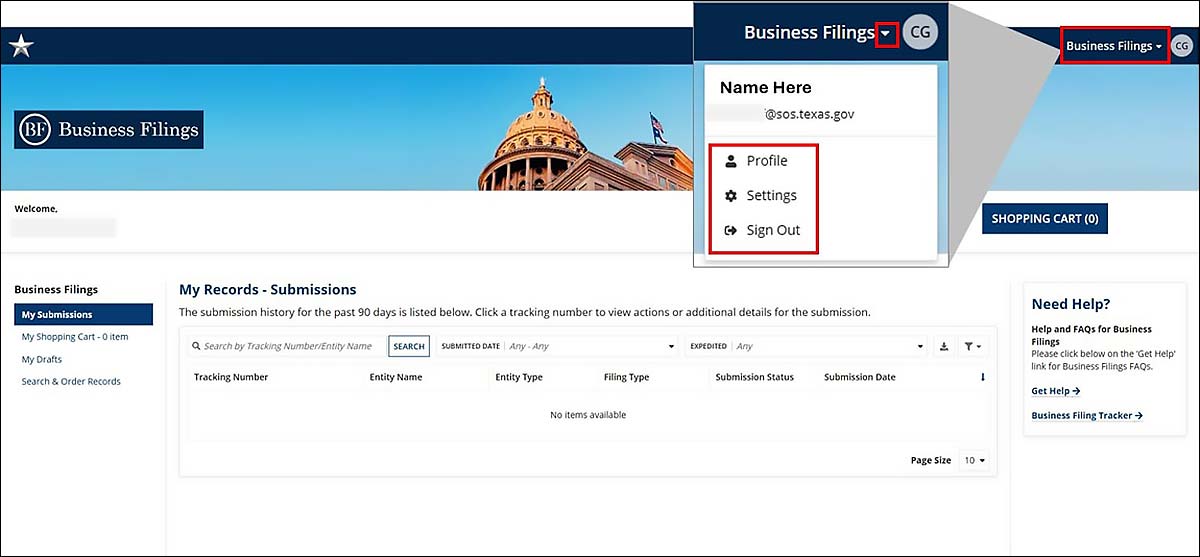
You can view your Profile, update Settings, and Sign Out by selecting the drop-down arrow in the top right corner.
3. Start a New Filing
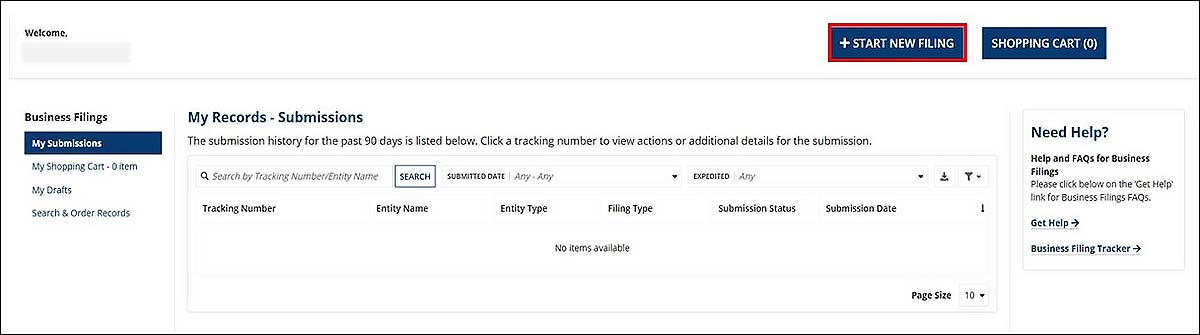
To start a new filing, click the “+ START NEW FILING” button.
Select the filing type and then selecting “Next”
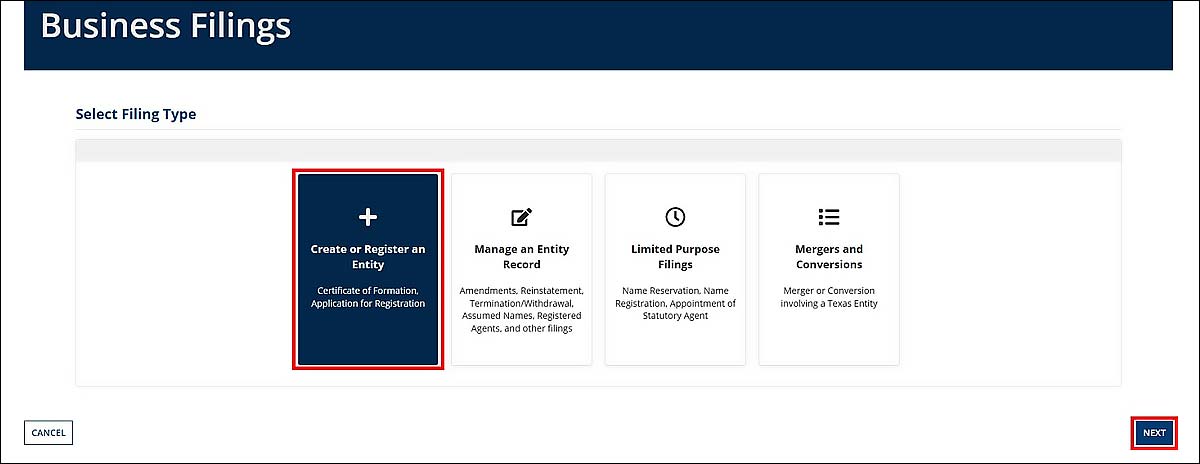
In this example, the “Create or Register an Entity” filing type was selected.
3.1 Create or Register an Entity
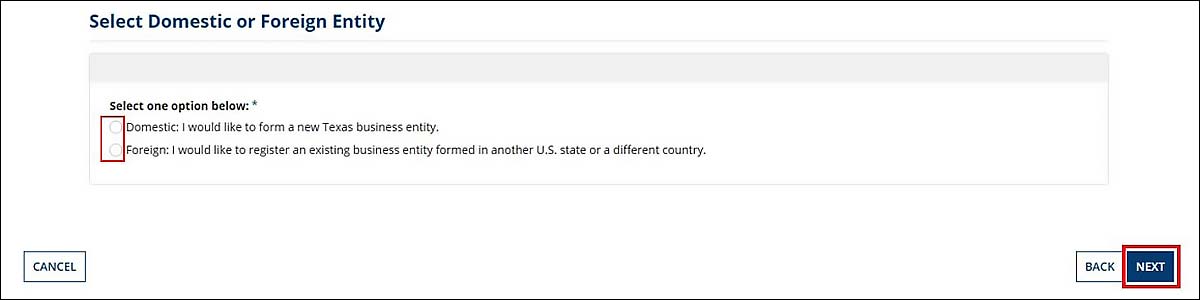
To create or register an entity, select the Domestic or Foreign entity type, then click the “Next” button.
Next, you will choose the specific entity type from the dropdown menu. Upon selecting the entity type, click the “Next” button.
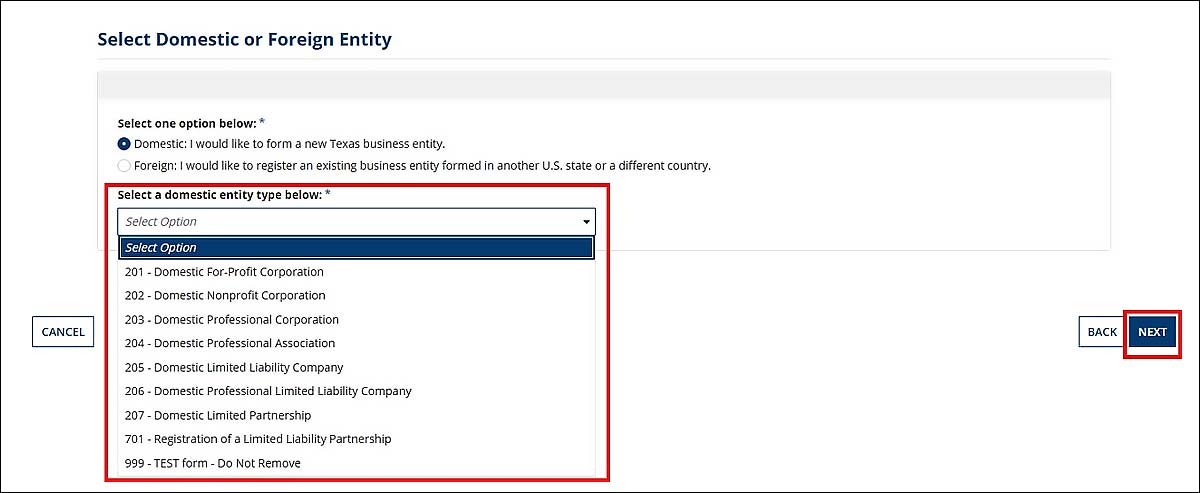
In this example, the domestic entity type list is displayed.
3.1.1 Complete the Form
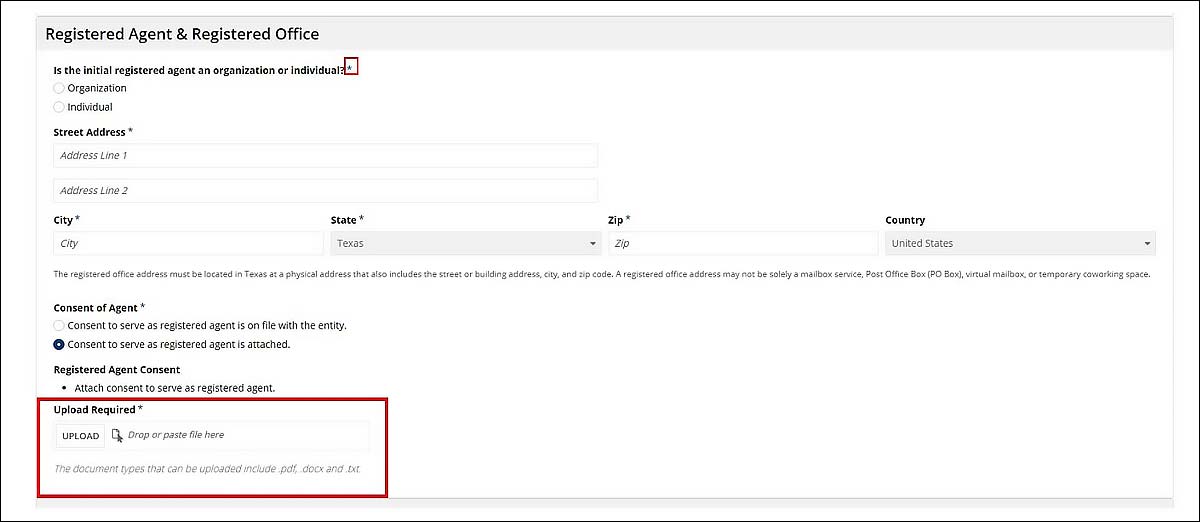
The system will display the form fields and indicate the mandatory fields with an asterisk (*). Where applicable, you will be able to upload files to complete your submission.
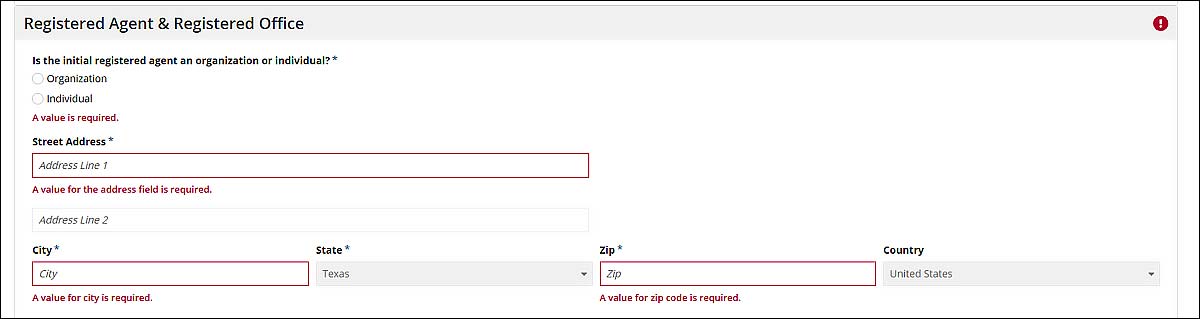
The system will indicate if required fields are blank with red text. You must complete all mandatory fields to submit a form.
Use the buttons at the bottom of the screen to:
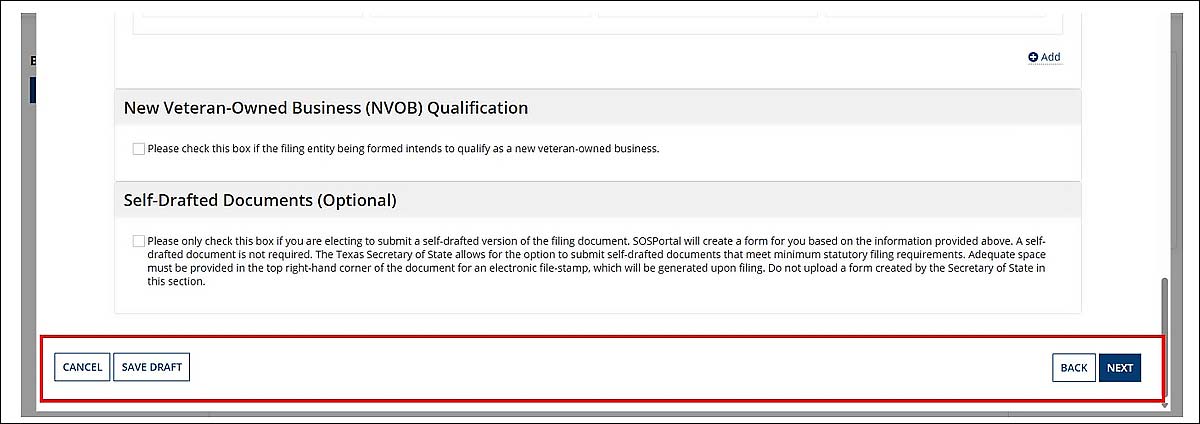
- Cancel: Cancel a form and lose progress.
- Save Draft: Save progress to complete form at a future point. Note: Drafts are only available for 30 days.
- Back: Navigate to the previous screen.
- Next: Navigate to the following screen.
3.1.1.1 Self-Drafted Documents
To submit self-drafted documents, select the checkbox. Upon selection, an upload field will appear.
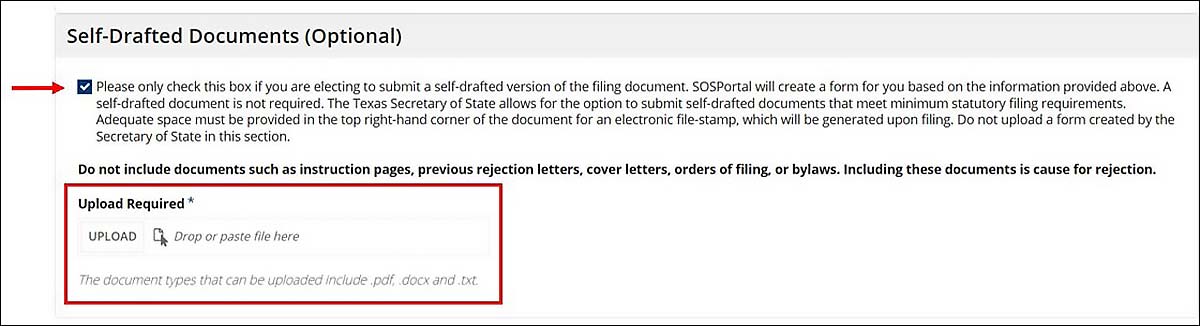
After uploading the file, select the “Next” button.
3.1.2 Preview Submission
When all the required fields are completed, you will preview the form to verify the information displays correctly.
You can download the draft by selecting the download icon in the top right corner.
Use the buttons at the bottom of the screen to:
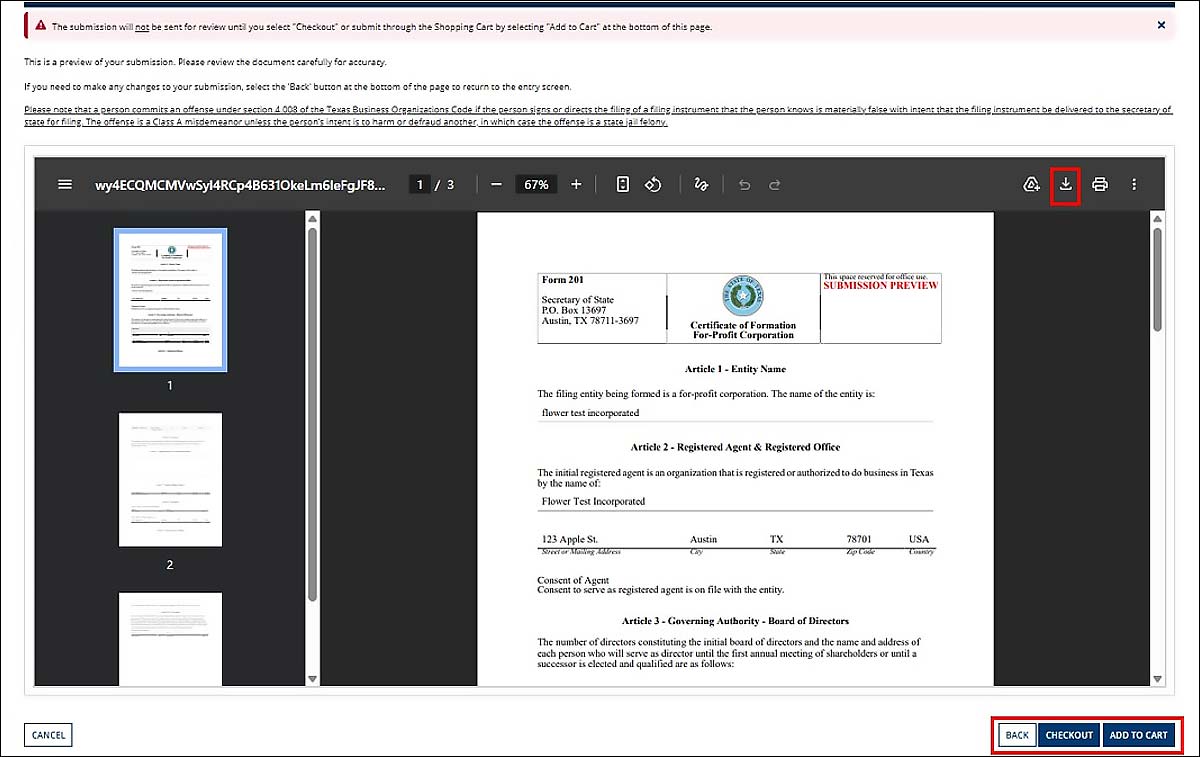
- Back: Navigate to the previous screen.
- Checkout: Proceed with the payment process.
- Add to Cart: Add a filing to the cart to complete the payment and submission process at a future point in time.
3.1.3 Checkout
After selecting “Checkout” the Expedited Handling screen will display. Make your selection, complete the fields, and click “Submit.”
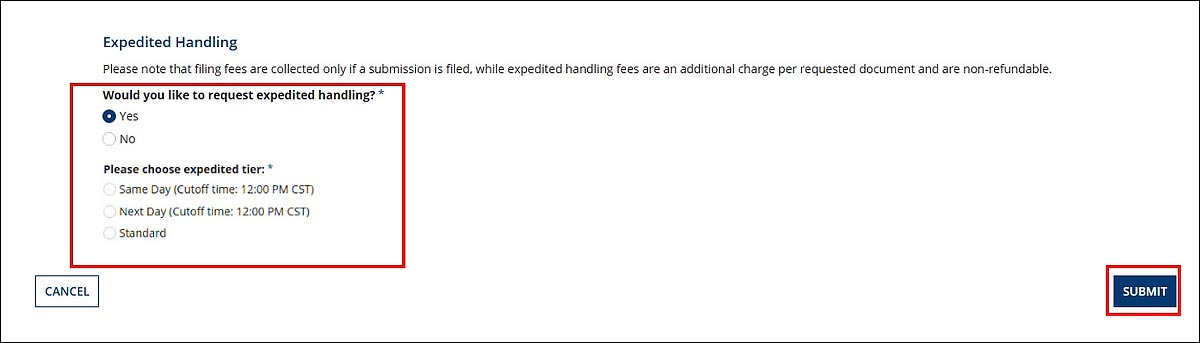
In this example, the expedited handling option was selected.
Select the payment type from the drop-down menu. In this example, the Credit Card option was selected.
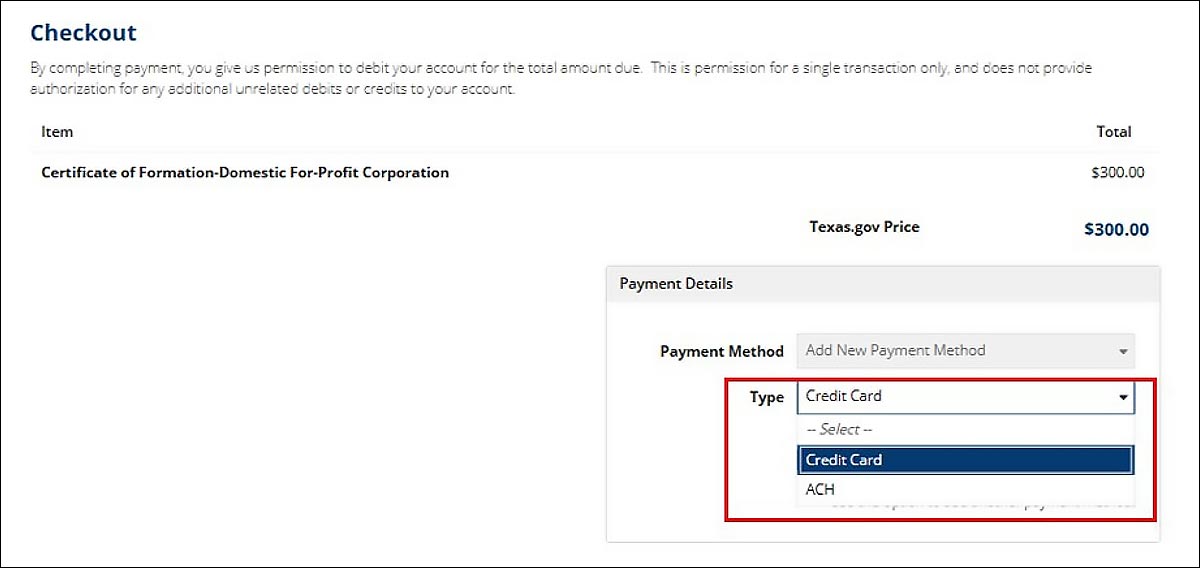
Next, select Add New Payment Method.
3.1.3.1 Add New Payment Method
Select the Save Payment Method box to store the payment method for future payments.
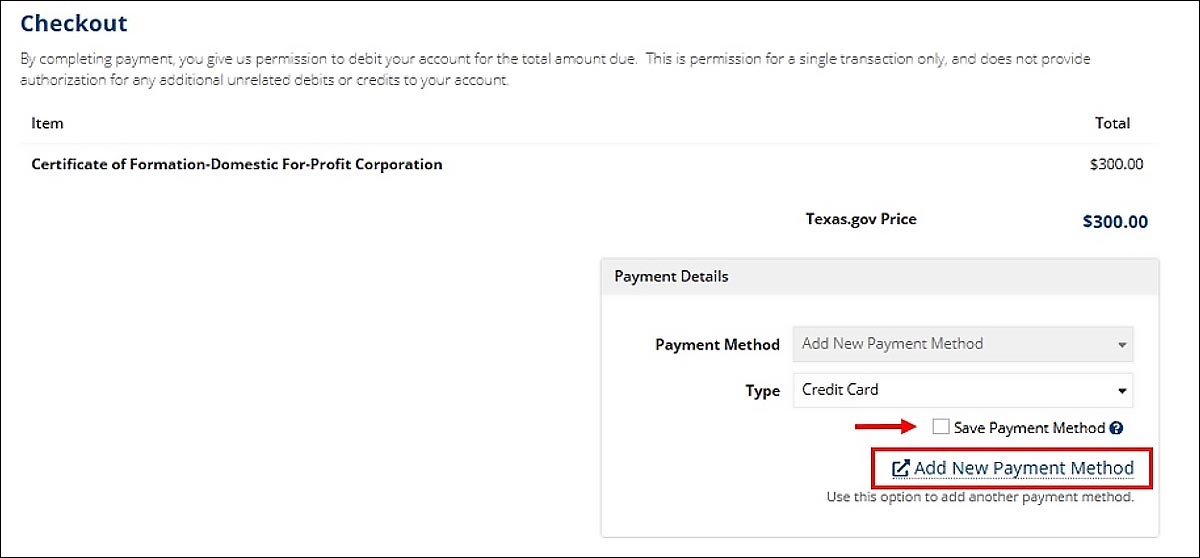
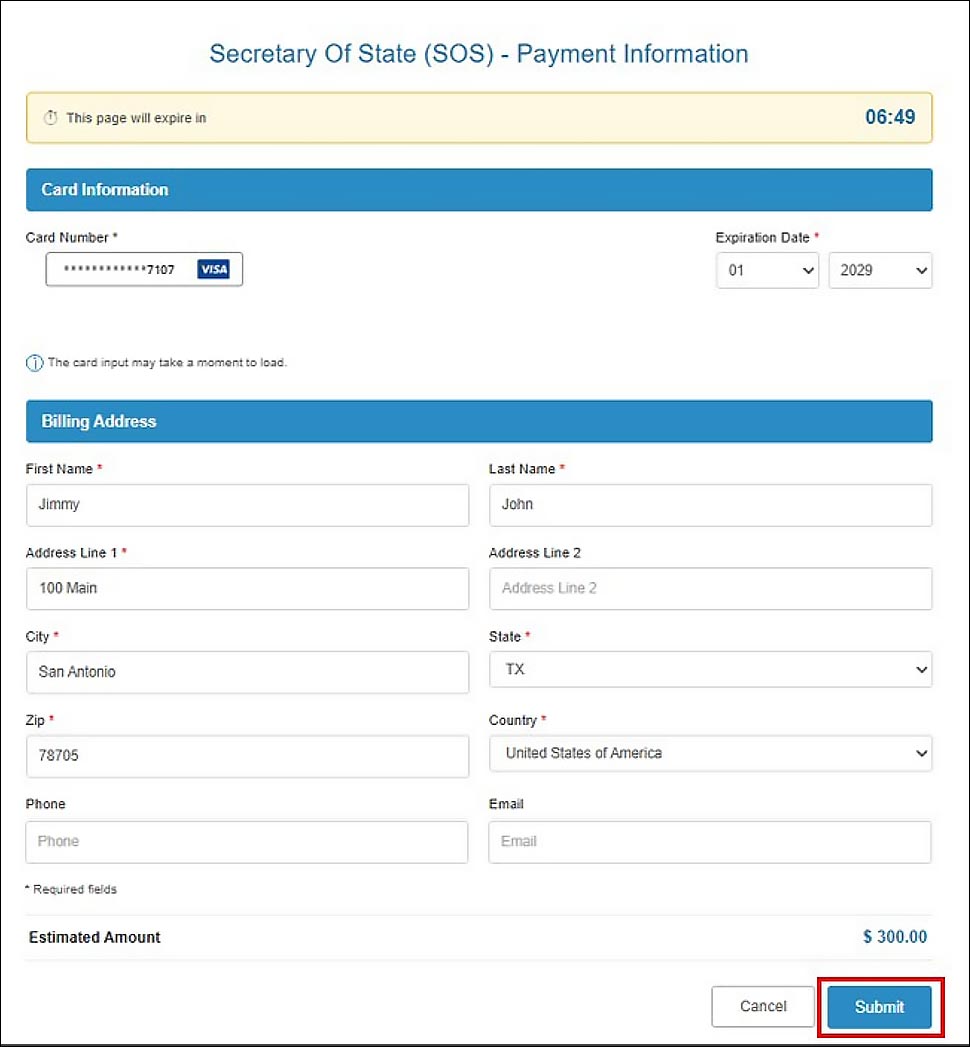
A new tab will appear for you to add the payment details.
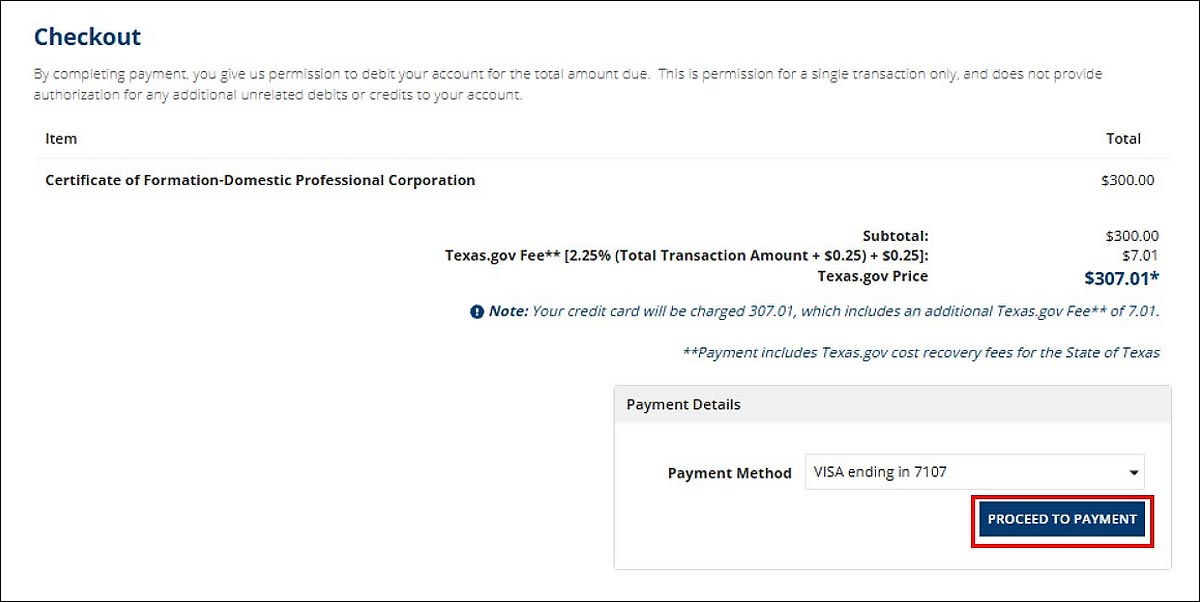
Complete the Checkout process by clicking the “Proceed to Payment” button.
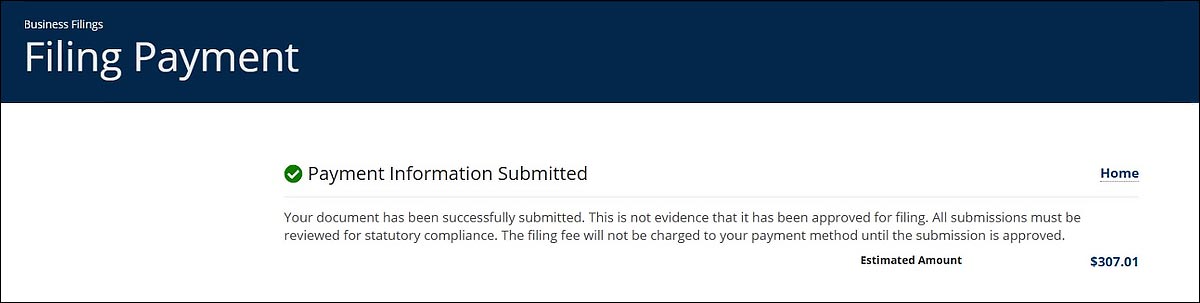
A confirmation screen will appear.
3.2 Manage an Entity Record
To manage an entity record, select the second tile and click “Next”.
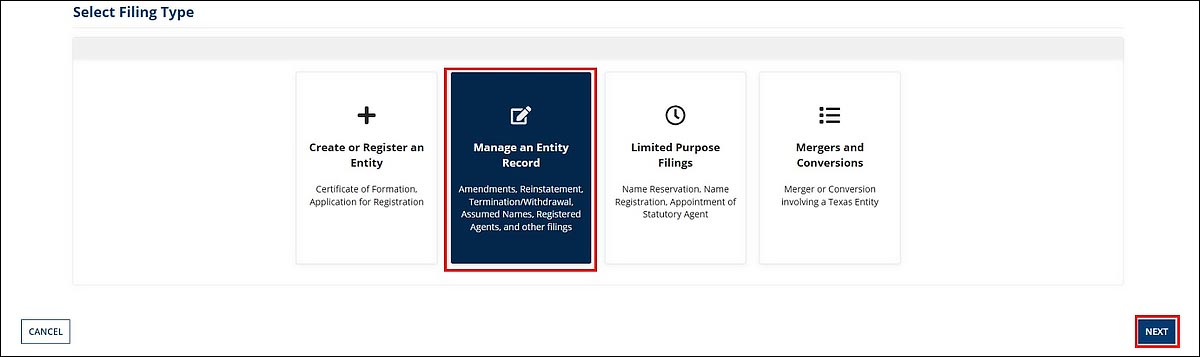
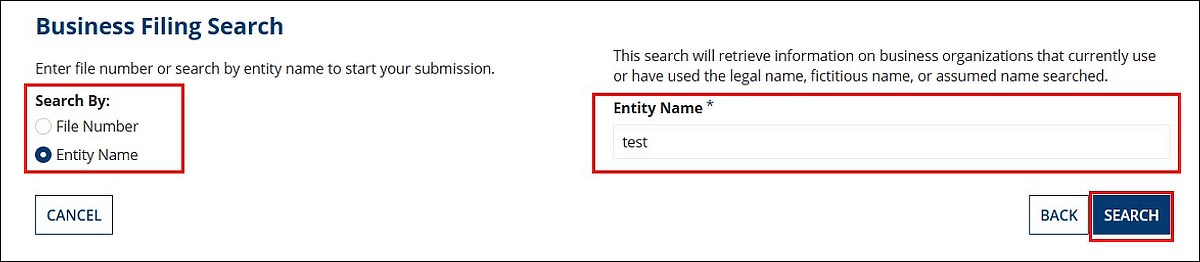
Select File Number or Entity Name and then complete the field on the right.
Click “Search” to view the results.
In this example Entity Name was selected.
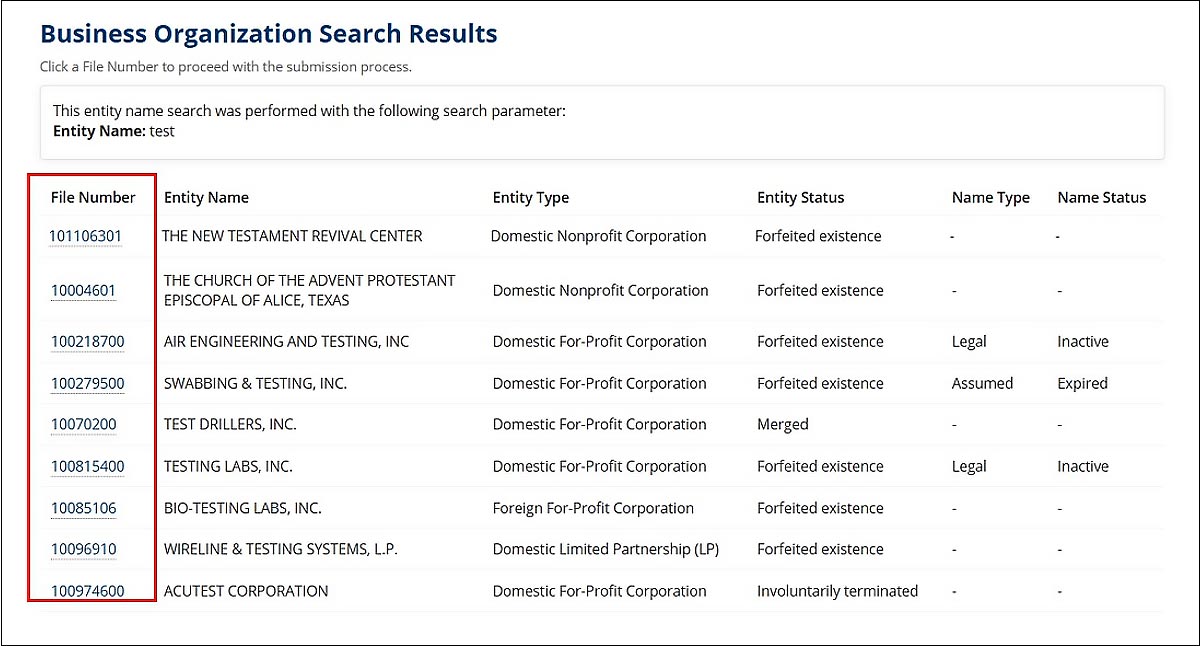
Locate the entity and click the File Number to proceed.
Next, click the “Start Submission” button.
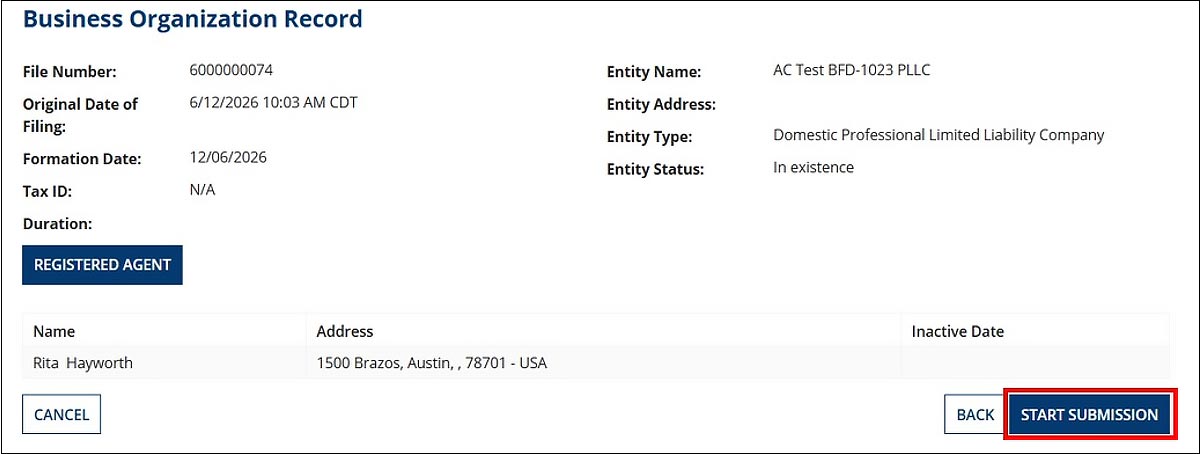
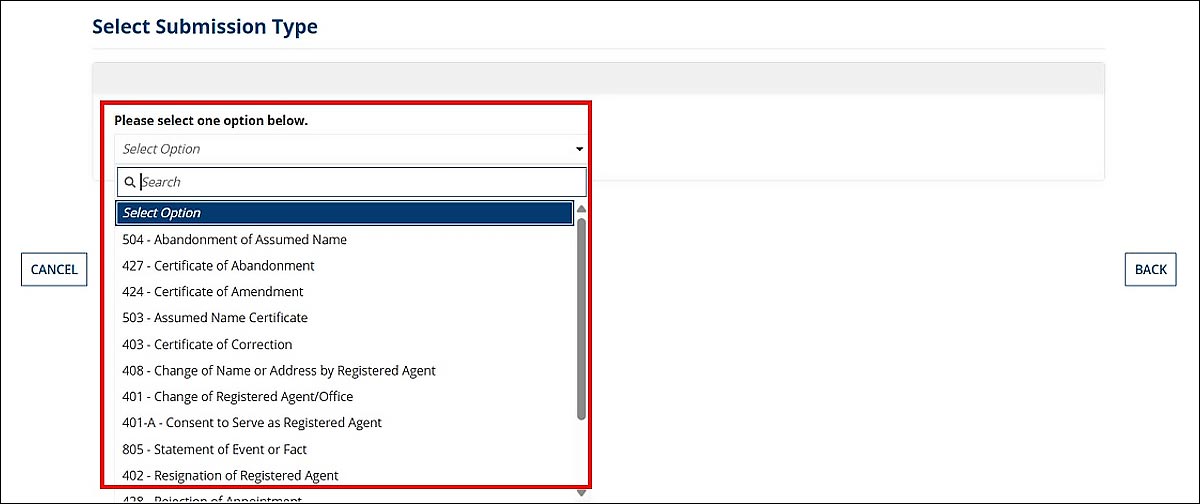
Select the submission type from the drop-down menu.
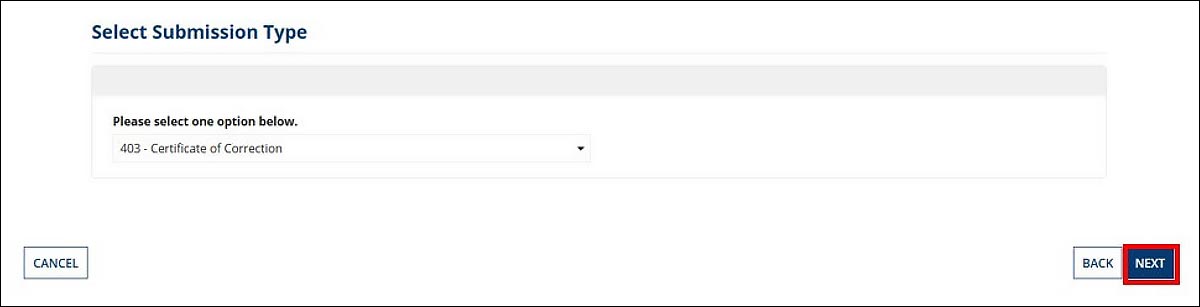
After making your selection, click the “Next” button.
Complete the required fields and proceed with the filing. Refer to the following sections for additional guidance:
- 3.1.1 Complete the Form
- 3.1.2 Preview Submission
- 3.1.3 Checkout
3.3 Limited Purpose Filings
To complete a Limited Purpose Filing, select the third tile and click “Next”
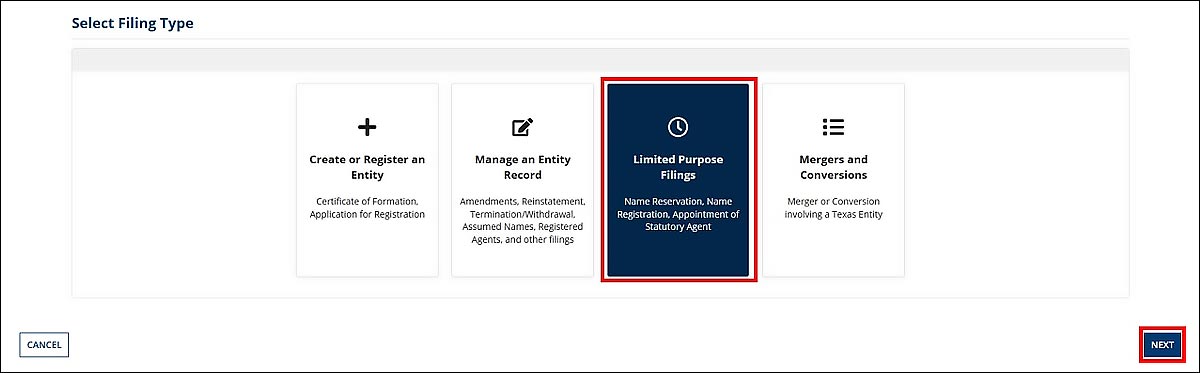
Select the limited purpose filing option from the drop-down menu and click “Next”
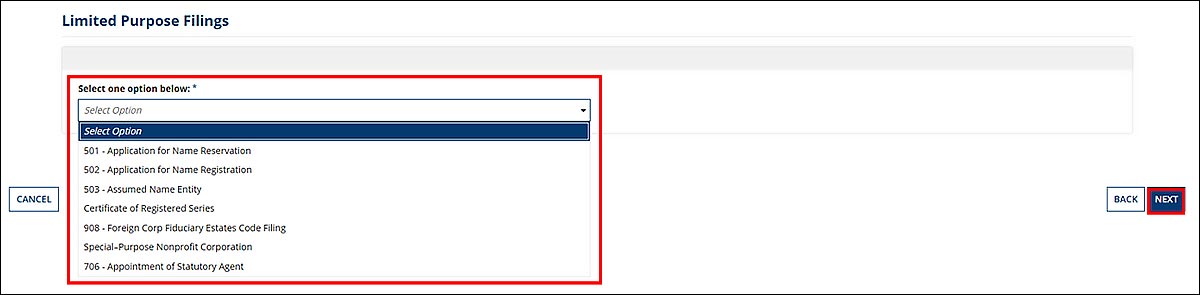
Complete the required fields and proceed with the filing. Refer to the following sections for additional guidance:
- 3.1.1 Complete the Form
- 3.1.2 Preview Submission
- 3.1.3 Checkout
3.4 Mergers and Conversions
Select the last tile and click “Next”
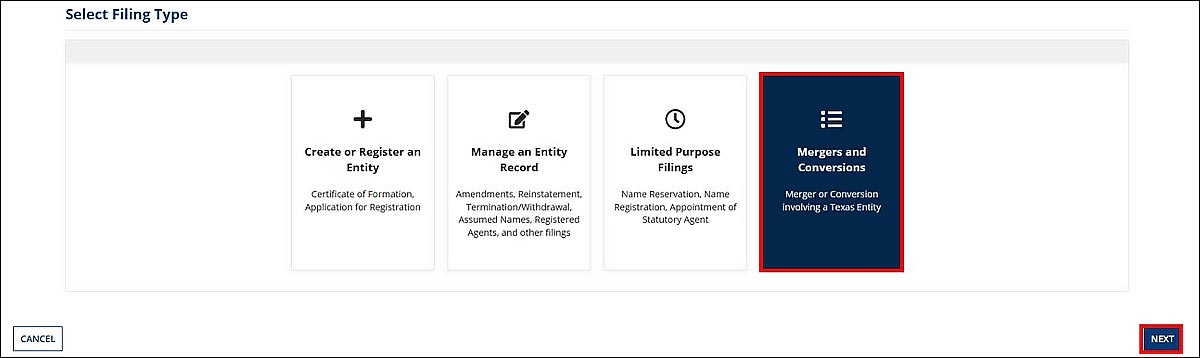
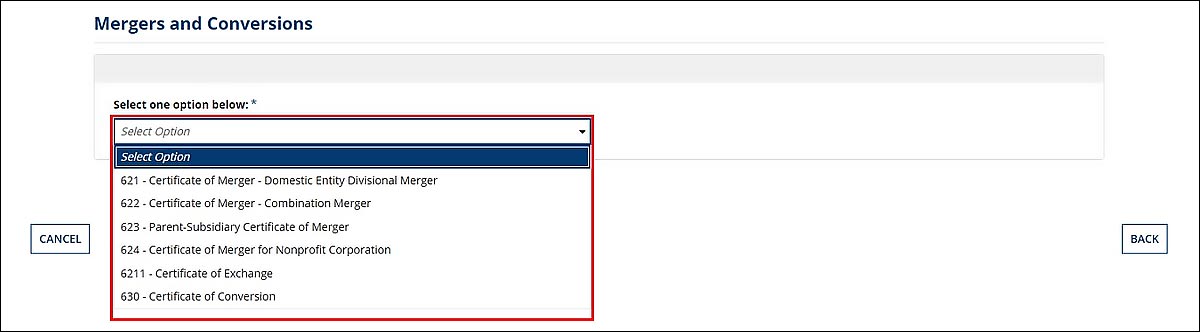
Choose the option from the drop-down menu.
After selecting the option, click the “Next” button.
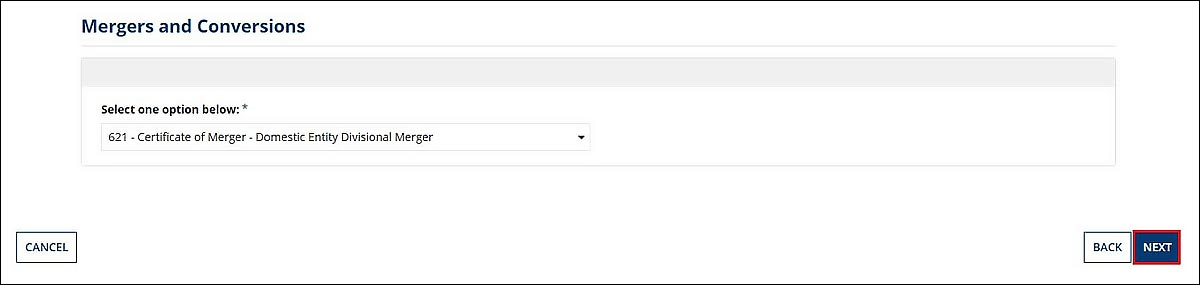
Complete the form by providing the required information.
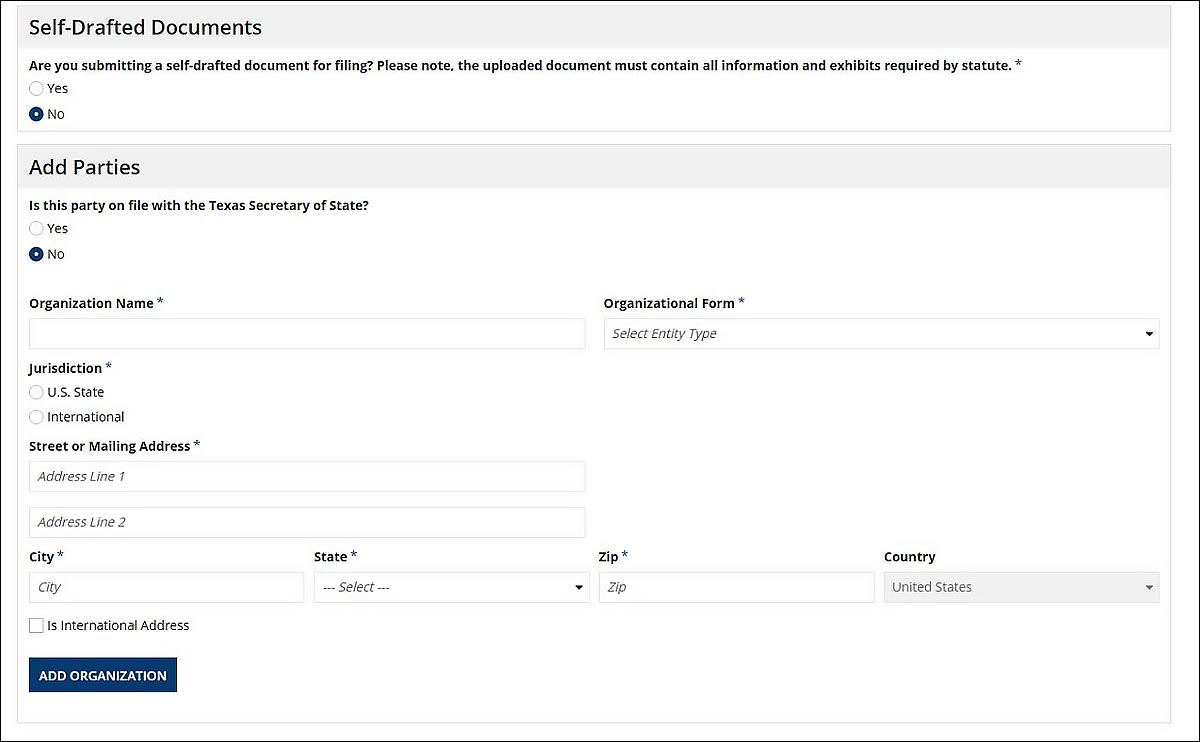
3.1.4 Self-Drafted Documents
Select Yes if you have a self-drafted document, the system will provide the upload field.
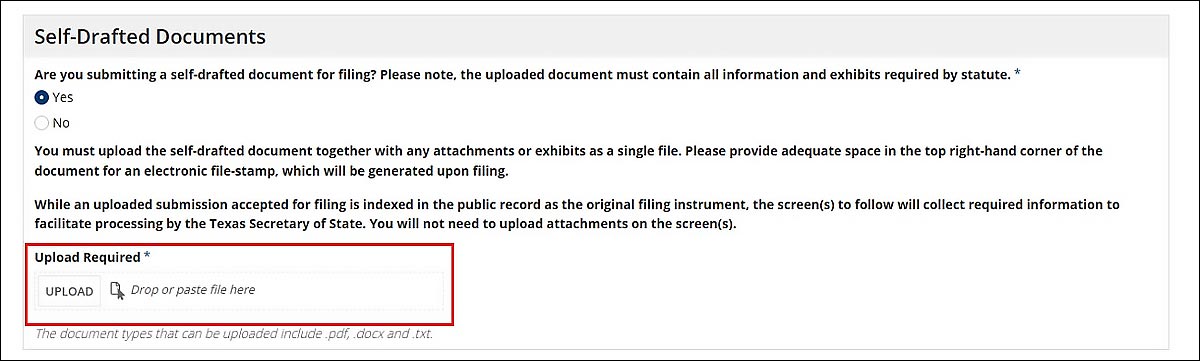
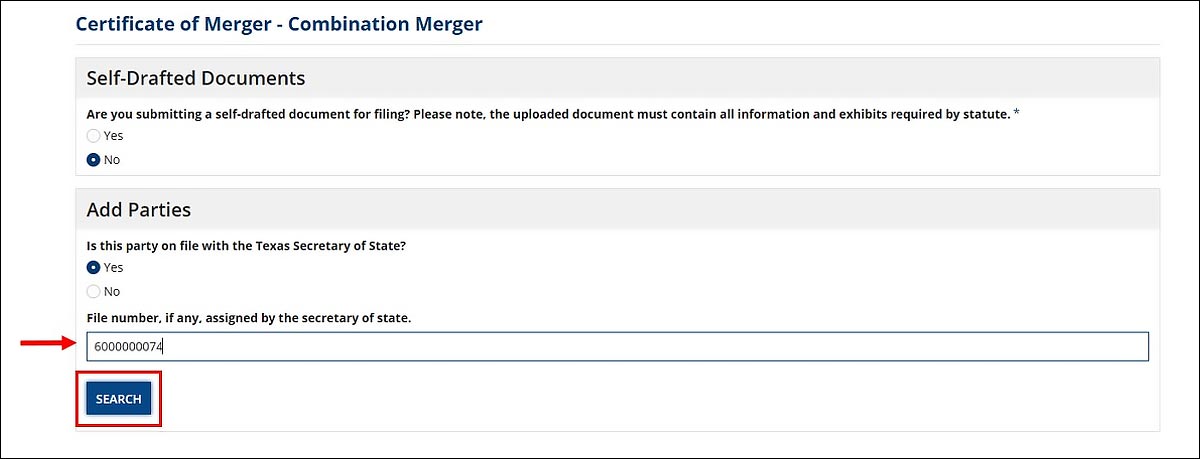
3.1.5 Add Parties
If the party is on file with the Texas SOS, provide the file number and click “Search.”
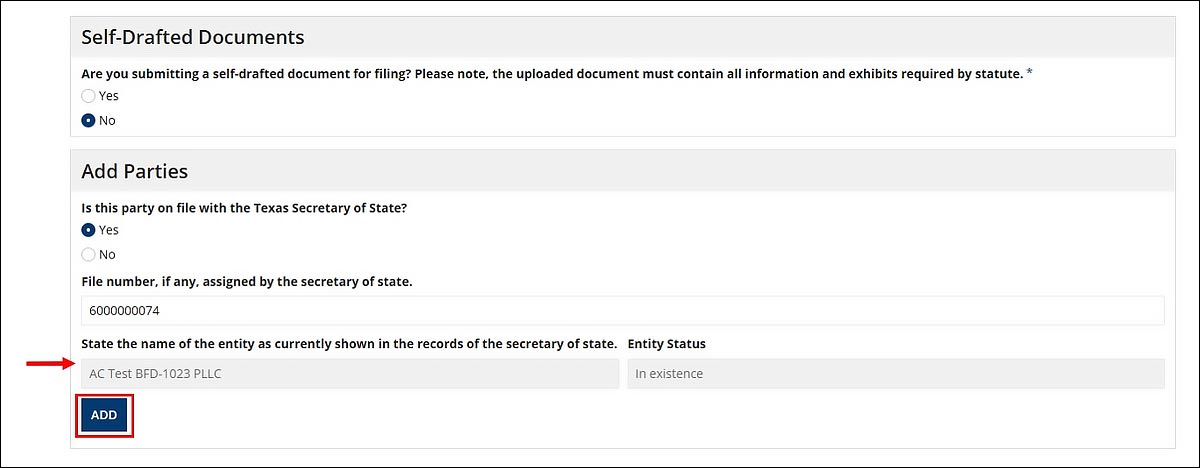
Confirm the entity record is correct and click “Add.”
If the party is not on file, provide the necessary information and select “Add Organization.”
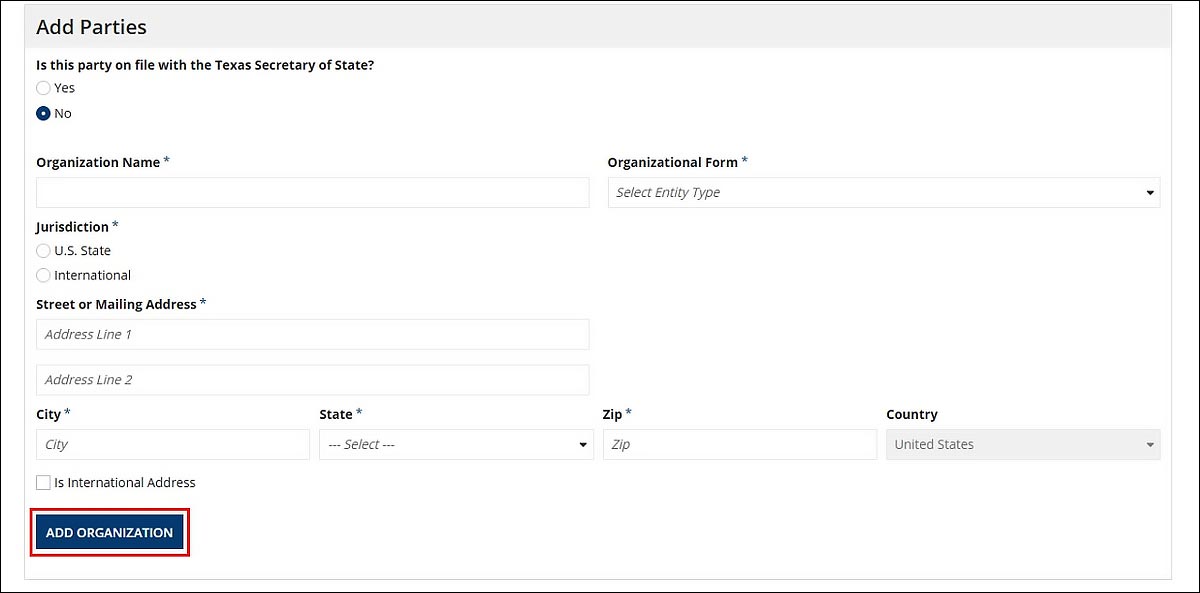
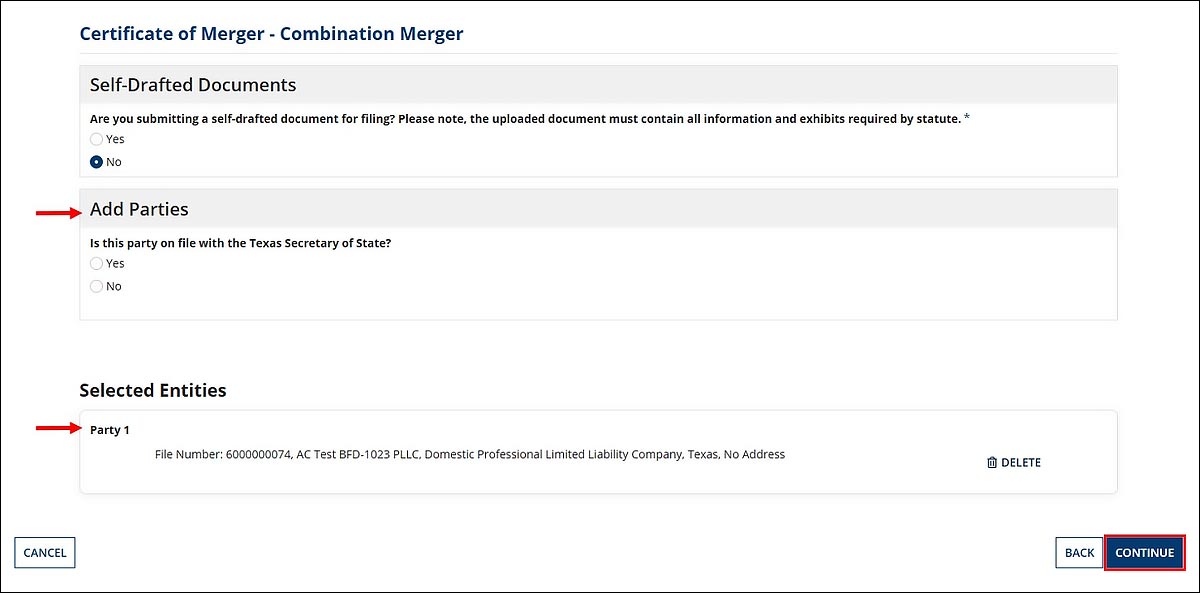
If you need to add more parties, complete the Add Parties section again. Confirm the
Selected Entities section and click the “Continue” button.
Complete the required fields and proceed with the filing. Refer to the following sections for additional guidance:
- 3.1.1 Complete the Form
- 3.1.2 Preview Submission
- 3.1.3 Checkout
4. My Submissions
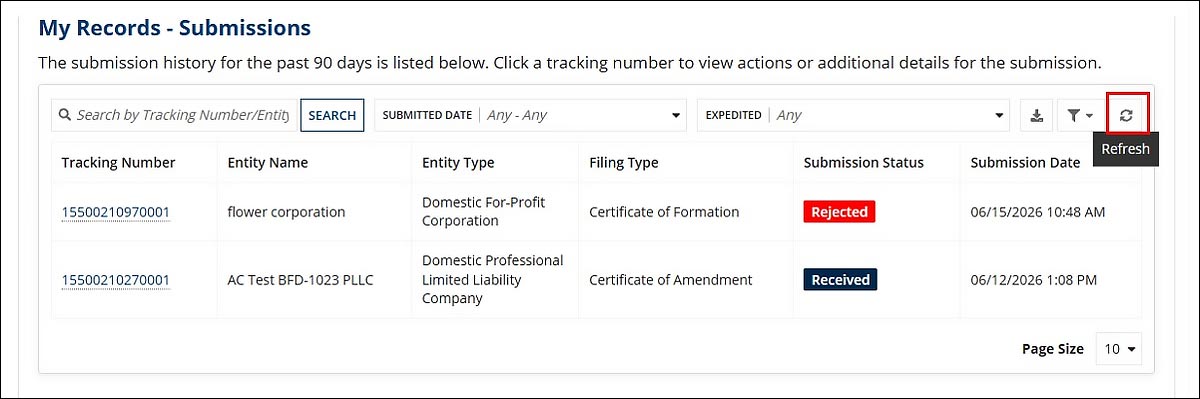
Select My Submissions from the left menu to view your submissions history from the past 90 days.
Use the Search, Submitted Date, or Expedited fields to filter your submissions.
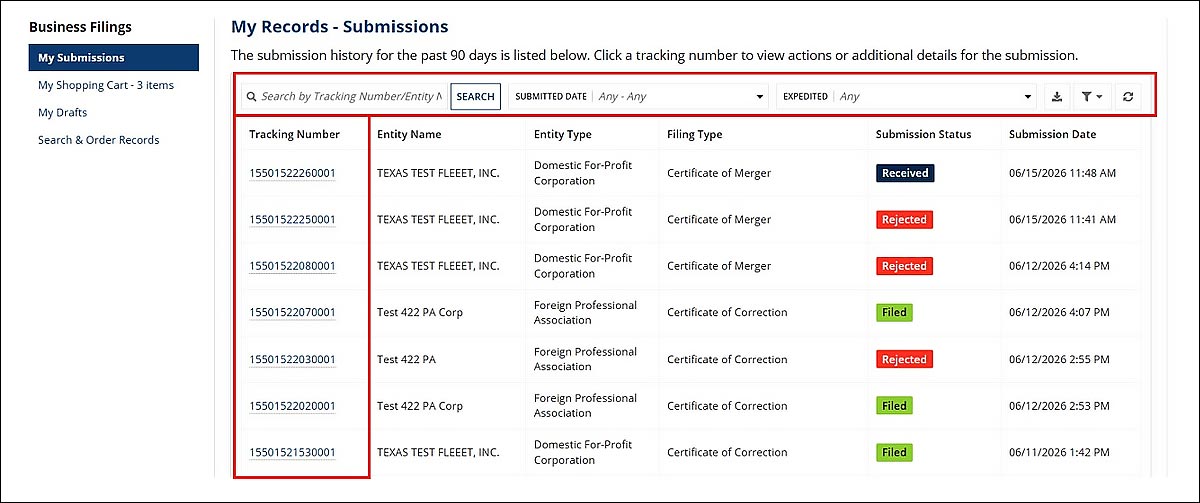
Click the Tracking Number of a record in the “Received” status to view additional details.
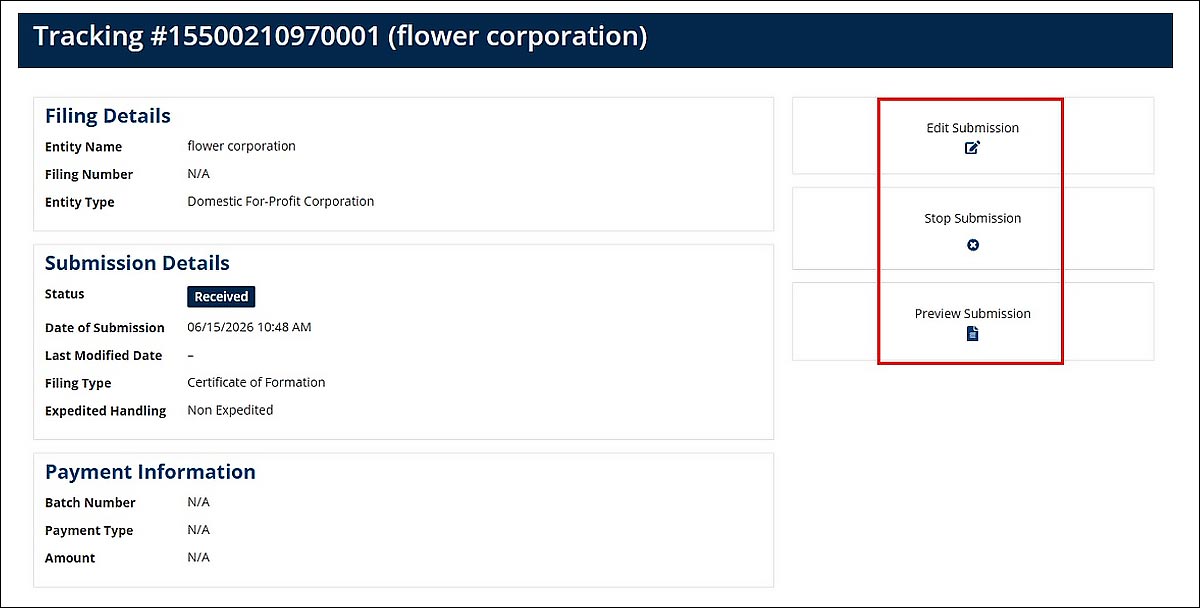
Upon selection, a new tab will appear with the submission details. You can use the buttons on the right to:
- Edit Submission: Make changes to a filing.
- Stop Submission: Cancel a submission. Note, the status will change to “Rejected.”
- Preview Submission: Review the submitted file.
To update your Submissions Table, select the “Refresh” icon.
4.1 Rejected Filings
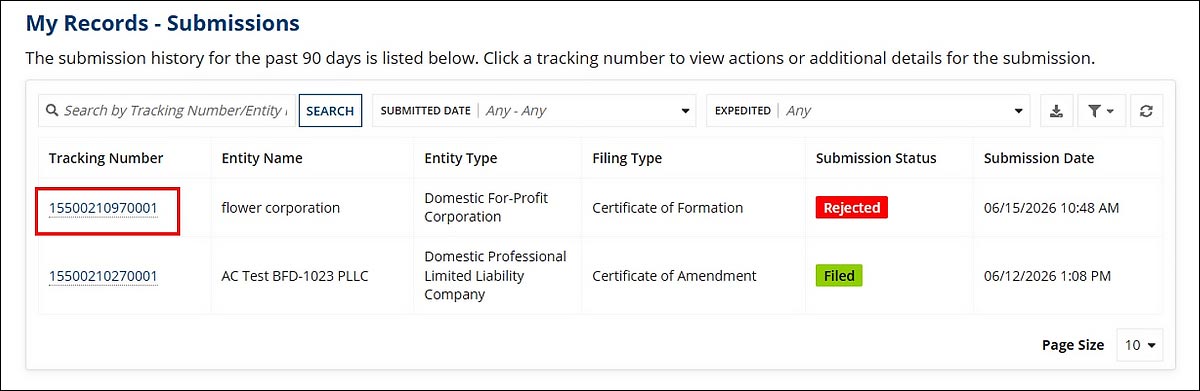
If a filing is rejected, you may resubmit the filing within 30 days. Click the tracking number of the rejected filing.
Next, click the “Edit Rejected Submission” button.
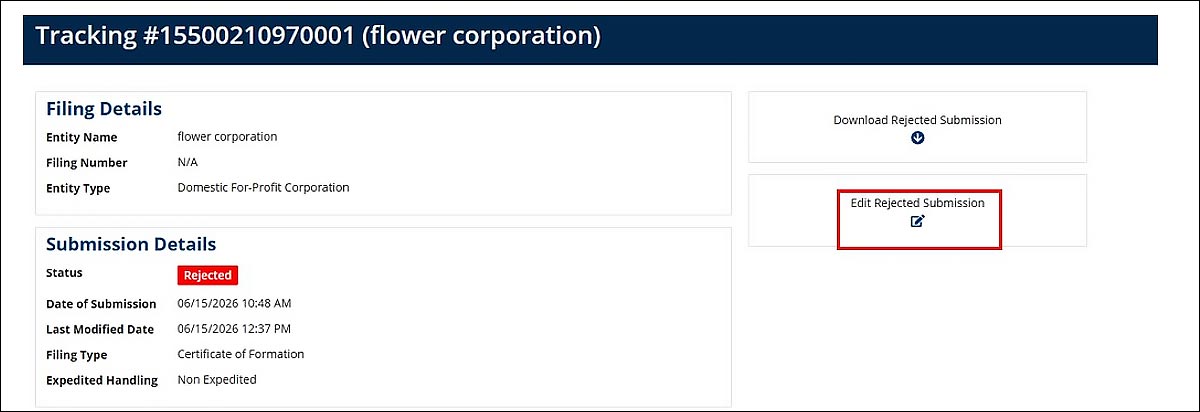
You can now make the necessary changes and resubmit the filing via the shopping cart.
4.1.1 Resubmit Rejected Filing
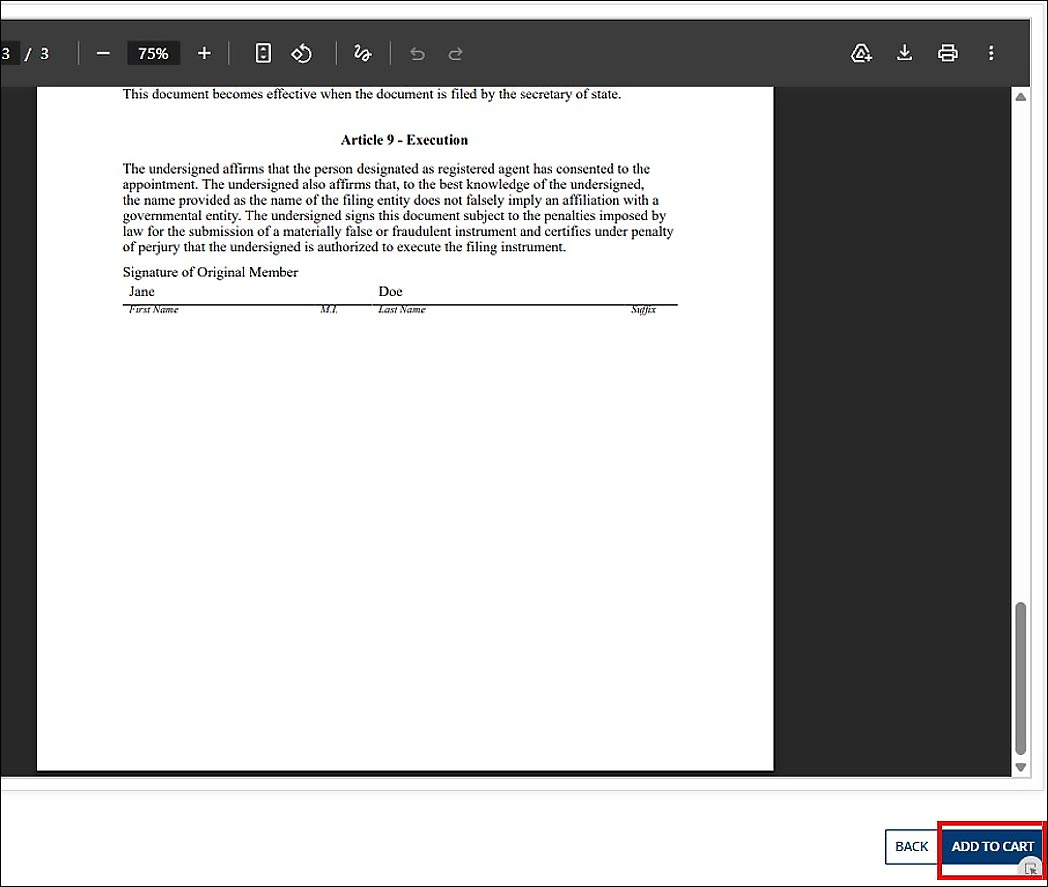
After making the necessary changes, click the “Add To Cart” button.
From the My Submissions screen, select the “Shopping Cart” button.
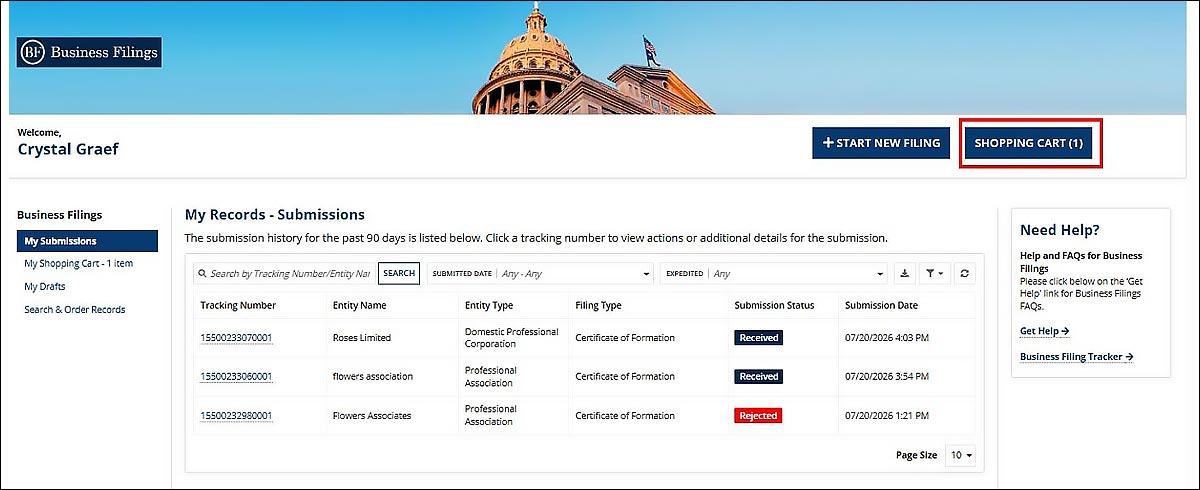
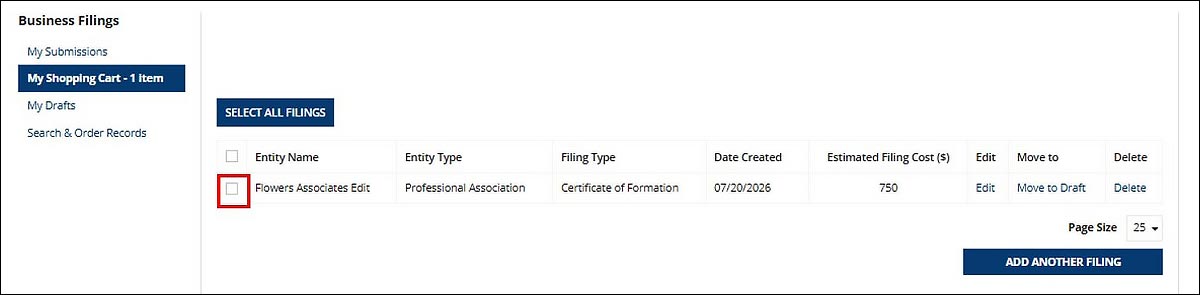
Select the checkmark box.
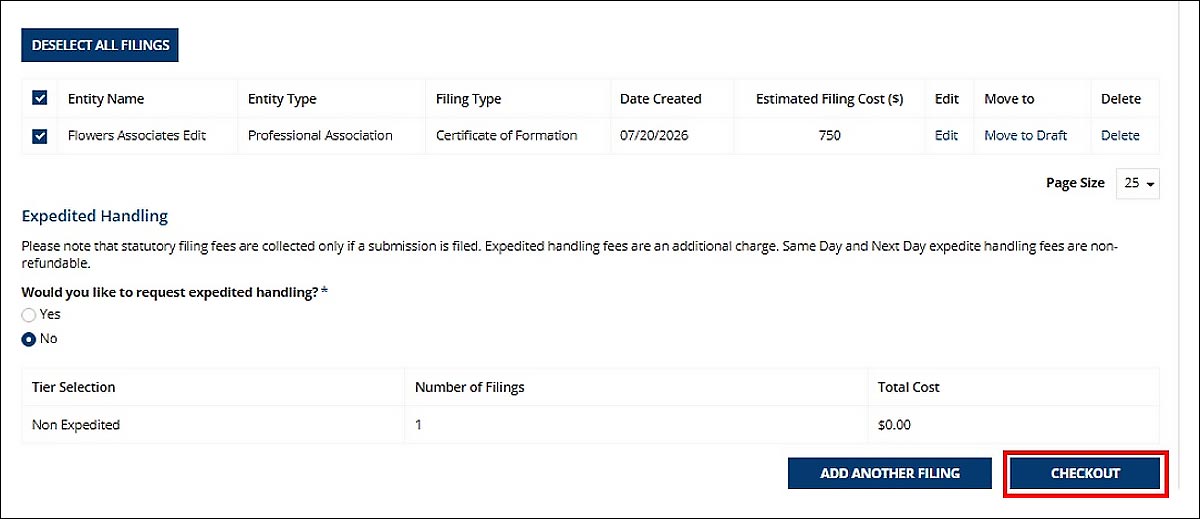
The Expedited Handling option will appear. After making your selection, click the “Checkout” button.
Complete the payment screen by selecting the Payment Method.
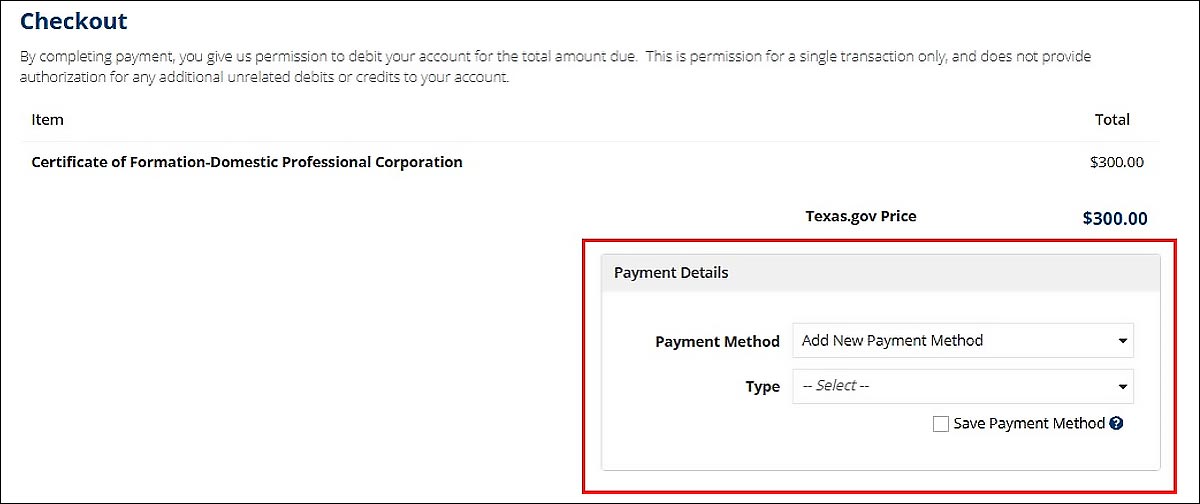
After selecting the payment method, click the “Proceed to Payment” button.
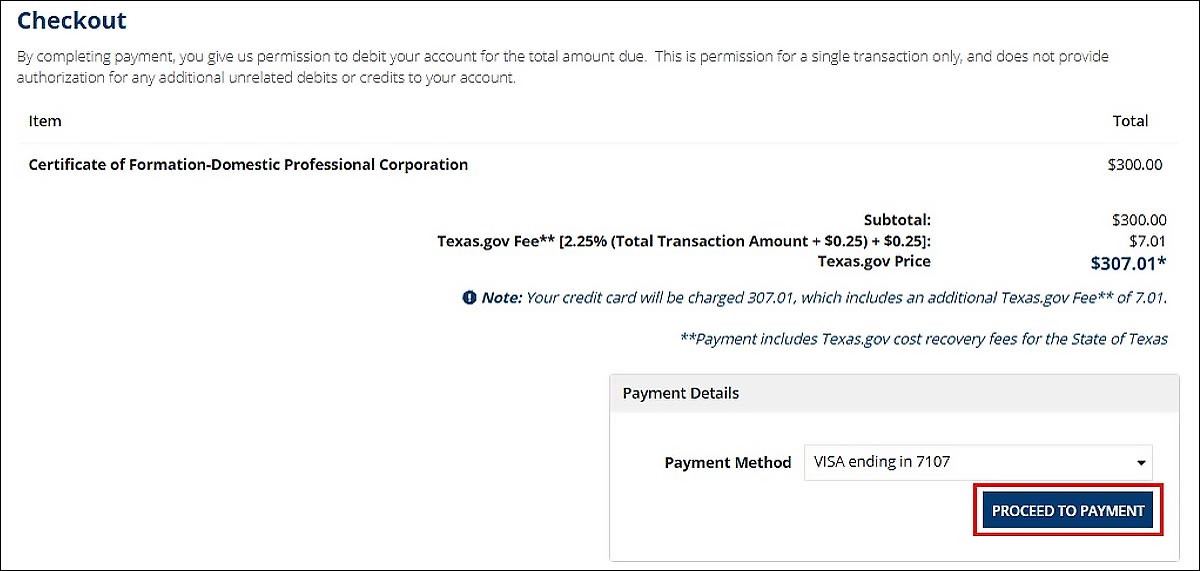
The payment confirmation screen will appear, click the Home link to return to the Business Filings landing page.

5. My Shopping Cart
Select My Shopping Cart from the left side menu or the “Shopping Cart” button in the top right to view the Shopping Cart page.
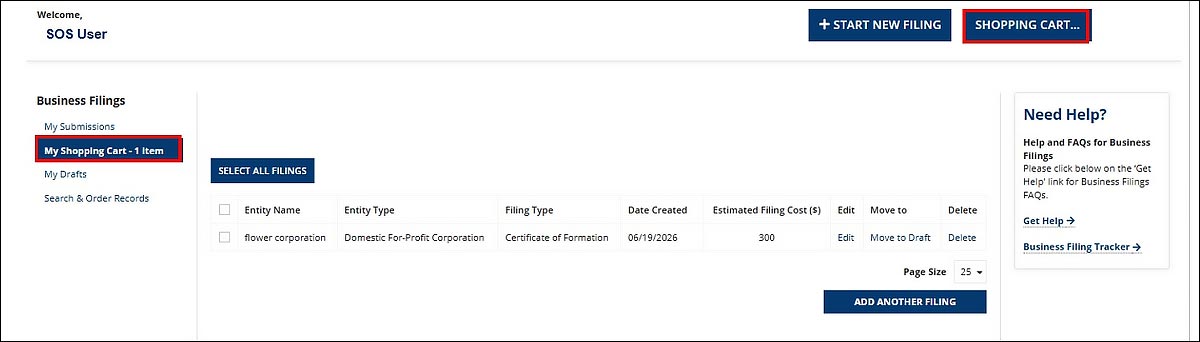
Select the item(s) you want to submit by clicking the checkbox. To select all items in your shopping cart you can use the “Select All Filings” button.
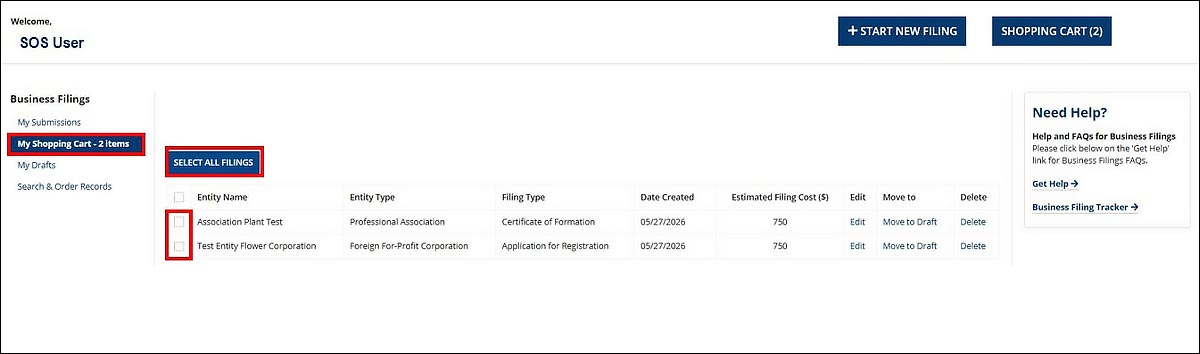
Select one or more items from the shopping cart to submit.
Upon selection, you must indicate if you will use Expedited Handling and/or Order of Filing.
- Order of Filing: If selected, all the documents will be reviewed simultaneously. If one of the filings must be rejected, all the documents will be returned unfiled.
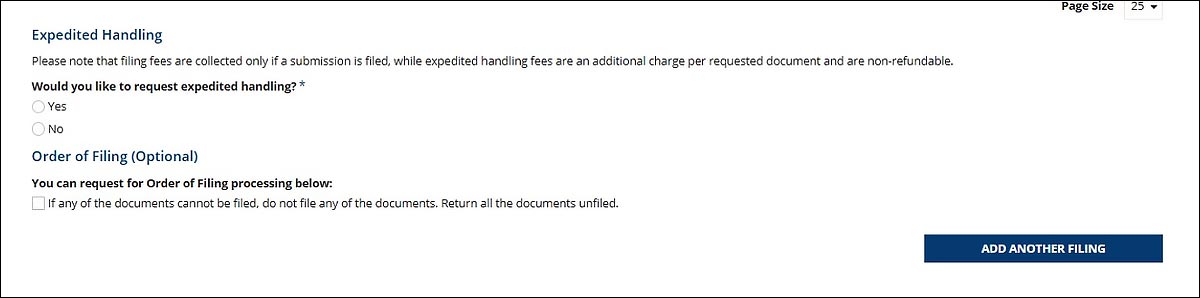
Once you have completed the mandatory fields, click the “Checkout” button to proceed with the payment process.
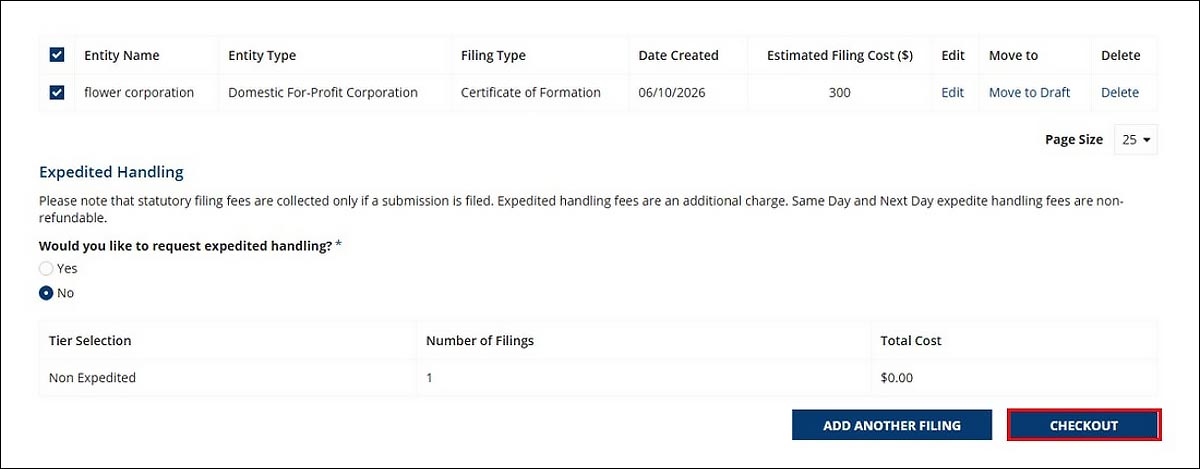
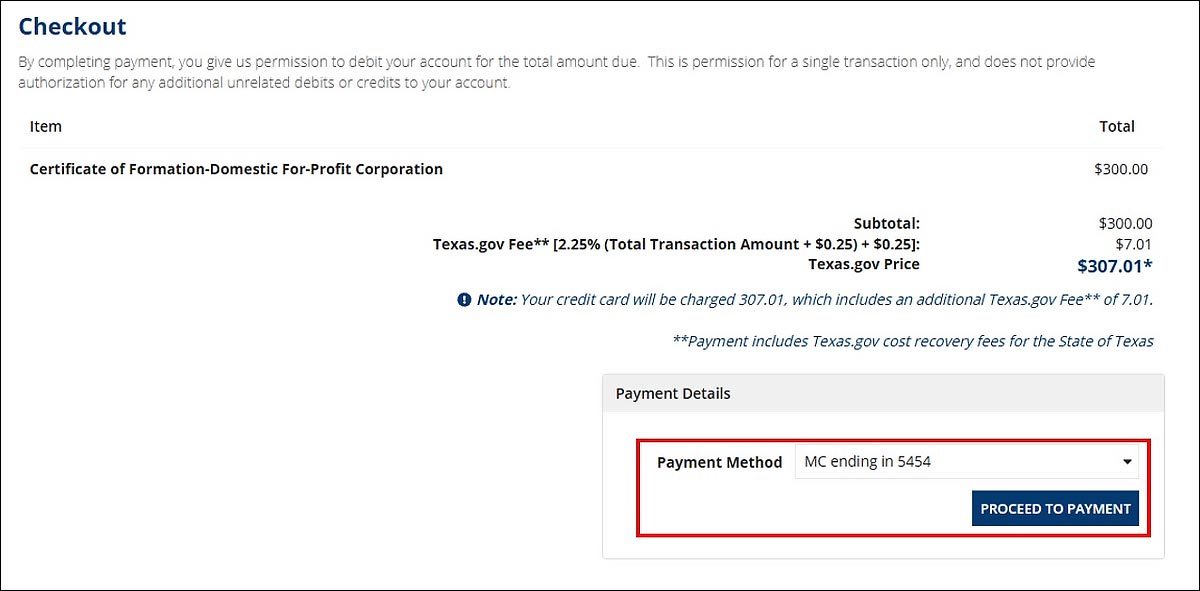
Select the payment method and then click the “Proceed to Payment” button.
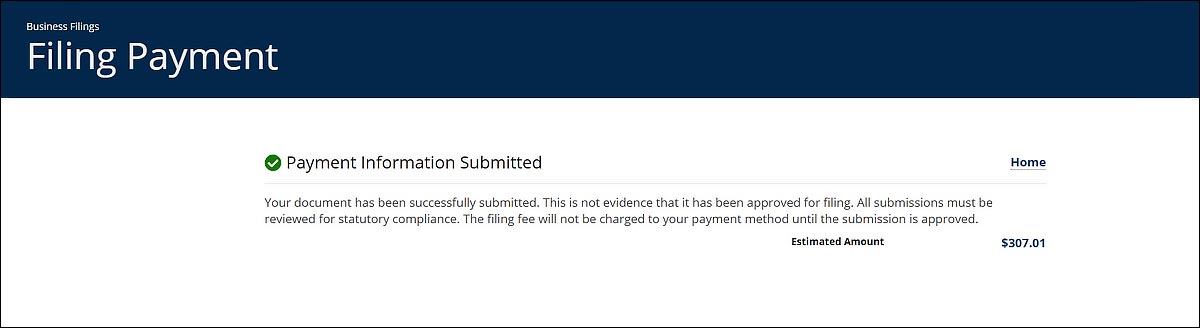
A confirmation screen will appear to indicate the payment information was submitted.
6. My Drafts
To view your drafts, select My Drafts from the left side menu.
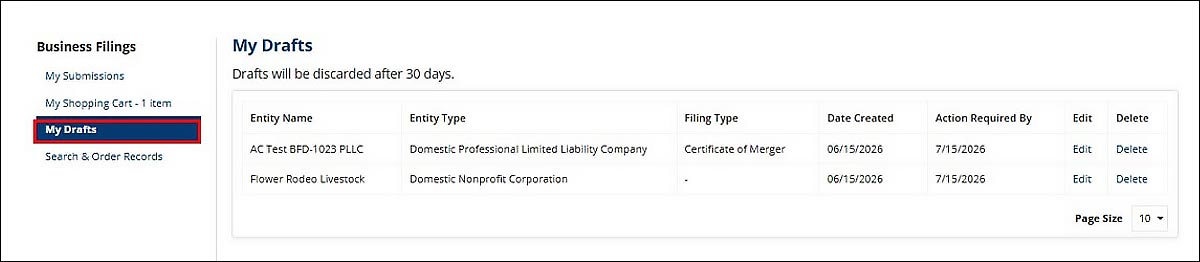
Use the Edit or Delete links to update your drafts.
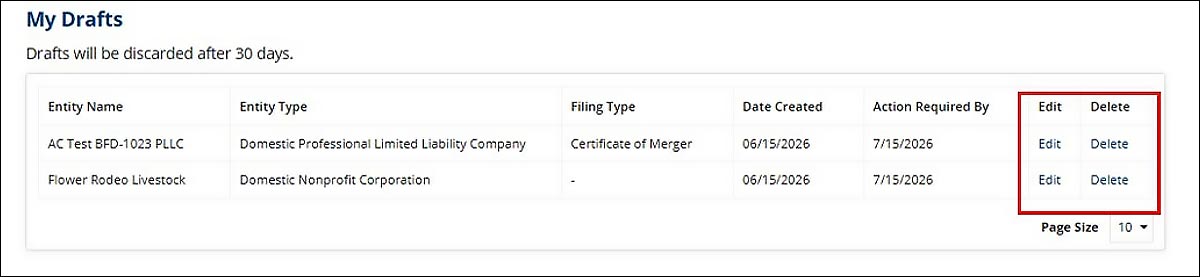
- Edit: Resume updating the filing to submit.
- Delete: Remove the filing from your drafts table.
7. Search & Order Records
From the left menu, select the Search & Order Records option.
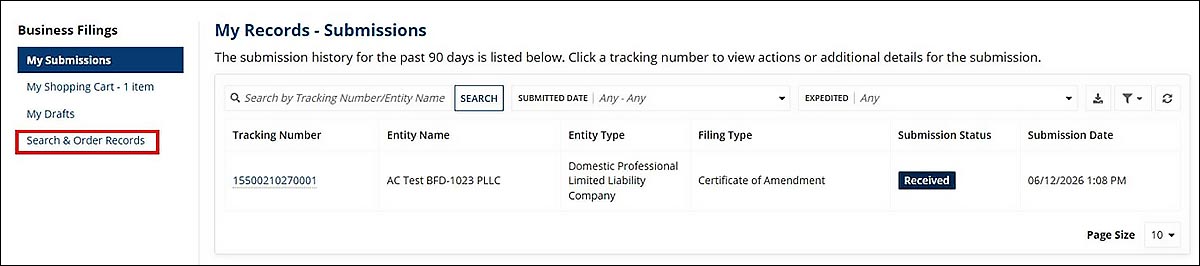
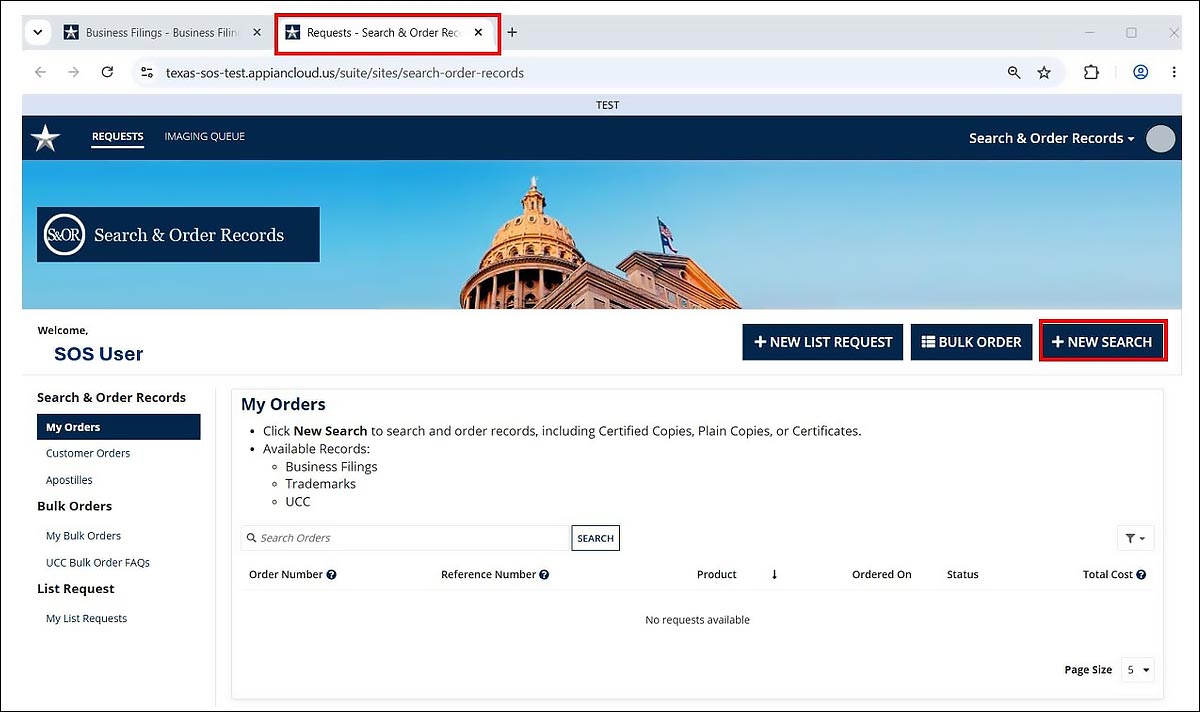
A new tab will appear with the Search & Order Records page.
To perform a new search, click the “+New Search” button.
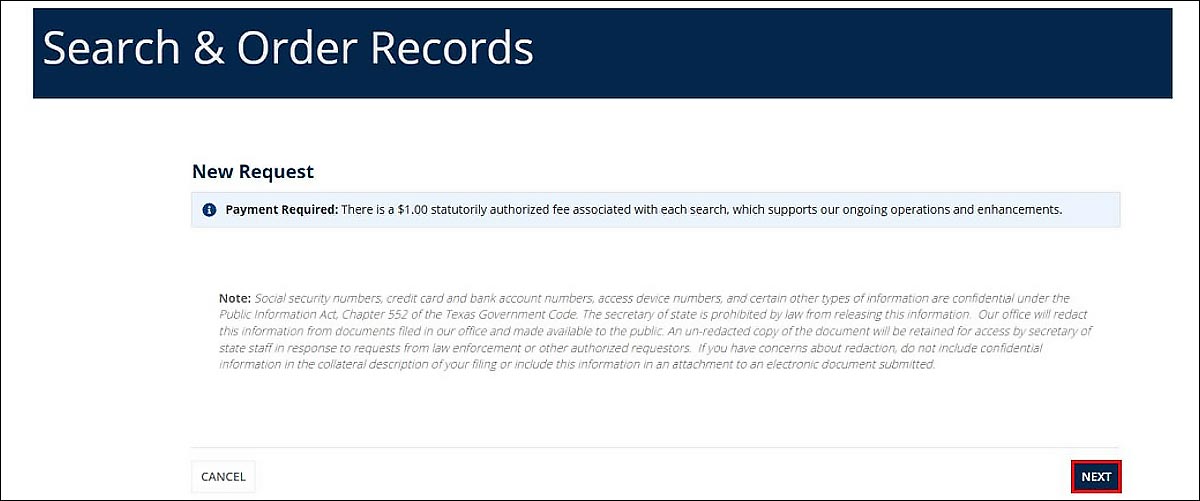
Confirm the payment fee and click the “Next” button.
Chose the payment method from the drop-down menu. Note: To add a new payment method, refer to section 3.1.3.1 Add New Payment Method
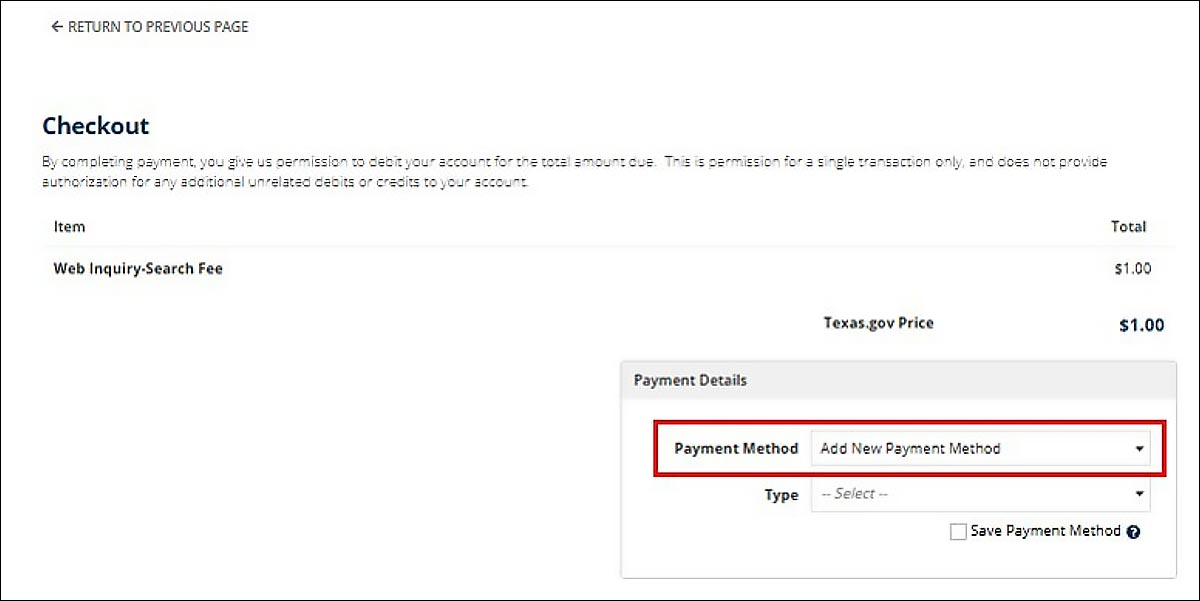
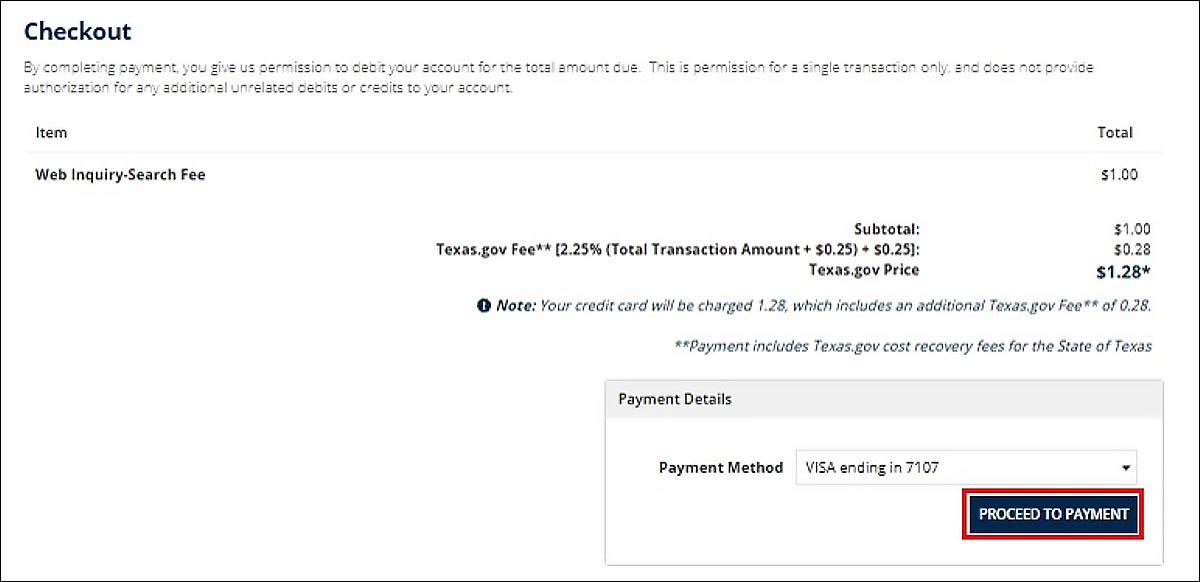
Next, click the “Proceed to Payment” button.
A payment confirmation screen will display, click the Continue link.

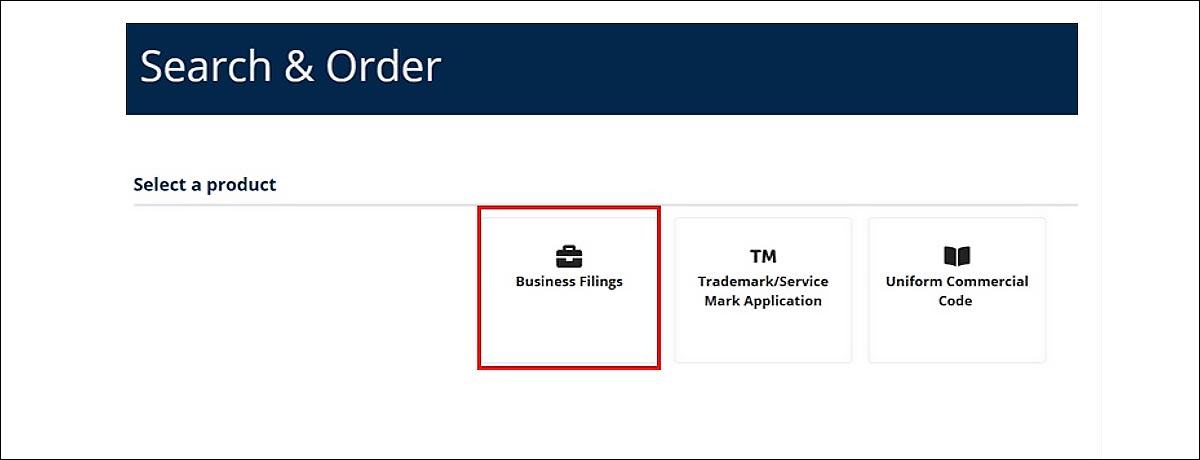
Select the “Business Filings” tile.
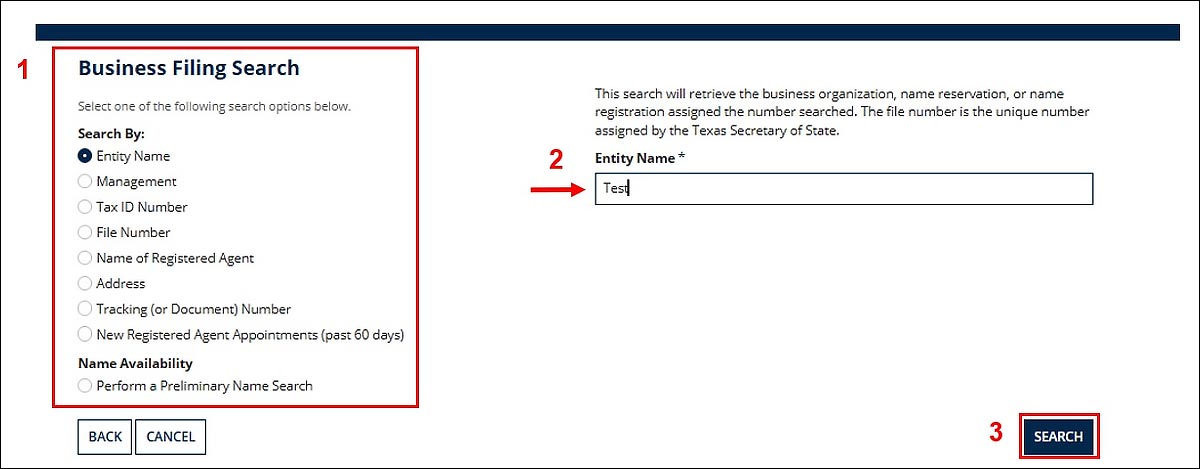
Complete the next 3 steps:
- Select the search option from the list on the left side of the screen.
- Complete the right side of the screen. Depending on the search option, a text or number box will display. In this example, a text box.
- Click the “Search” button.
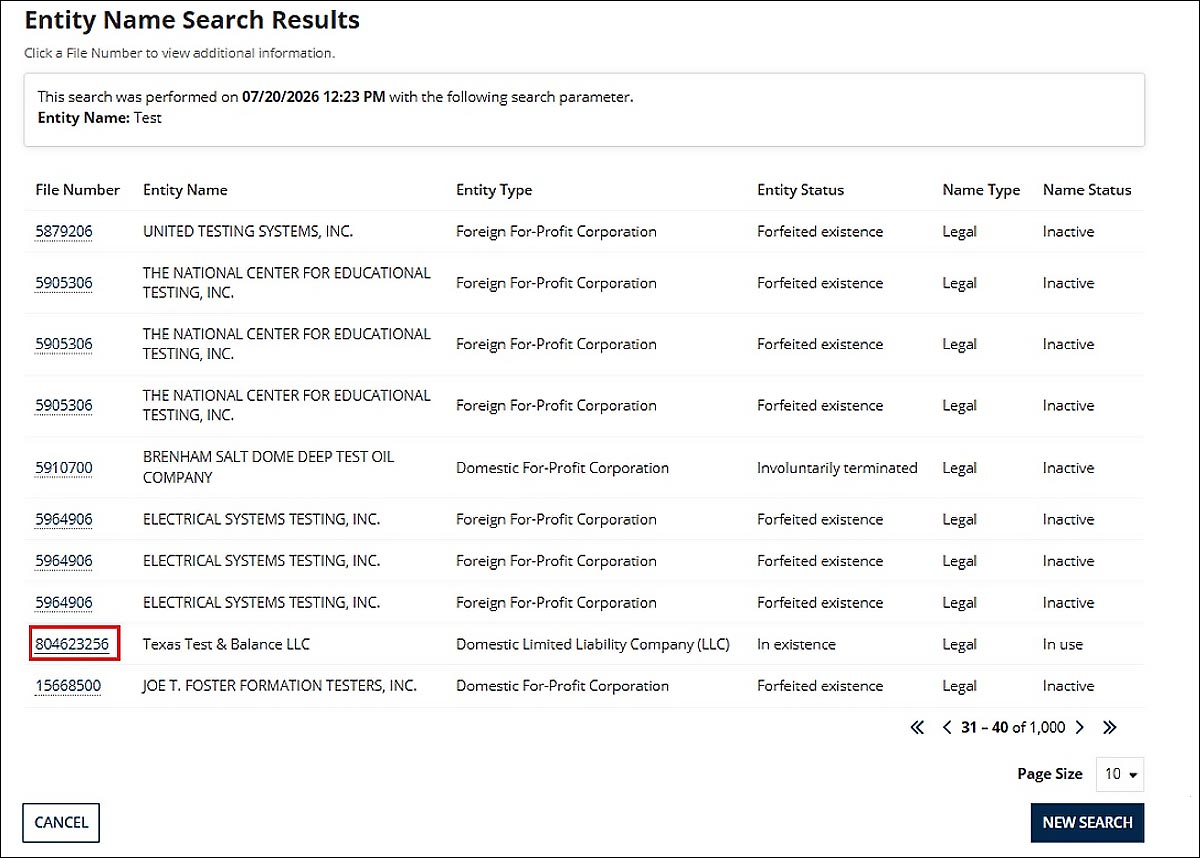
From the search results screen, make your selection by clicking the File Number.
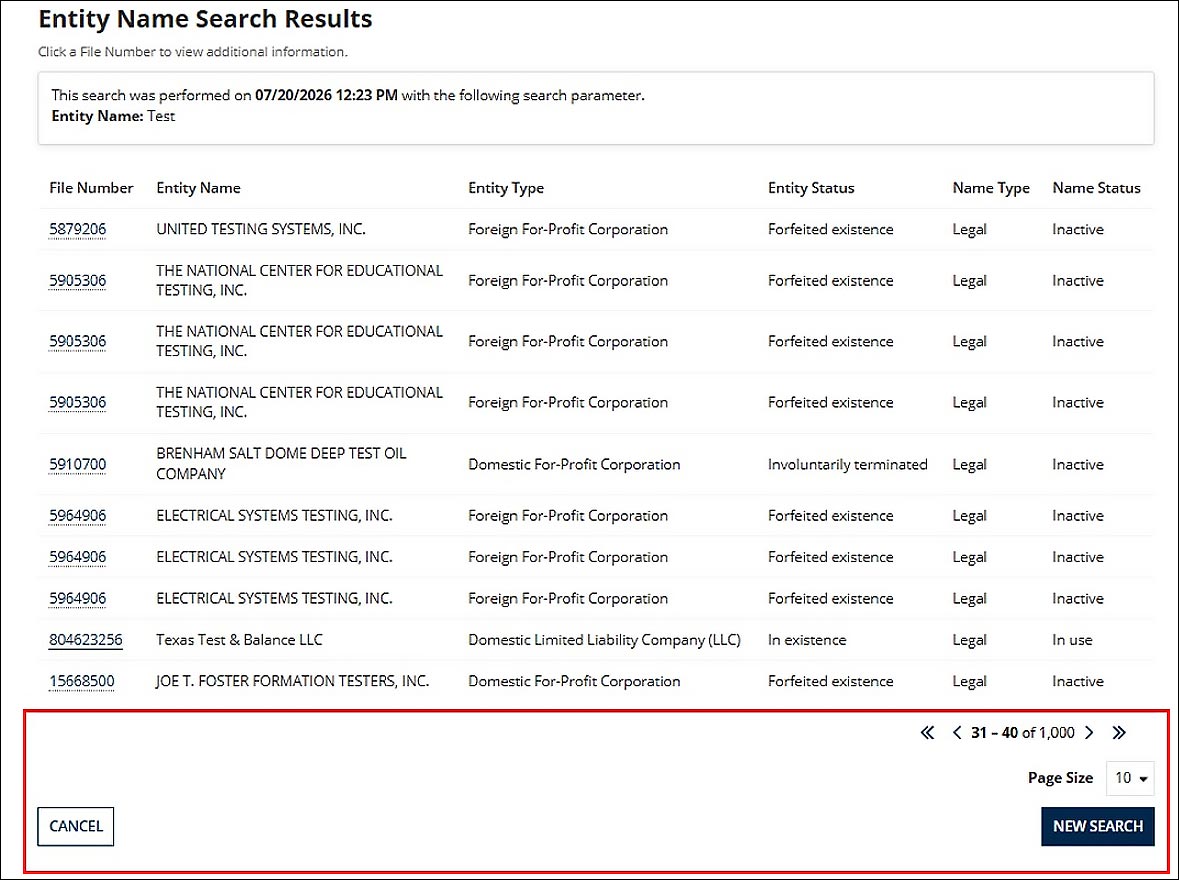
Use the arrows to review the search results. If you want to cancel or conduct a new search, click the corresponding button.
7.1 Copies and Certificates
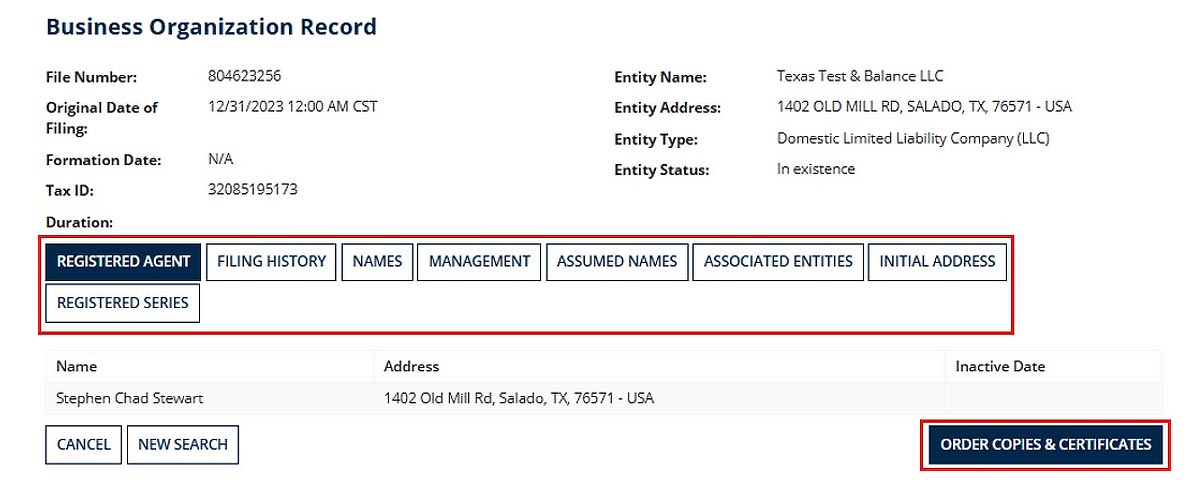
Review the business organization record, you can use the available tabs to view additional details.
Click the “Order Copies & Certificates” button to proceed.
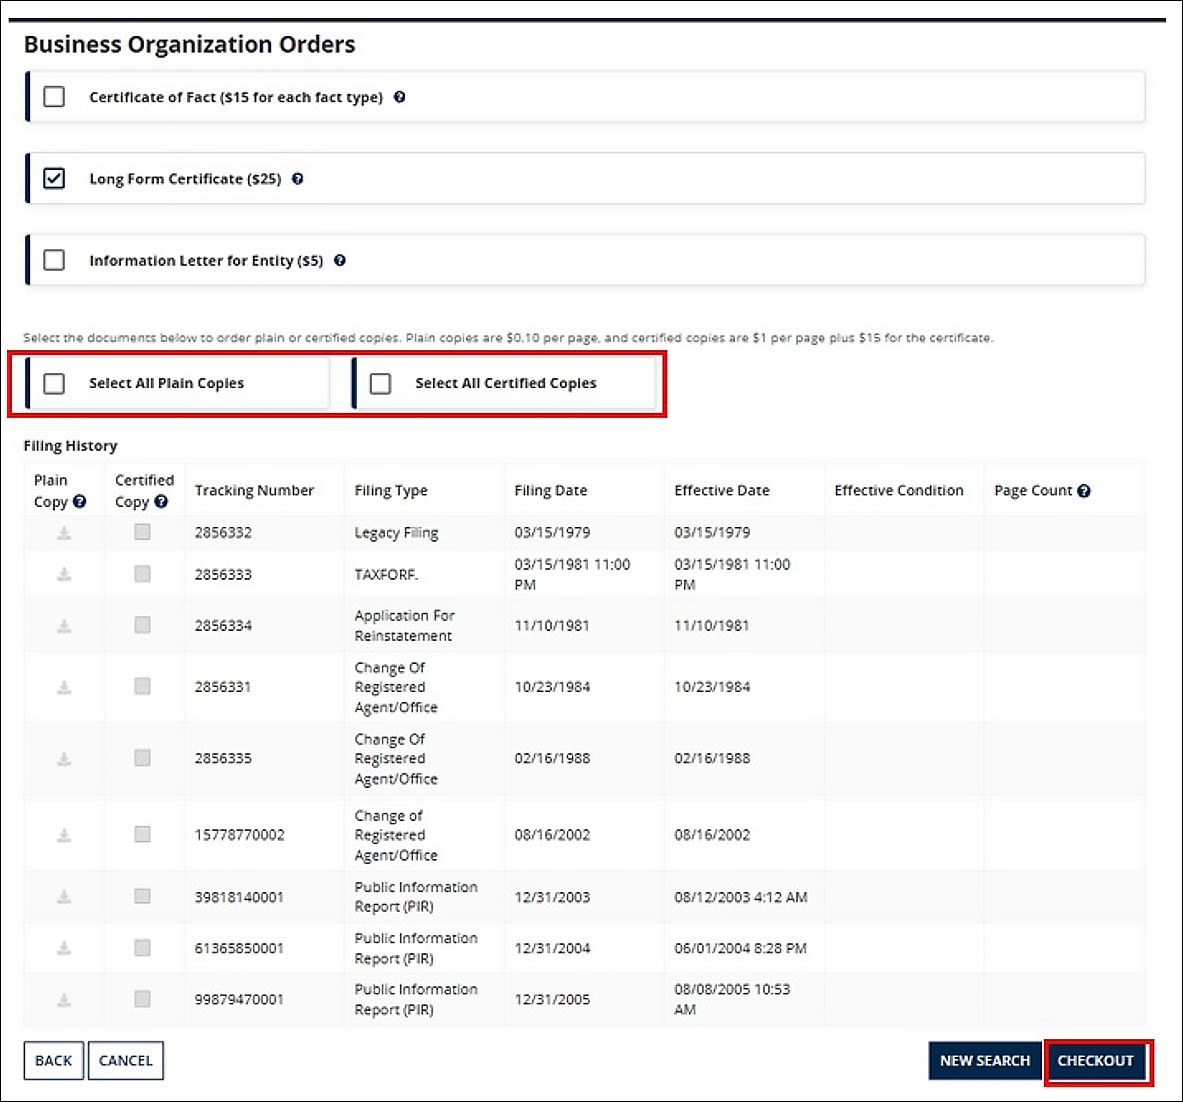
Select at least one type of order.
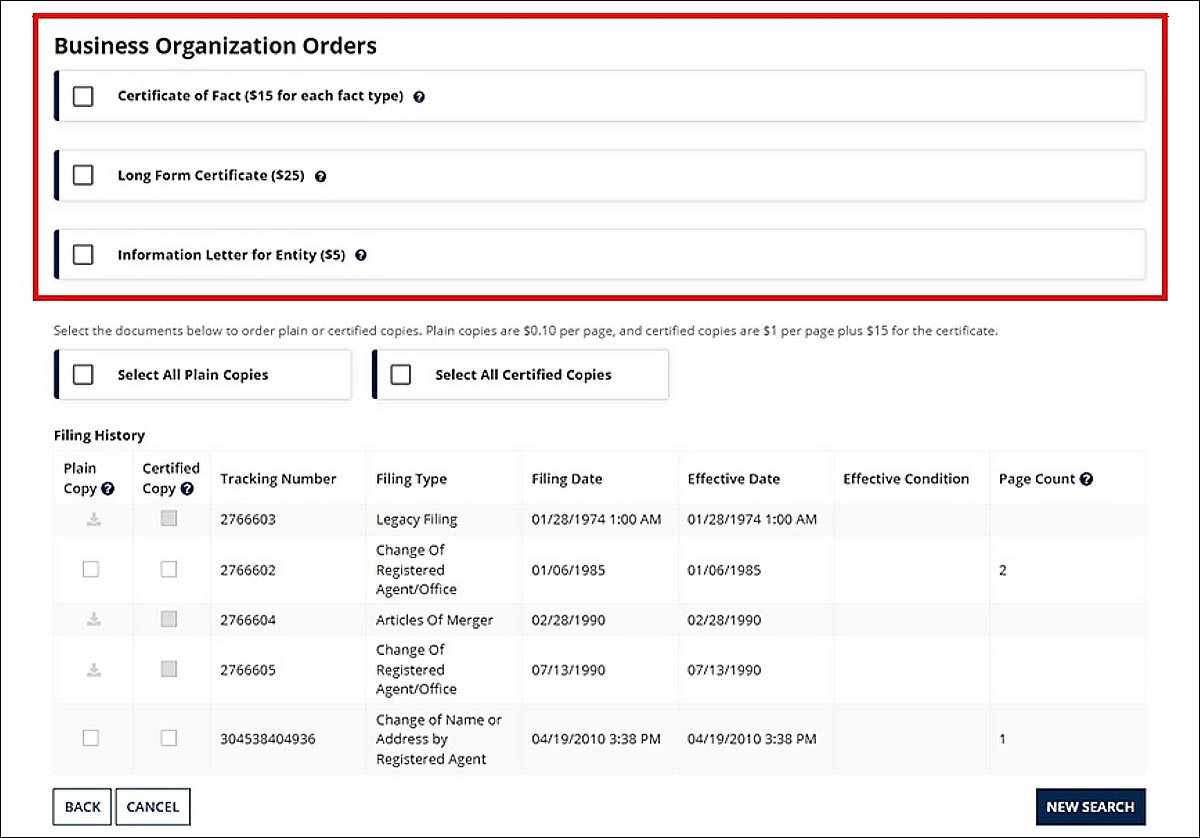
Next, select plain or certified copies and click the “Checkout” button.
7.1.1 Certificate of Fact
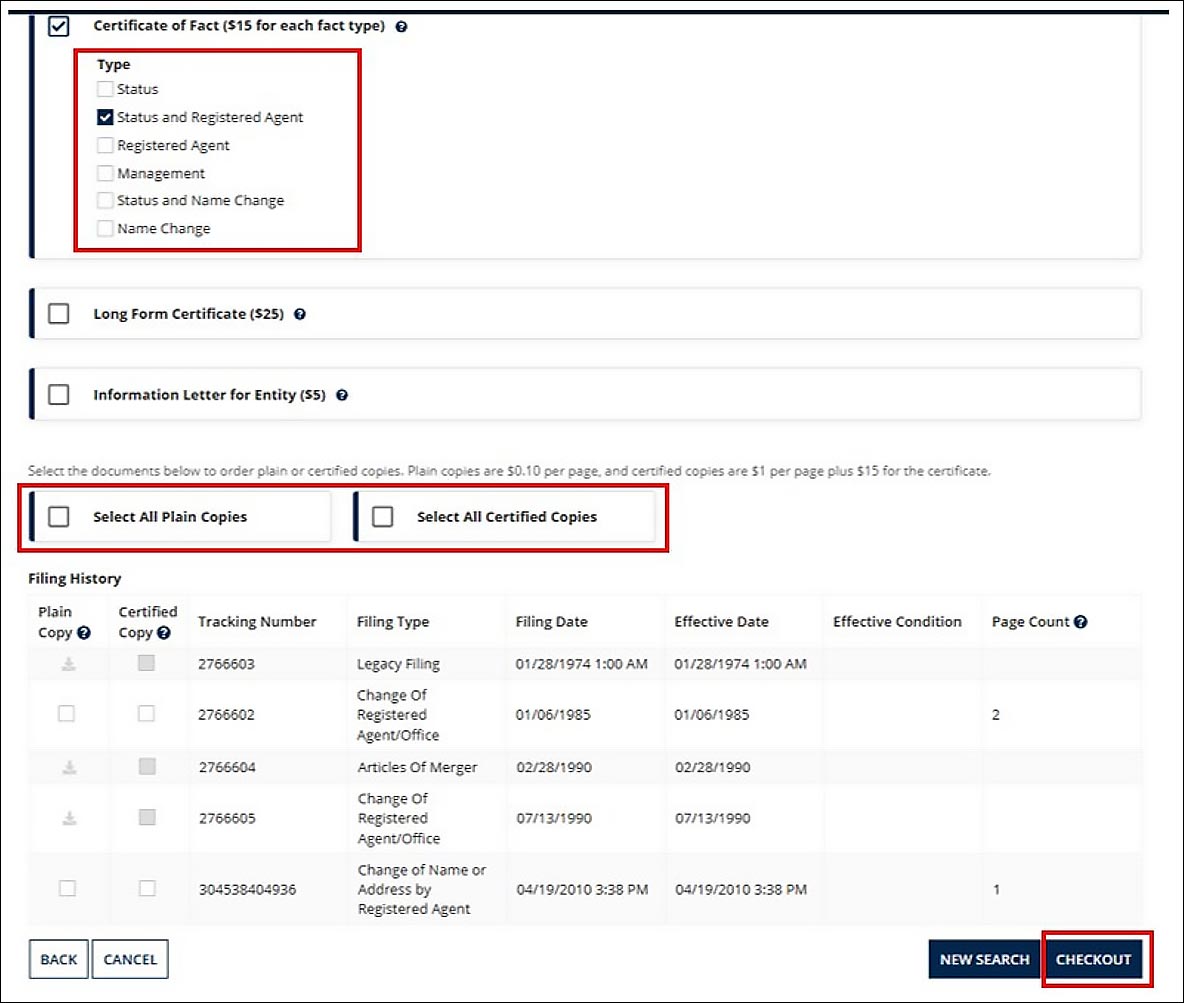
When you order a Certificate of Fact, select the type(s) from the list. Chose plain or certified copies and click the “Checkout” button.
7.2 Checkout Process
Review the items and then select the Payment Method from the drop-down menu.
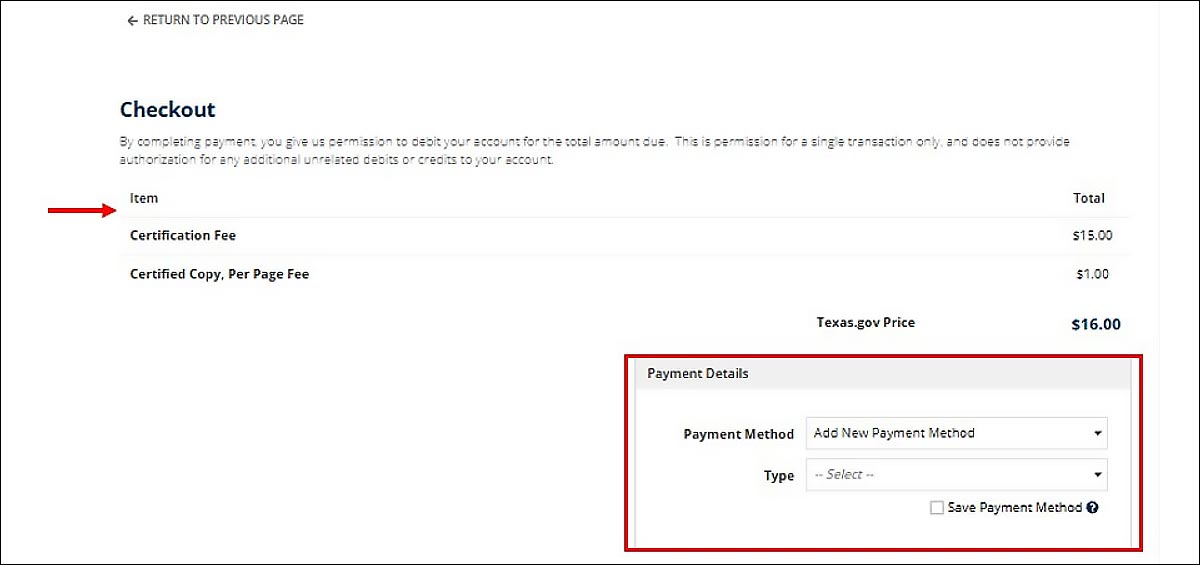
To continue, click the “Proceed to Payment” button.
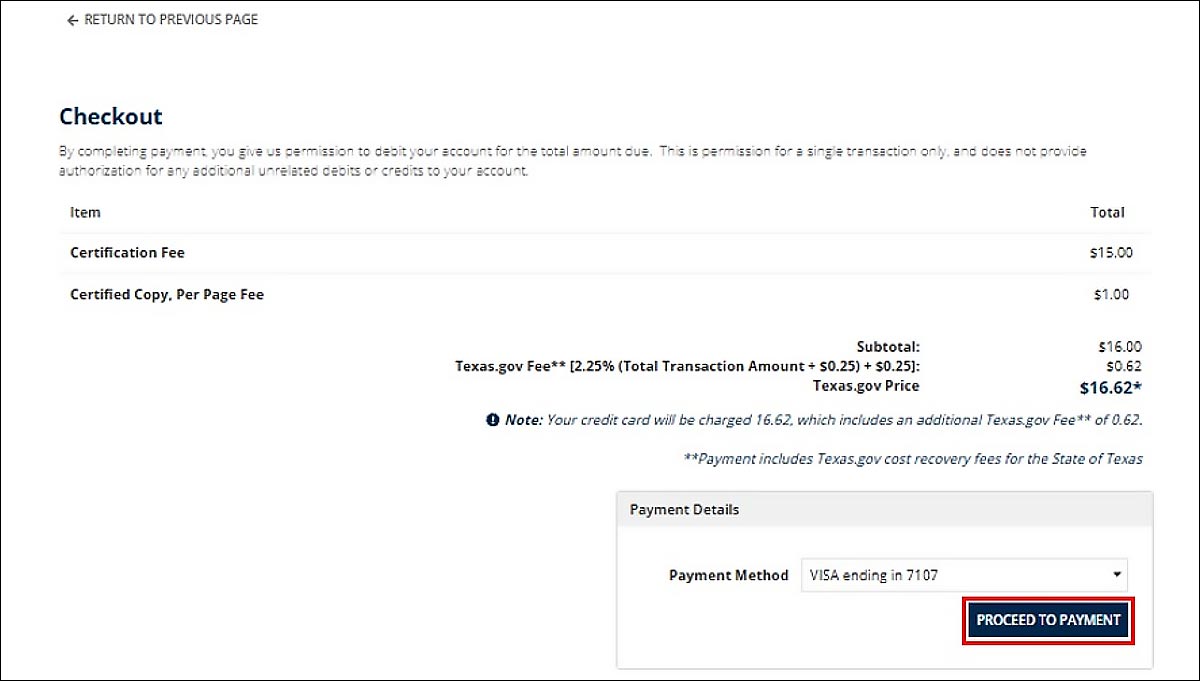
The payment confirmation screen will appear, click the Home link to return to the Search & Order Records landing page.

7.3 Download Copies and Certificates
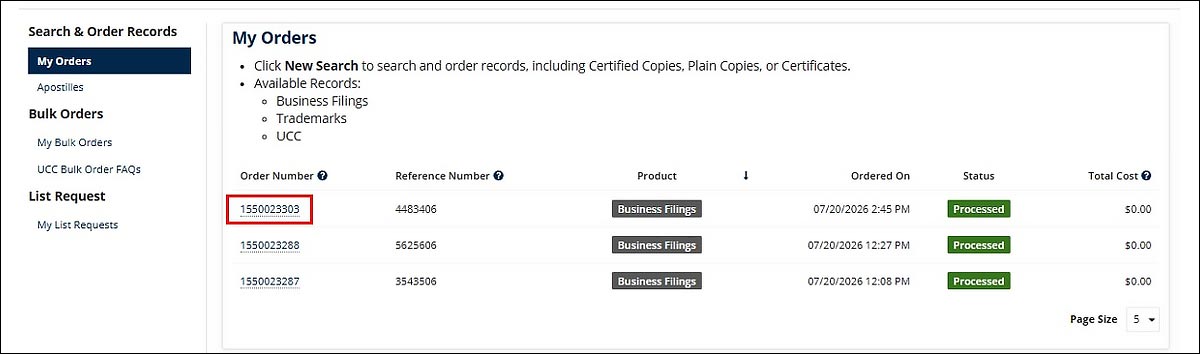
To download a digital copy, click the Order Number link.
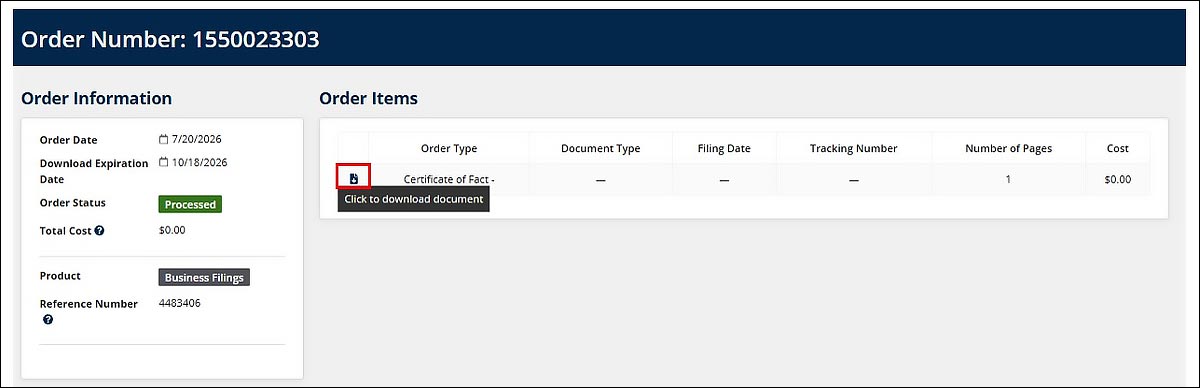
Next, click the file icon to download the file.
8. Contact and Help
If you have any questions or concerns, you can reach out to the Business Filings team via email at corpinfo@sos.texas.gov


